
Search history
Clear allSearch by image
XDrag and drop an image here or upload an image
Max 5MB per image
UploadSign In | Join
Search history
Clear allSearch by image
XDrag and drop an image here or upload an image
Max 5MB per image
UploadSign In | Join
X Email Mobile
| Number | Unit-price | Total | |||
| I want to buy: | × | 45.0 | = | 0 |
A new item has been added to your Shopping Cart. You now have items in your Shopping Cart.
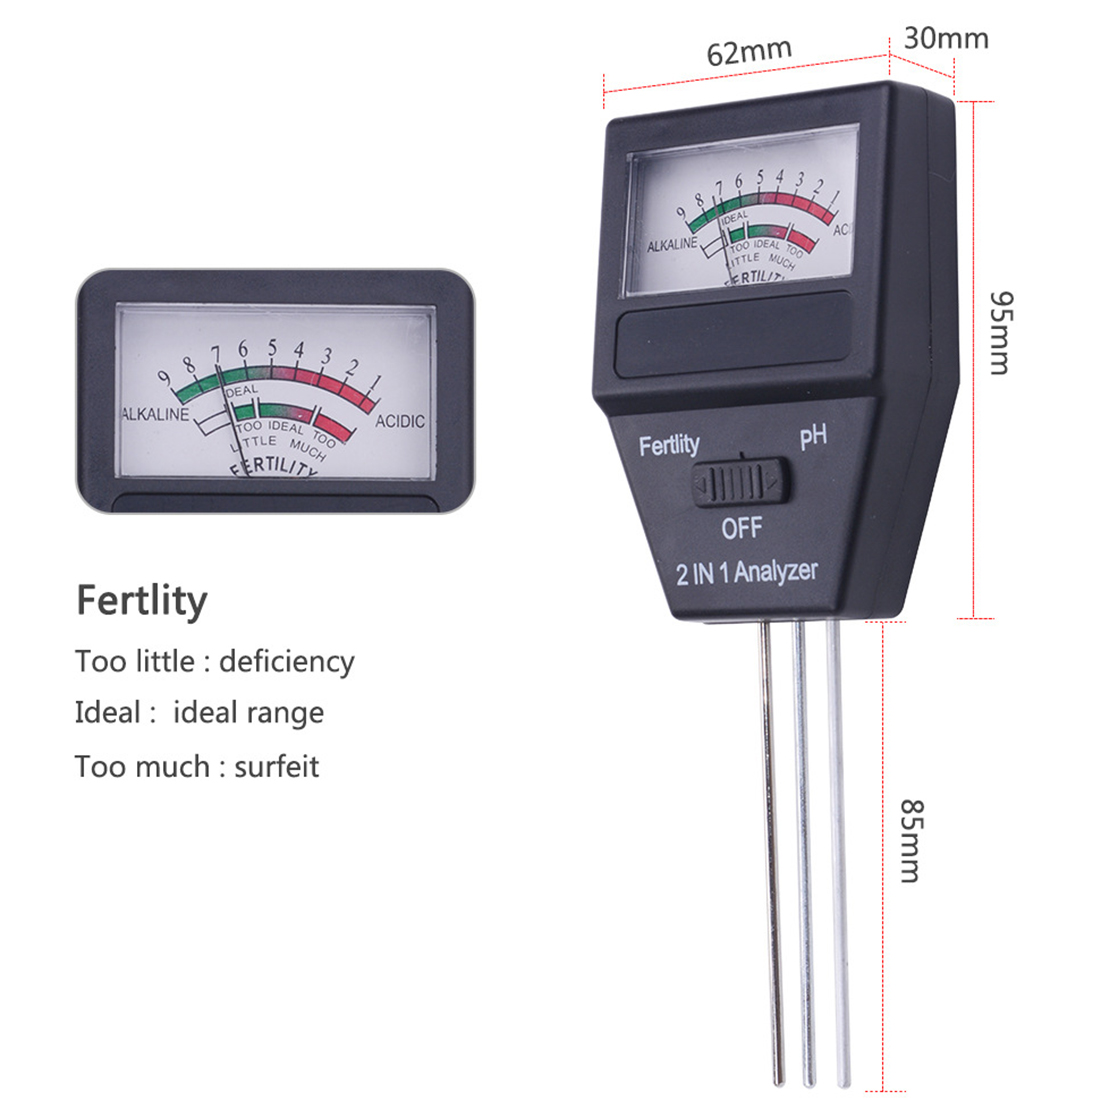
Instructions:
How to Analyze Soil Fertility
1. First remove about 5 cm of the topsoil; then break up the soil to a depth of 13 cm. Clean the soil of any organic impurities that could affect the test results, such as leaves, roots, etc.
2. Soak the soil in water until it becomes a mud-like consistency.
3. Wipe the probe clean with a clean cotton swab or tissue.
4. Set the function key to the first position from the left.
5. Insert the probe into the soil to be measured until the distance between the soil and the body does not exceed 2.5 centimeters. Wait for 10 seconds, and once the needle is stable, you can read the data.
6. Record the data. Remove the probe from the soil and thoroughly clean the probe.
The judgment criteria for the analysis results are as follows:
Lack (Too Little)
Nitrogen less than 50 ppm
Phosphorus less than 4 ppm
Potassium less than 50 ppm
Ideal Range
50-200 parts per million
4-14 parts per million
50-200 parts per million
Excess
greater than 200 ppm
greater than 14 ppm
greater than 200 ppm
· Unit ppm: millionth of
If the analysis result shows 'TOO LITTLE', it means: Lack of.
Please use the appropriate liquid fertilizer for the different plants you are growing to supplement the nutrients for the crops. (Refer to the instructions on the fertilizer packaging for specific details).
If the analysis result shows 'IDEAL', it means: Ideal.
Based on the different plants you are growing, use the appropriate fertilizer and apply it once a month along with irrigation.
If the analysis result shows 'TOO MUCH', it means: Excessive
1. Water extensively to dilute and wash away excessive nutrients.
2. For potted plants, they should be re-transplanted into new soil.
3. Do not apply any more chemical fertilizers, but you can add manure, compost, plant residues, leaves, and other organic materials to the soil.
How to Analyze the pH Value of Soil
1. First, remove about 5 cm of the topsoil from the soil to be tested. Then, break the soil down to a depth of 13 cm by compressing it. Clean the soil of any organic impurities that could affect the test results, such as leaves, roots, etc.
2. Soak the soil in water until it becomes a mud-like consistency. (Preferably use rainwater or distilled water.)
3. Set the function key to the farthest right position.
4. Moisture probe. Clean the probe on the far right with a clean cotton pad.
5. Insert the probe completely into the soil to be measured.
6. Wait for 1 minute to read the data.
7. After the test is completed, wipe the probe clean and allow it to dry.
Special Note
Please do not insert the probe into the soil for a long time, nor use this device to test liquids, to avoid any damage.


Update time:


TOP


