
Search history
Clear allSearch by image
XDrag and drop an image here or upload an image
Max 5MB per image
UploadSign In | Join
Search history
Clear allSearch by image
XDrag and drop an image here or upload an image
Max 5MB per image
UploadSign In | Join
X Email Mobile
Hailan Electrical Appliance Firm 14yr.
Contacts zhouaibiao Chat
Mobile 86-13735758480
E-mail 1040472497@qq.com
WeChat 13735758480
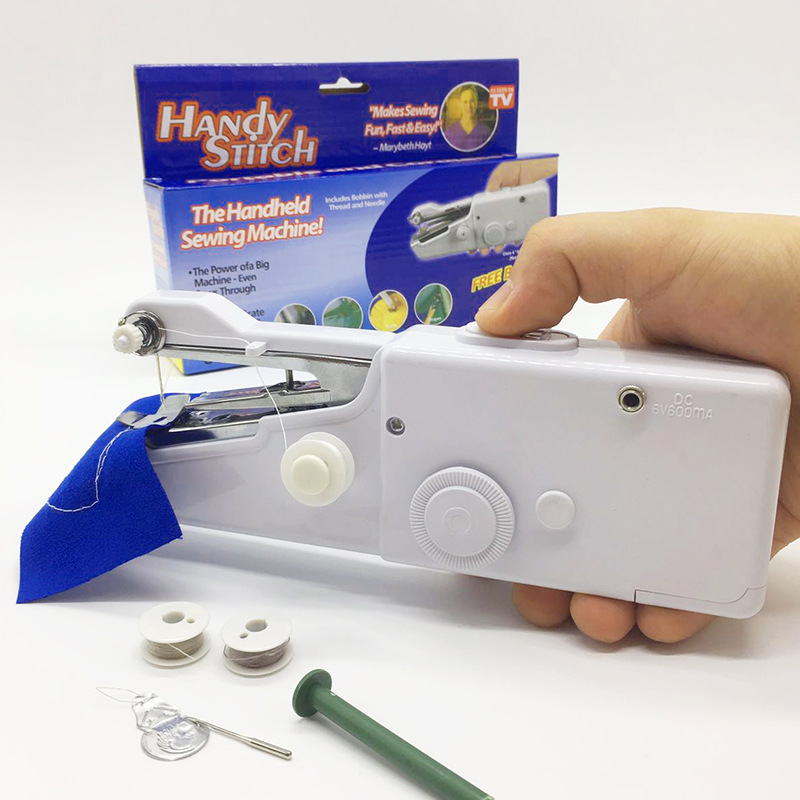
Product features:
1. able to sew hanging curtains, wall hangings, and so on with ease.
2. Sewing handkerchiefs, aprons, and pillowcases designed by yourself using this machine adds a unique charm.
3. If your clothes, such as pants or skirts, suddenly come undone, you can easily sew them back together without taking them off using this machine. It's handy to have one when traveling or working, as it can be used as an emergency fix.
4. For children around the age of 12, with a little guidance, they can sew small clothes and more with this machine, which is not just a toy but also a good partner in cultivating children's labor habits and training sewing skills;
Statement: The thickness of the fabric can be sewn at about 1.8MM. If it is too thick, too hard, or too thick, it cannot be sewn. If the machine malfunctions due to the personal sewing of the customer being too thick or too hard, the store will not consider it to be a quality problem of the machine.Dear customers: All sewing machines may have issues such as stitching inaccurately, jumping stitches, thread breakage, fabric jams, or thread jams. These problems can be resolved by adjusting the machine settings. If you are unsure how to do this, feel free to consult our customer service, and we will be happy to assist you. Therefore, we do not consider these issues as quality problems with the machine.
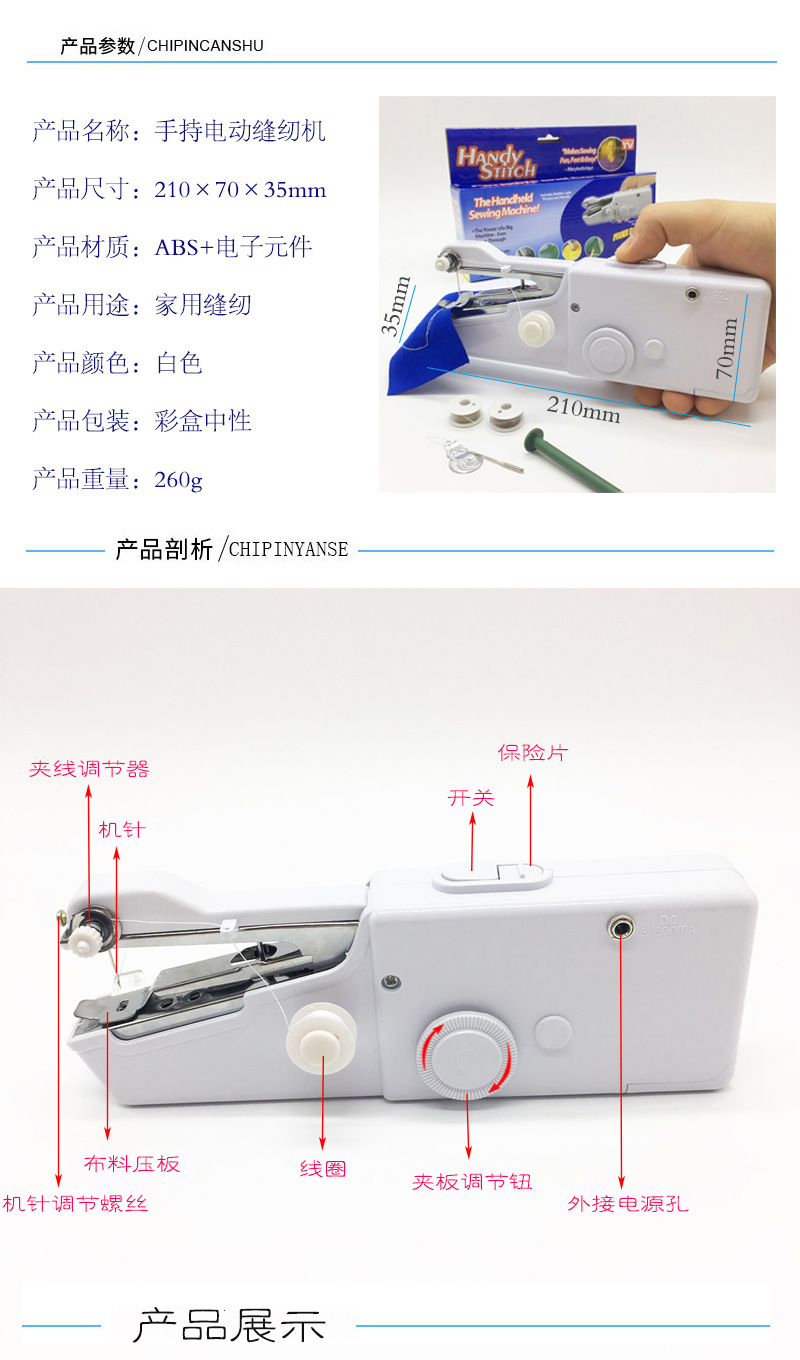
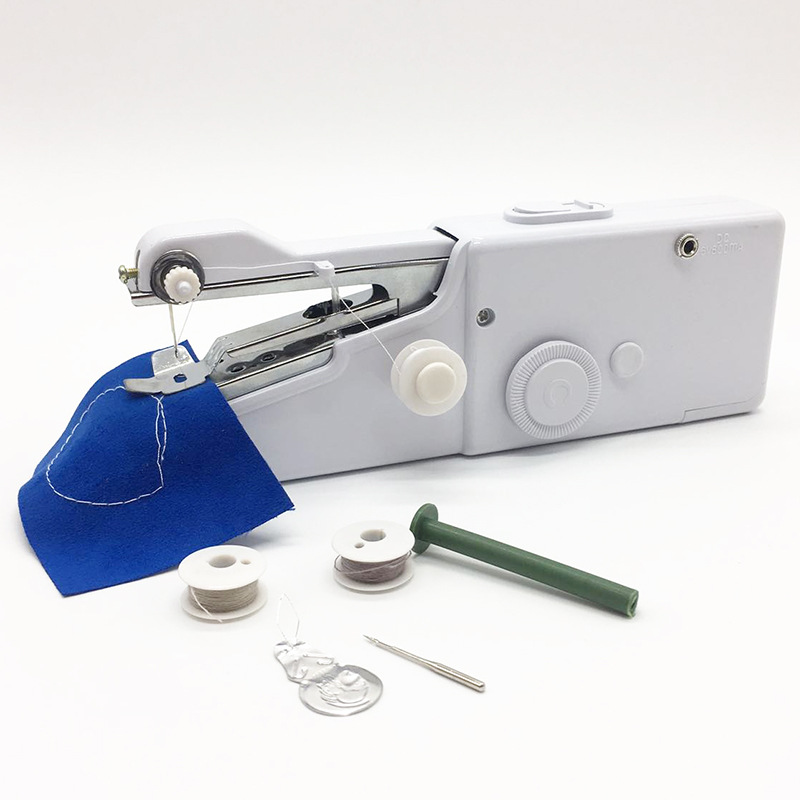

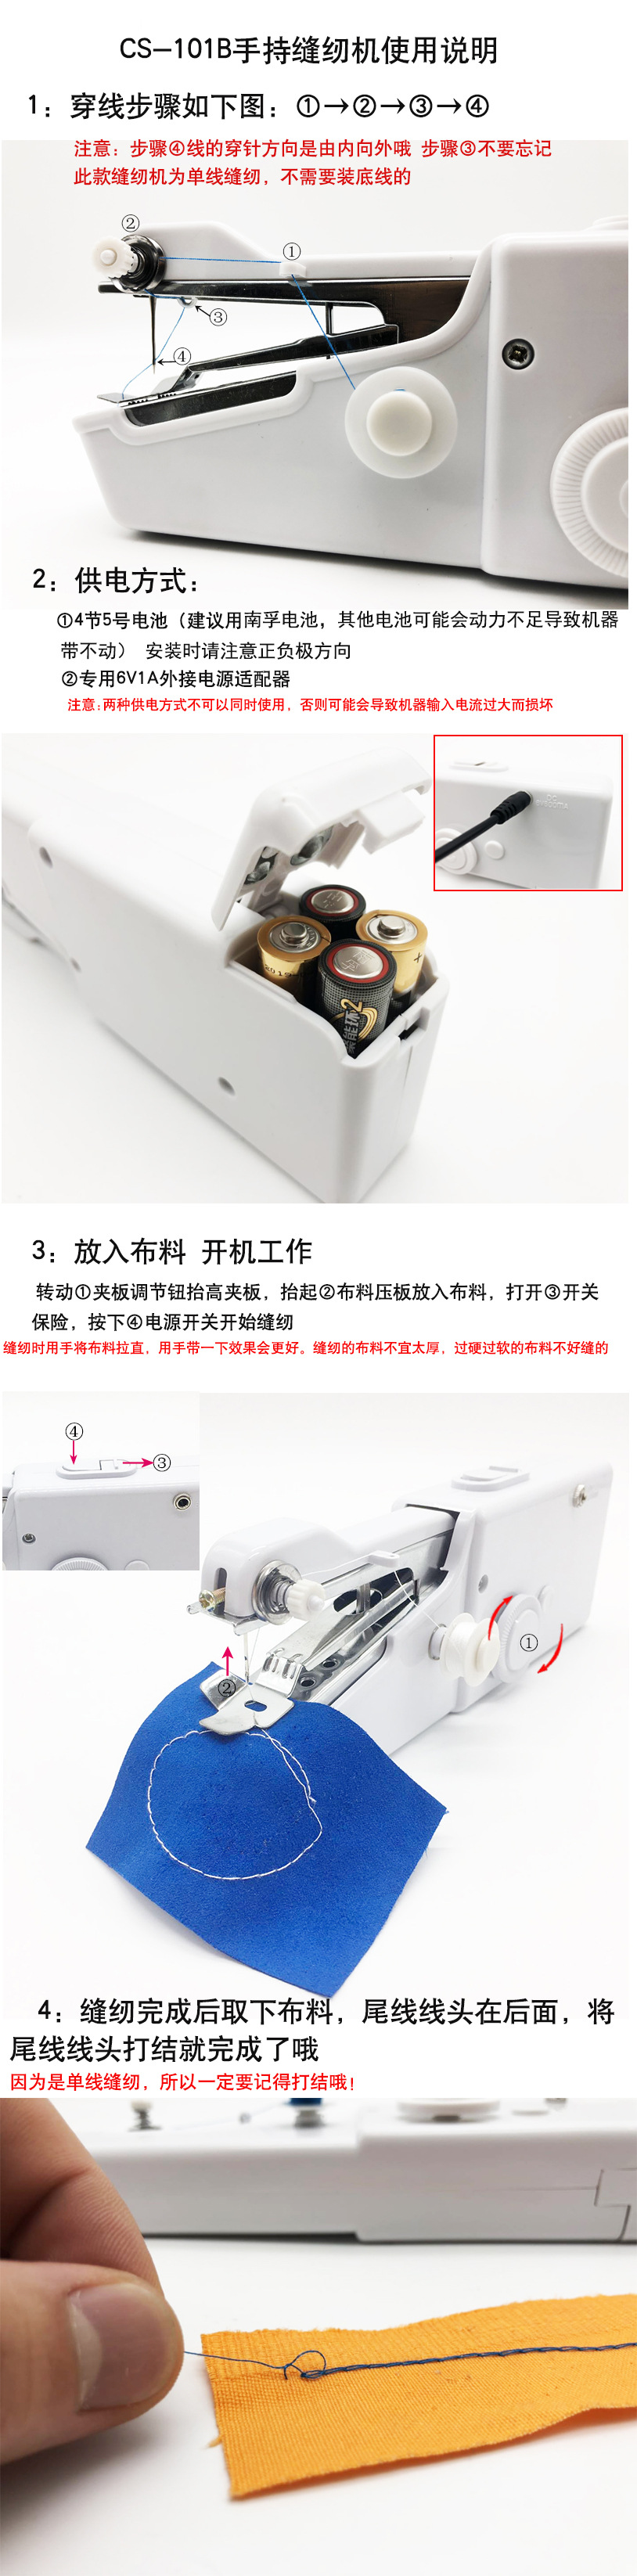
Operation Method:
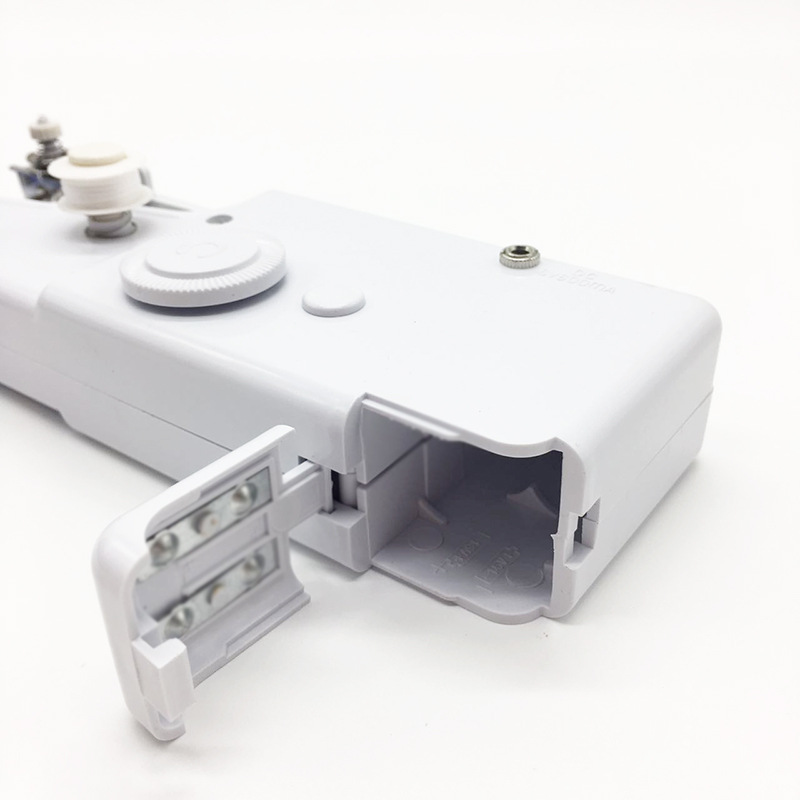
1. Install 4 AA batteries (recommended to use Nanfu batteries, as poor quality batteries may not work).
2. Standby: Use the four fingers of your right hand to support the base, and place your thumb naturally on the top of the body cover, holding the entire machine smoothly.
3. Thread: At the bottom of the product description, there is a picture;
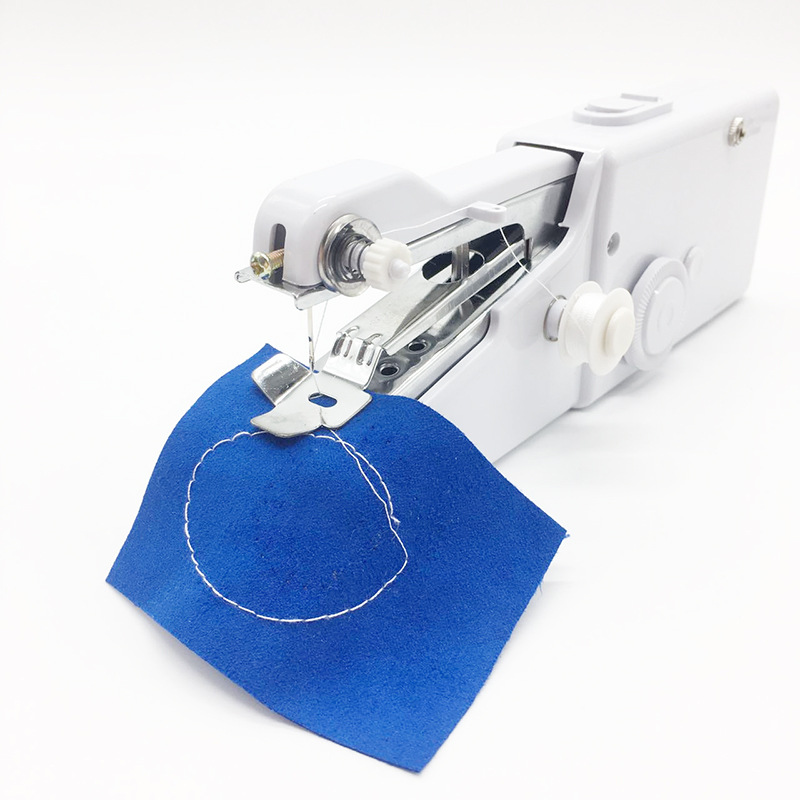
4. Lay the fabric: Lift the press plate with the index finger of your right hand, place the prepared fabric to be sewn flat under the press plate, and gently replace the press plate to press the fabric.
5. Sewing Operation: Hold the fabric with your left hand, and press down lightly and quickly with your right thumb, allowing the feed mechanism to automatically push the sewn item to the left. Keep the right hand holding the machine still, let the machine feed the fabric by itself, and control the direction of the fabric with your left hand to maintain a straight stitch until the sewing is complete. This machine can automatically feed the fabric and adjust the tension between the stitches.
6. Knot Tying: If the single-thread sewing machine needs to be tied, the method of knot tying is on the upper right corner of page 3 of the instruction manual.
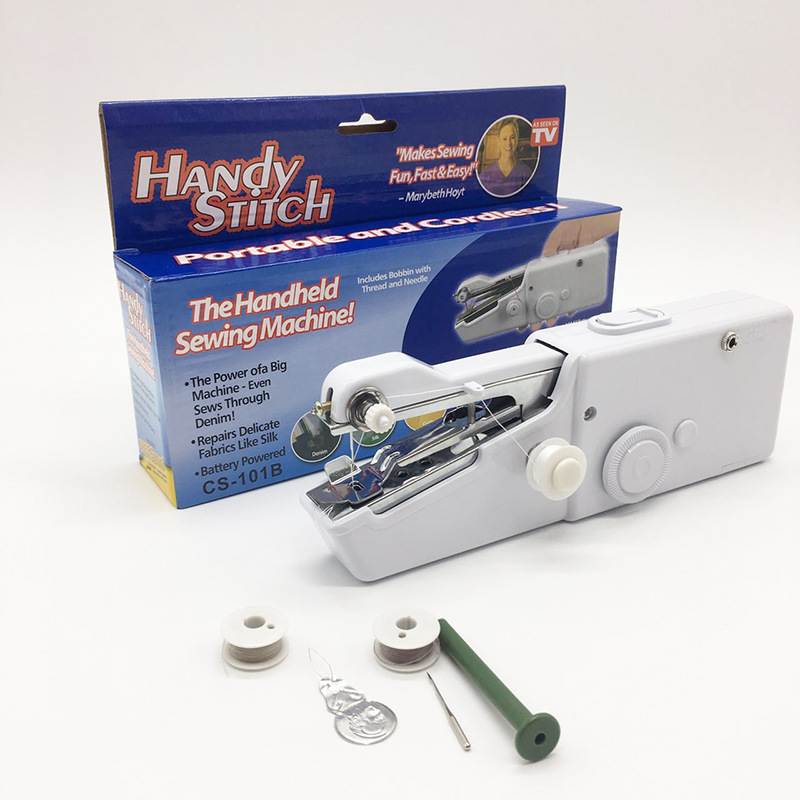
7. Change the thread group: simply pull it out, be careful not to lose the spring, if you need to change to a larger thread group, you can connect the spare extending rod to the thread tube shaft, insert the larger thread group, and then re-thread the needle, adjust the tension of the thread after sewing.
8. Change the needle: Loosen the fixed screw, remove the broken needle, and install the new needle.
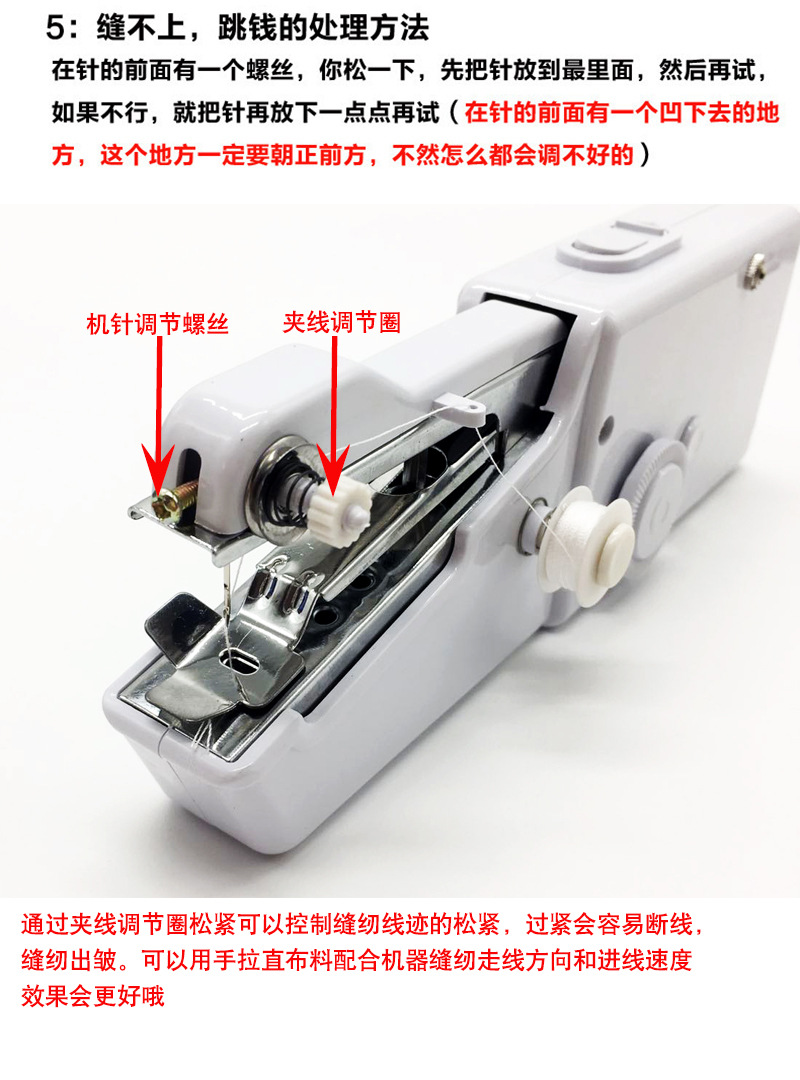
Commonly encountered problems and their solutions
Problem one: The needle jumps, and there's nothing on the back, the needle is empty, and on the front it's just a straight line. It falls off as soon as you pull it!
Solution: If the needle jumps and falls off when pulled, it is inevitable, as the thread on the back has not been looped through. Normally, the loops should be secured. The problem with the needle jumping is that the speed of the fabric entering is too fast, and the machine cannot catch up to secure the loops on the back. Keep your hands holding the machine still, let the machine enter the fabric by itself. If it still goes straight, you need to adjust the machine! If you don't know how, please contact customer service, and we will teach you!
Problem 2: There's a bunch of lines on the back, it's stuck!
Solution: There's always a bunch of lines on the back, and it always gets stuck, preventing the machine from moving. The reason is that the fabric is being fed too slowly. Keep your hands on the machine still, and pull the fabric to the left side of the machine to speed up the feeding process. This will solve the problem.
Question 3: I keep losing connection or the stitches are really loose!
Solution: If you constantly experience disconnections, make sure to only thread the wire through positions 1-3-4. Do not place the wire in position 2, as it will definitely break if it is clamped there.
1. Sewing machine jump thread, how to repair the broken thread
You must have worn thick socks. It's likely that the sewing time was wrong. First, check if the needle is crooked. Crooked needles can also cause this problem.
2. My mechanical sewing machine won't thread with the top thread but it will with the bottom thread. First, check if the needle is bent.
It is usually the wrong placement of the spinning needle tip and the machine needle. The gap between the spinning needle tip and the machine needle is 0.5mm. The time of the spinning needle tip and the machine needle is 1.5mm earlier or later (1.5mm above the needle hole),
Jumpers:
1. Incorrect threading method. Please re-thread according to the "threading diagram".
2. Incorrect installation of the straight needle - Check the needle height and orientation, ensuring that when the needle moves downward, it is slightly in front of the needle plate hole.
3. The needle tip of the straight machine needle breaks or bends. Replace the new machine needle.
4. If the tip of the curved needle becomes dull, use an oil stone or fine sandpaper to sharpen it, or replace the new curved needle.
5. The tension of the suture is too large or too small. Adjust the tension of the suture appropriately.
6. The curved needle cannot capture the loop of the straight needle on the right side, and the right side of the lower decoration line jumps the needle. The loop of the straight needle is too small, and the jump line quantity should be appropriately increased.
7. The curved needle cannot capture the loop of the straight needle on the left, and the left stitch of the lower decoration thread jumps. The loop of the straight needle is too large, and the amount of jumping should be appropriately reduced.
8. The curved needle cannot simultaneously hold the middle and left straight needle loop, and the middle and left thread traces of the lower decoration line jump needles. Reduce the amount of jumping threads appropriately.
9. The middle of the back of the curved needle, the left needle thread cannot be threaded into the triangular shape formed by the knitting needle thread and the curved needle thread. The middle of the back of the left thread trace jumps through the needle. Check if the seam thread has passed through the bobbins, and check the synchronous operation of the bottom thread cam. If there are any problems, adjust according to the standards.
10. Incorrect combination of the straight needle and the curved needle - Check the height of the needle bar, the synchronization between the straight needle and the curved needle, and adjust as needed according to the standards if there are any issues.
11. Misalignment of the needle with the needle guard check the position of the needle and the needle guard
12. Incorrect combination of the machine needle and the basting needle or incorrect position of the basting needle can cause the decoration thread to skip stitches. Check the size of the machine needle and basting needle combination, and check the amount of thread coming out of the basting needle.
Four, Line Break
1. Incorrect threading method. Please re-thread according to the "threading diagram".
2. Incorrect installation of the needle. Reinstall the needle, ensuring that the needle groove is directly facing the operator.
3. The needle eye and needle groove of the sewing machine are not smooth. Replace the new needle.
4. Tension of the suture is too high. Adjust the tension of the suture appropriately.
5. The quality of the suture is too poor. Replace with better suture.
6. The thread is thicker than the needle hole, use a suitable thread or sewing machine needle.
7. The threading holes of the machine needle, bend needle, needle plate, presser foot tongue, and threading holes may have burrs or scratches. Use a oil stone or fine sandpaper to re-polish, or replace the damaged machine parts.
8. Incorrect coordination between the needle and the bent needle, the tension needle. Adjust the coordination according to the standard for the needle and the bent needle, the tension needle.
Five, broken needle
1. The pressure of the presser foot is too low, causing the fabric to be delivered poorly and leading to broken needles. Increase the pressure of the presser foot appropriately to ensure normal fabric delivery.
2. If the curved needle collides with the straight machine needle, adjust the position of the curved needle and straight machine needle according to the standard.
3. If the binder needle collides with the straight machine needle, adjust the position of the binder needle and the straight machine needle according to the standard.
4. Misalignment of the straight needle with the needle guard bar Adjust the alignment of the straight needle and the needle guard bar according to the standard.
5. Bend needle tip is round and bald, replace with new bend needle.
6. The needle bar and needle bar sleeve wear too much, causing the loose fit between the needle bar and the needle bar sleeve. Replace the needle bar and the needle bar sleeve.
7. The needle holes on the needle plate are too small. Update the larger needle hole needle plate or change to a smaller size machine needle.
8. The loose fit of mechanical components is large. Check the fit and wear condition between the hook line mechanism's components, adjust the dimensions according to the standards, and replace the severely worn components.
六、花针
1. The straight needle is too low, causing the straight needle coil to form too large, leading to interweaving between the coils. Re-position according to the straight needle height positioning standards.
2. The needle plate tongue is too narrow, which can easily cause the straight needle coil to pile up. Replace the new needle plate.
3. The bottom of the curved needle is too narrow and round, which also makes it difficult for the straight needle loops to separate on the curved needle, leading to the loops intertwining with each other and producing a flower needle. Replace the new curved needle.
4. Adjust the straight needle and the bent needle to the standard position of coordination.
Seventhly, the fabric creases.
1. Incorrect differential feeding ratio Adjust the differential feeding ratio appropriately
2. Adjust the height and position of the feeder teeth to the standard to ensure that the height and position are appropriate.
3. Excessive suture tension - Adjust suture tension appropriately.
4. Adjust the pressure of the press foot to the appropriate level.
5. Small pressure foot loses the flexibility of up and down movement, and there is a seam or rust embedded between the large and small pressure feet. Clear the foreign matter between the large and small pressure feet, and remove rust or replace the rusty pressure foot if necessary.
Eight, poor thread trace
1. The thickness of the thread is inconsistent. Replace with better sewing thread.
2. The wire clipper is not working normally. Clear the dust in the wire clipper to ensure smooth wire passing.
3. The positioning of the over-threading device is incorrect. Adjust the tension of the needle thread, the bent needle thread, and the tension of the needle thread.
4. The through-hole is not smooth. Sand or polish the through-hole.
Dongdong's Angel 521 - Manager Level 4 - 4-9 11:14
Nine, needle hole
1. The needle tip of the straight machine needle is dull or fuzzy - replace the machine needle.
2. Compared with the seam material, the needle is too coarse. Replace with a thicker needle.
3. The eye of the needle is too small or the corner is not smooth. Repair the eye of the needle to make it round.
Generally, the following aspects may cause the sewing machine to jump the needle:
A: The delivery teeth are not in the correct height.
B: The needle bar is not in the correct position
C: The downward bend needle travel is incorrect
D:Protection needle time, gap is incorrect
E: The time for the down-curved needle to loosen the thread is incorrect.
Update time:


TOP


