X Email Mobile
| EXW Price: |
|
| Main Products: |
pacifier, chopstick, earbud, vacuum bag, hair curler, dish rack, microphone, glass jar, gym bag, 502 glue |
| Contacts: | AliceChat |
| Mobile: | 86-15356946160 |
| WhatsApp: | +8615356946160 |
| WeChat: | 15356946160 |
| Address: | Jiangdong Street |
Packaging information
CTN Size: 46 × 34 × 39 cm
G.W./CTN:15 kg
QTY/CTN:196 pcs/carton
Packing: 200PCs
packing: Boxed


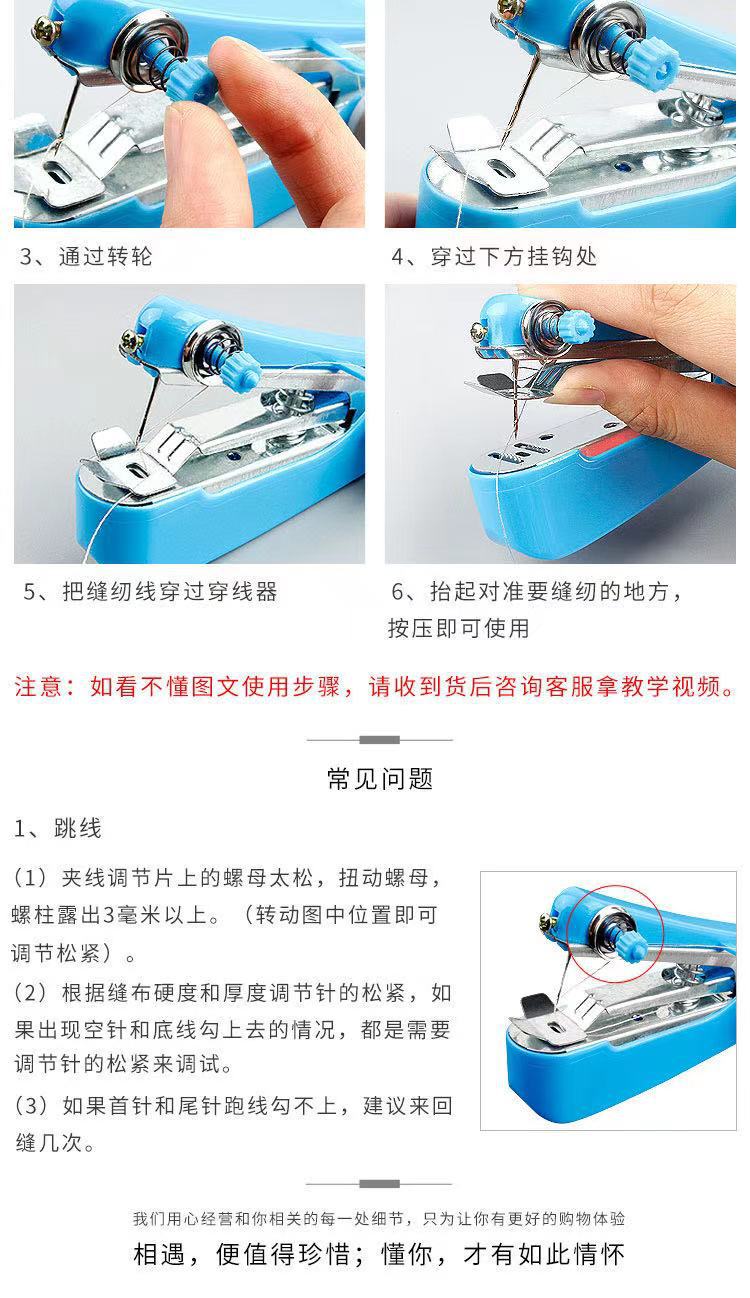
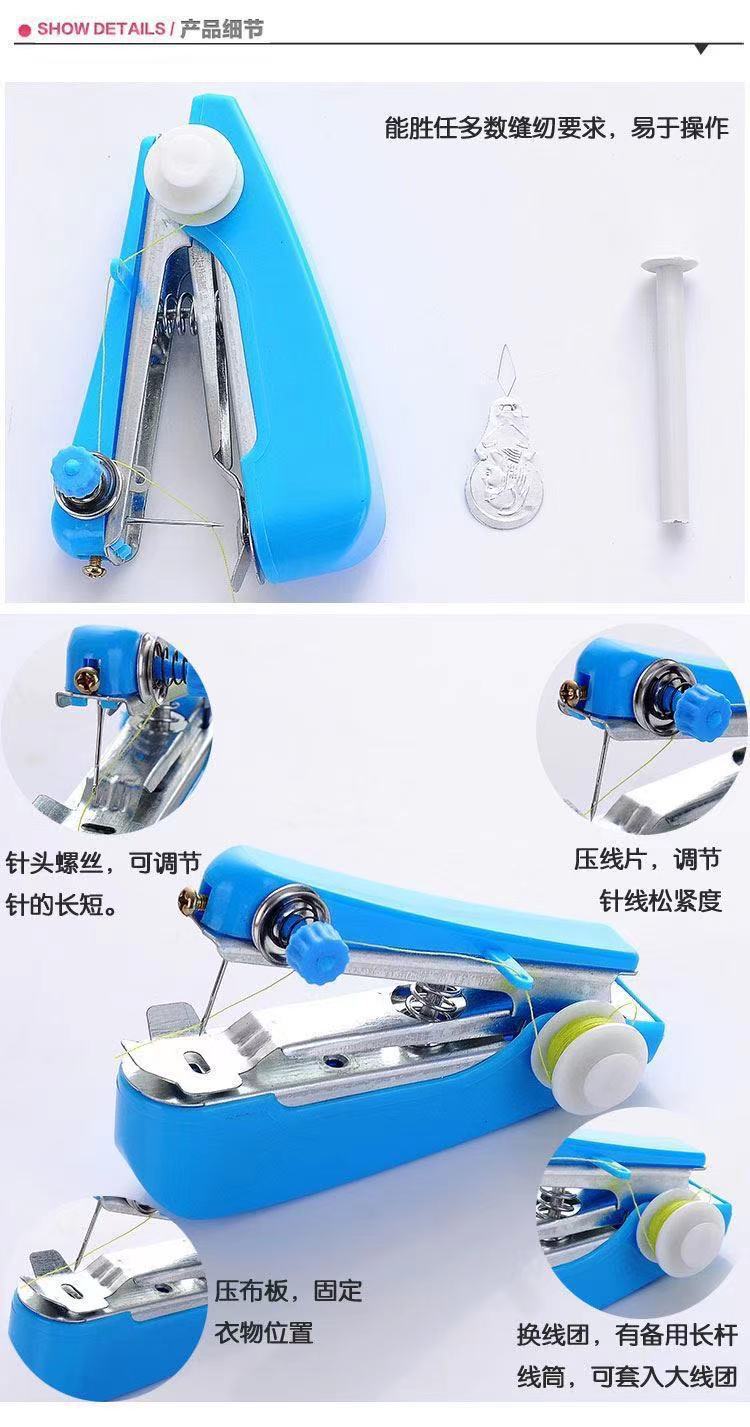
1. Standby: Use the right hand four finger rest to live in the base, and the thumb is naturally placed on the top of the upper cover of the fuselage to hold the whole machine smoothly. 2. Threading: gently pull out the thread of spool. Pass through lead coil A. Then, the clamp line adjustment flap B is introduced. Passing through the lead coil C. The LED thread ends are temporarily placed beside the sewing machine needles, and the threader is passed through the sewing machine needles hole from the front of the sewing machine needles (the joint part to the fuselage), and then the thread ends are introduced into the threader hole, exit threader pull out the thread head 2-3cm and press crimp terminal to wait for use. 3. Cloth placement: lift the pressure plate with the index finger of the right hand, put the fabric ready to be sewed flat under the pressure plate, and gently put it back to the pressure plate to press the fabric. 4. Sewing operation: Use the left hand-held fabric, gently and quickly press the top of the upper cover to the bottom with the thumb of the right hand, and then press the top of the thumb, so repeatedly, the cloth feeding mechanism automatically sends the seam to the left. The right hand of the holding machine gradually moves to the right, and the left hand holding cloth gently moves the sewing object to the left with the sewing rhythm until the sewing is over. After breaking the wire cutter on the press plate, pull up the press plate and gently pull out the fabric to tighten it. (Note: Since this machine only uses one holder, the thread under the pressure plate does not need to be cut and pulled out, otherwise it cannot be tightened) 5. This machine can automatically enter the cloth and adjust the tightness between the pins. Nut adjustment. 6. Change to wire ball: if you change to a larger wire ball, you can connect the spare lengthening piece with the holder shaft and set it into a larger wire ball. Then re-threading, Adjust the tightness of the thread and then sew. 7. Change the needle: loosen the fixing screw, take out break stitch, install a new needle, pay attention to the smooth face of the needle to the front fixing screw, and do not install it in reverse. Needle DHX = 14


TOP
Items have been added to the Inquiry Basket
There are items in the inquiry basket