
Search history
Clear allSearch by image
XDrag and drop an image here or upload an image
Max 5MB per image
UploadSign In | Join

Search history
Clear allSearch by image
XDrag and drop an image here or upload an image
Max 5MB per image
UploadSign In | Join
 kx1920-kx805 thread nozzle
KX1920-KX805 螺纹喷嘴 |
CN¥ 4.0 |
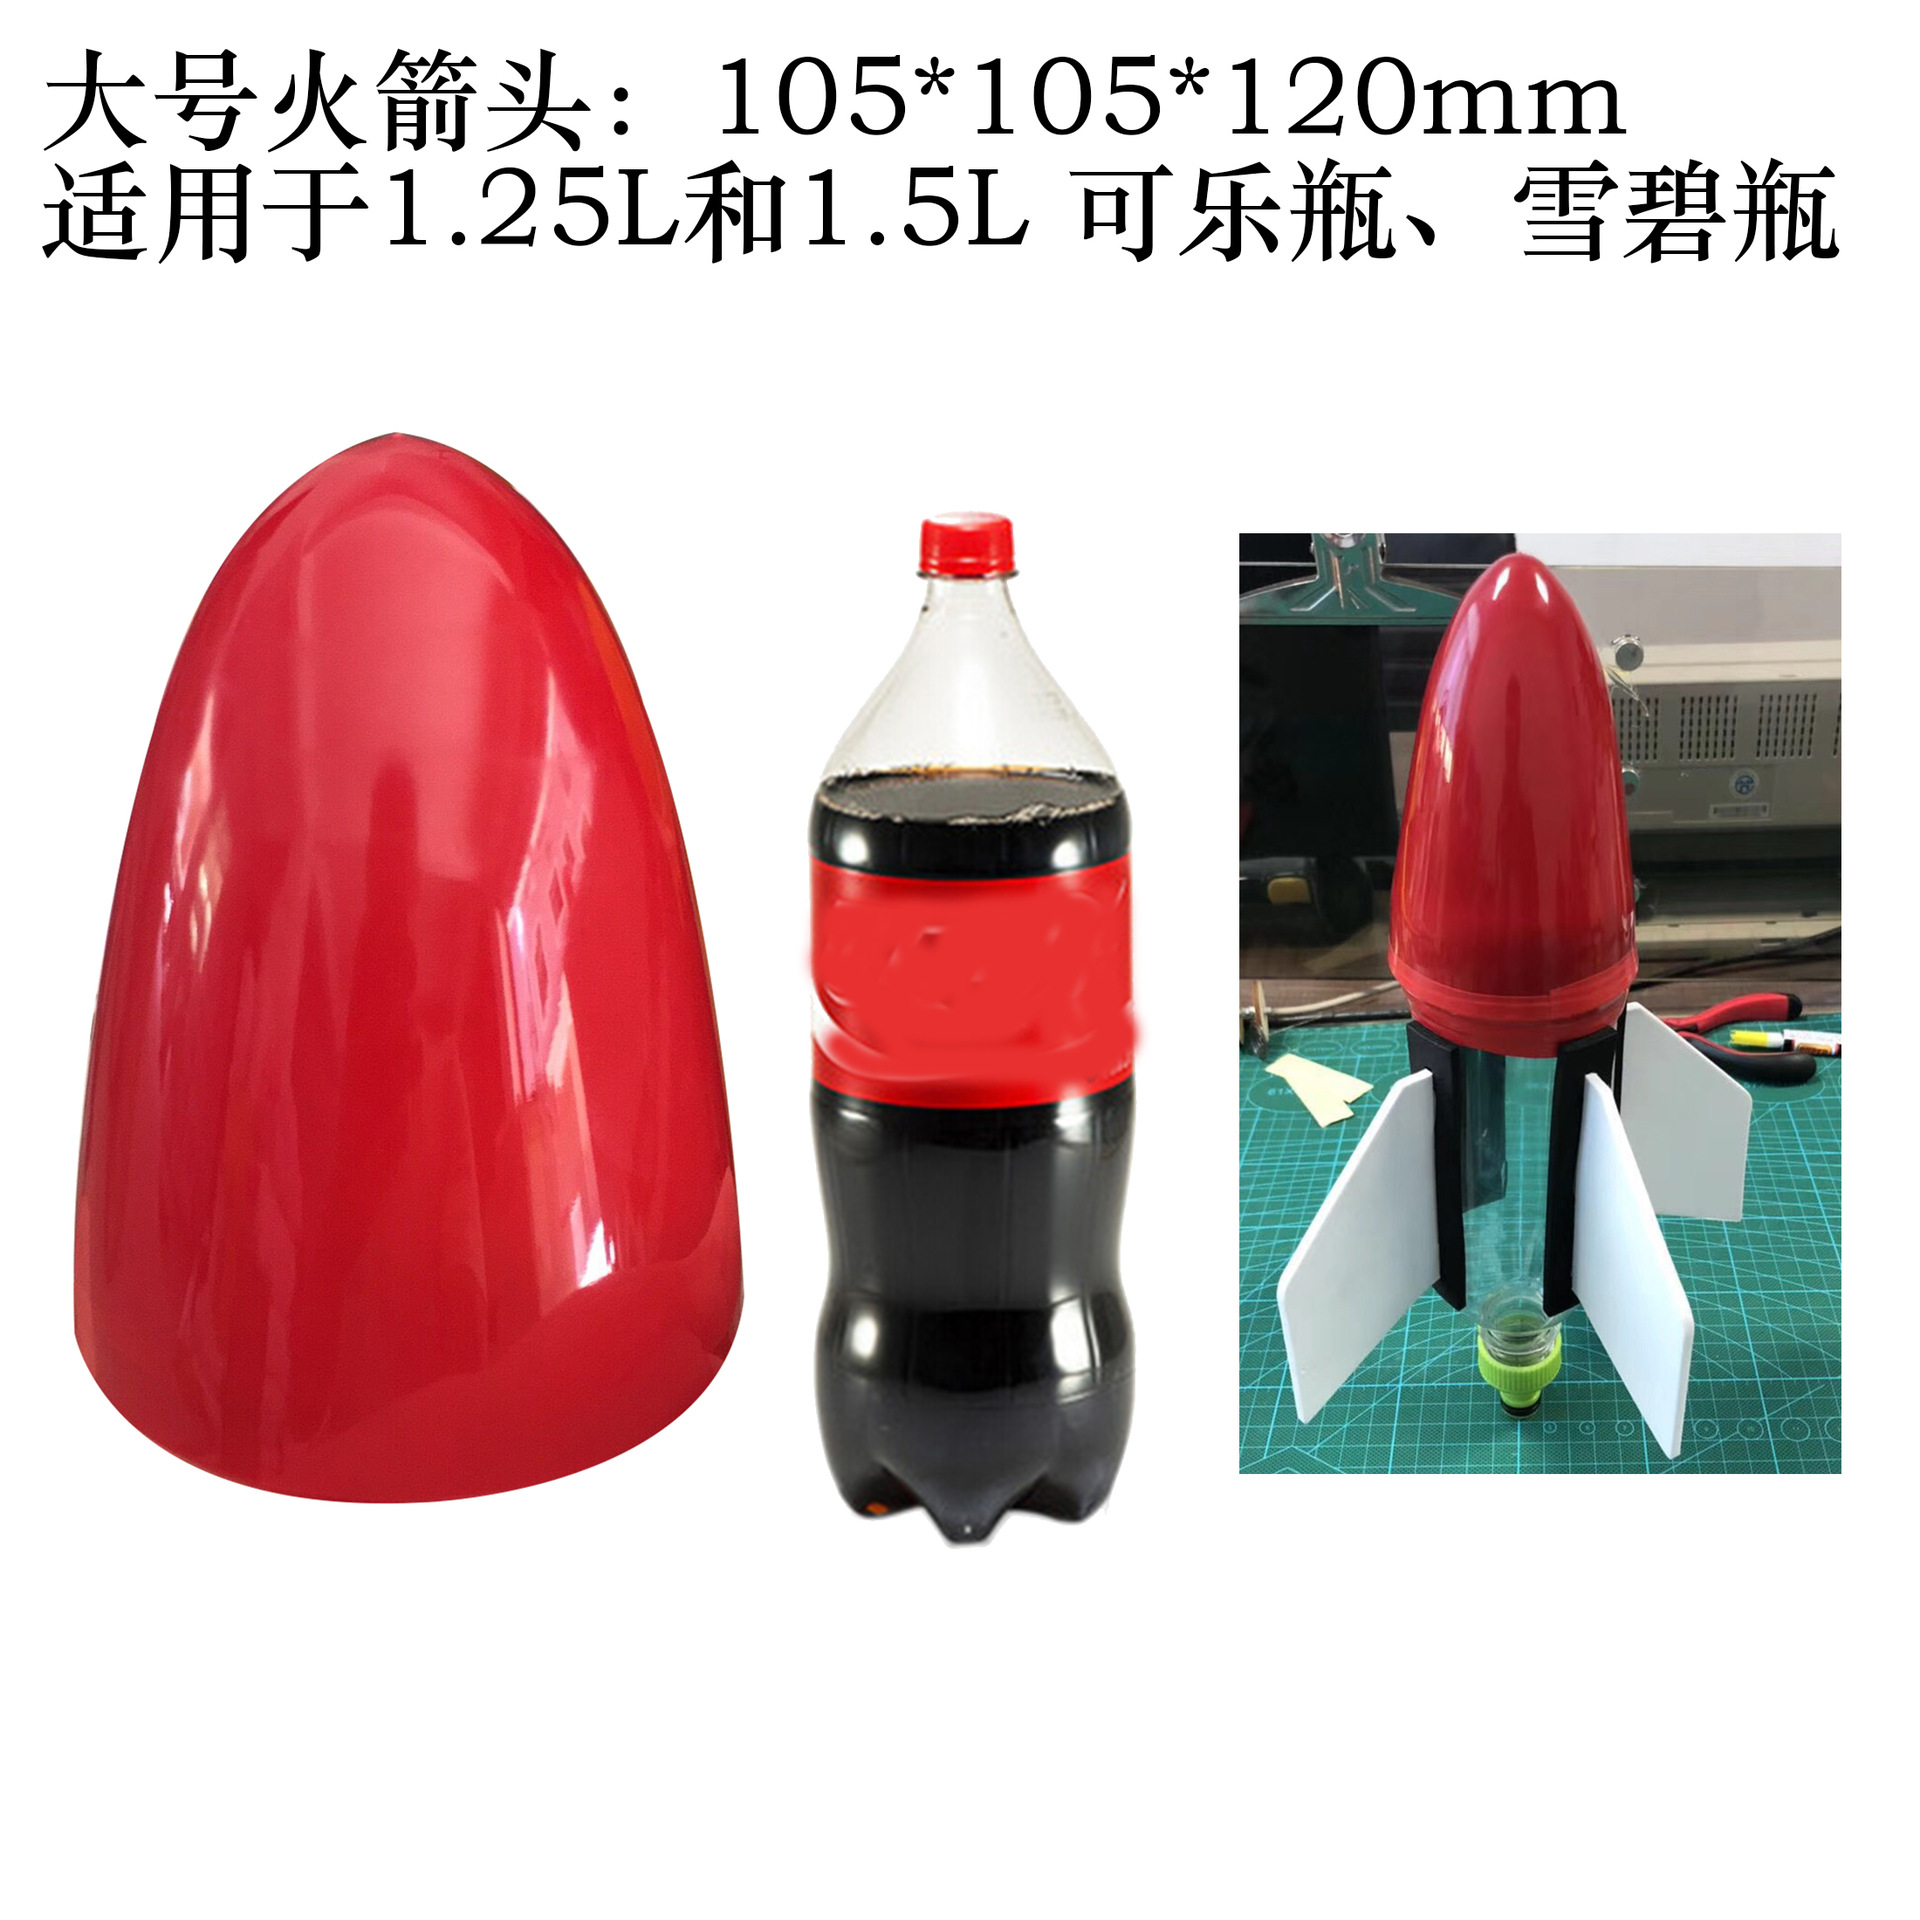
 kx1920-pj8 fire arrow large
KX1920-PJ8 火箭头大号 |
CN¥ 12.0 |
 kx1920-b water rocket set (launcher tire pump)
KX1920-B 水火箭套装(发射架打气筒) |
CN¥ 174.0 |
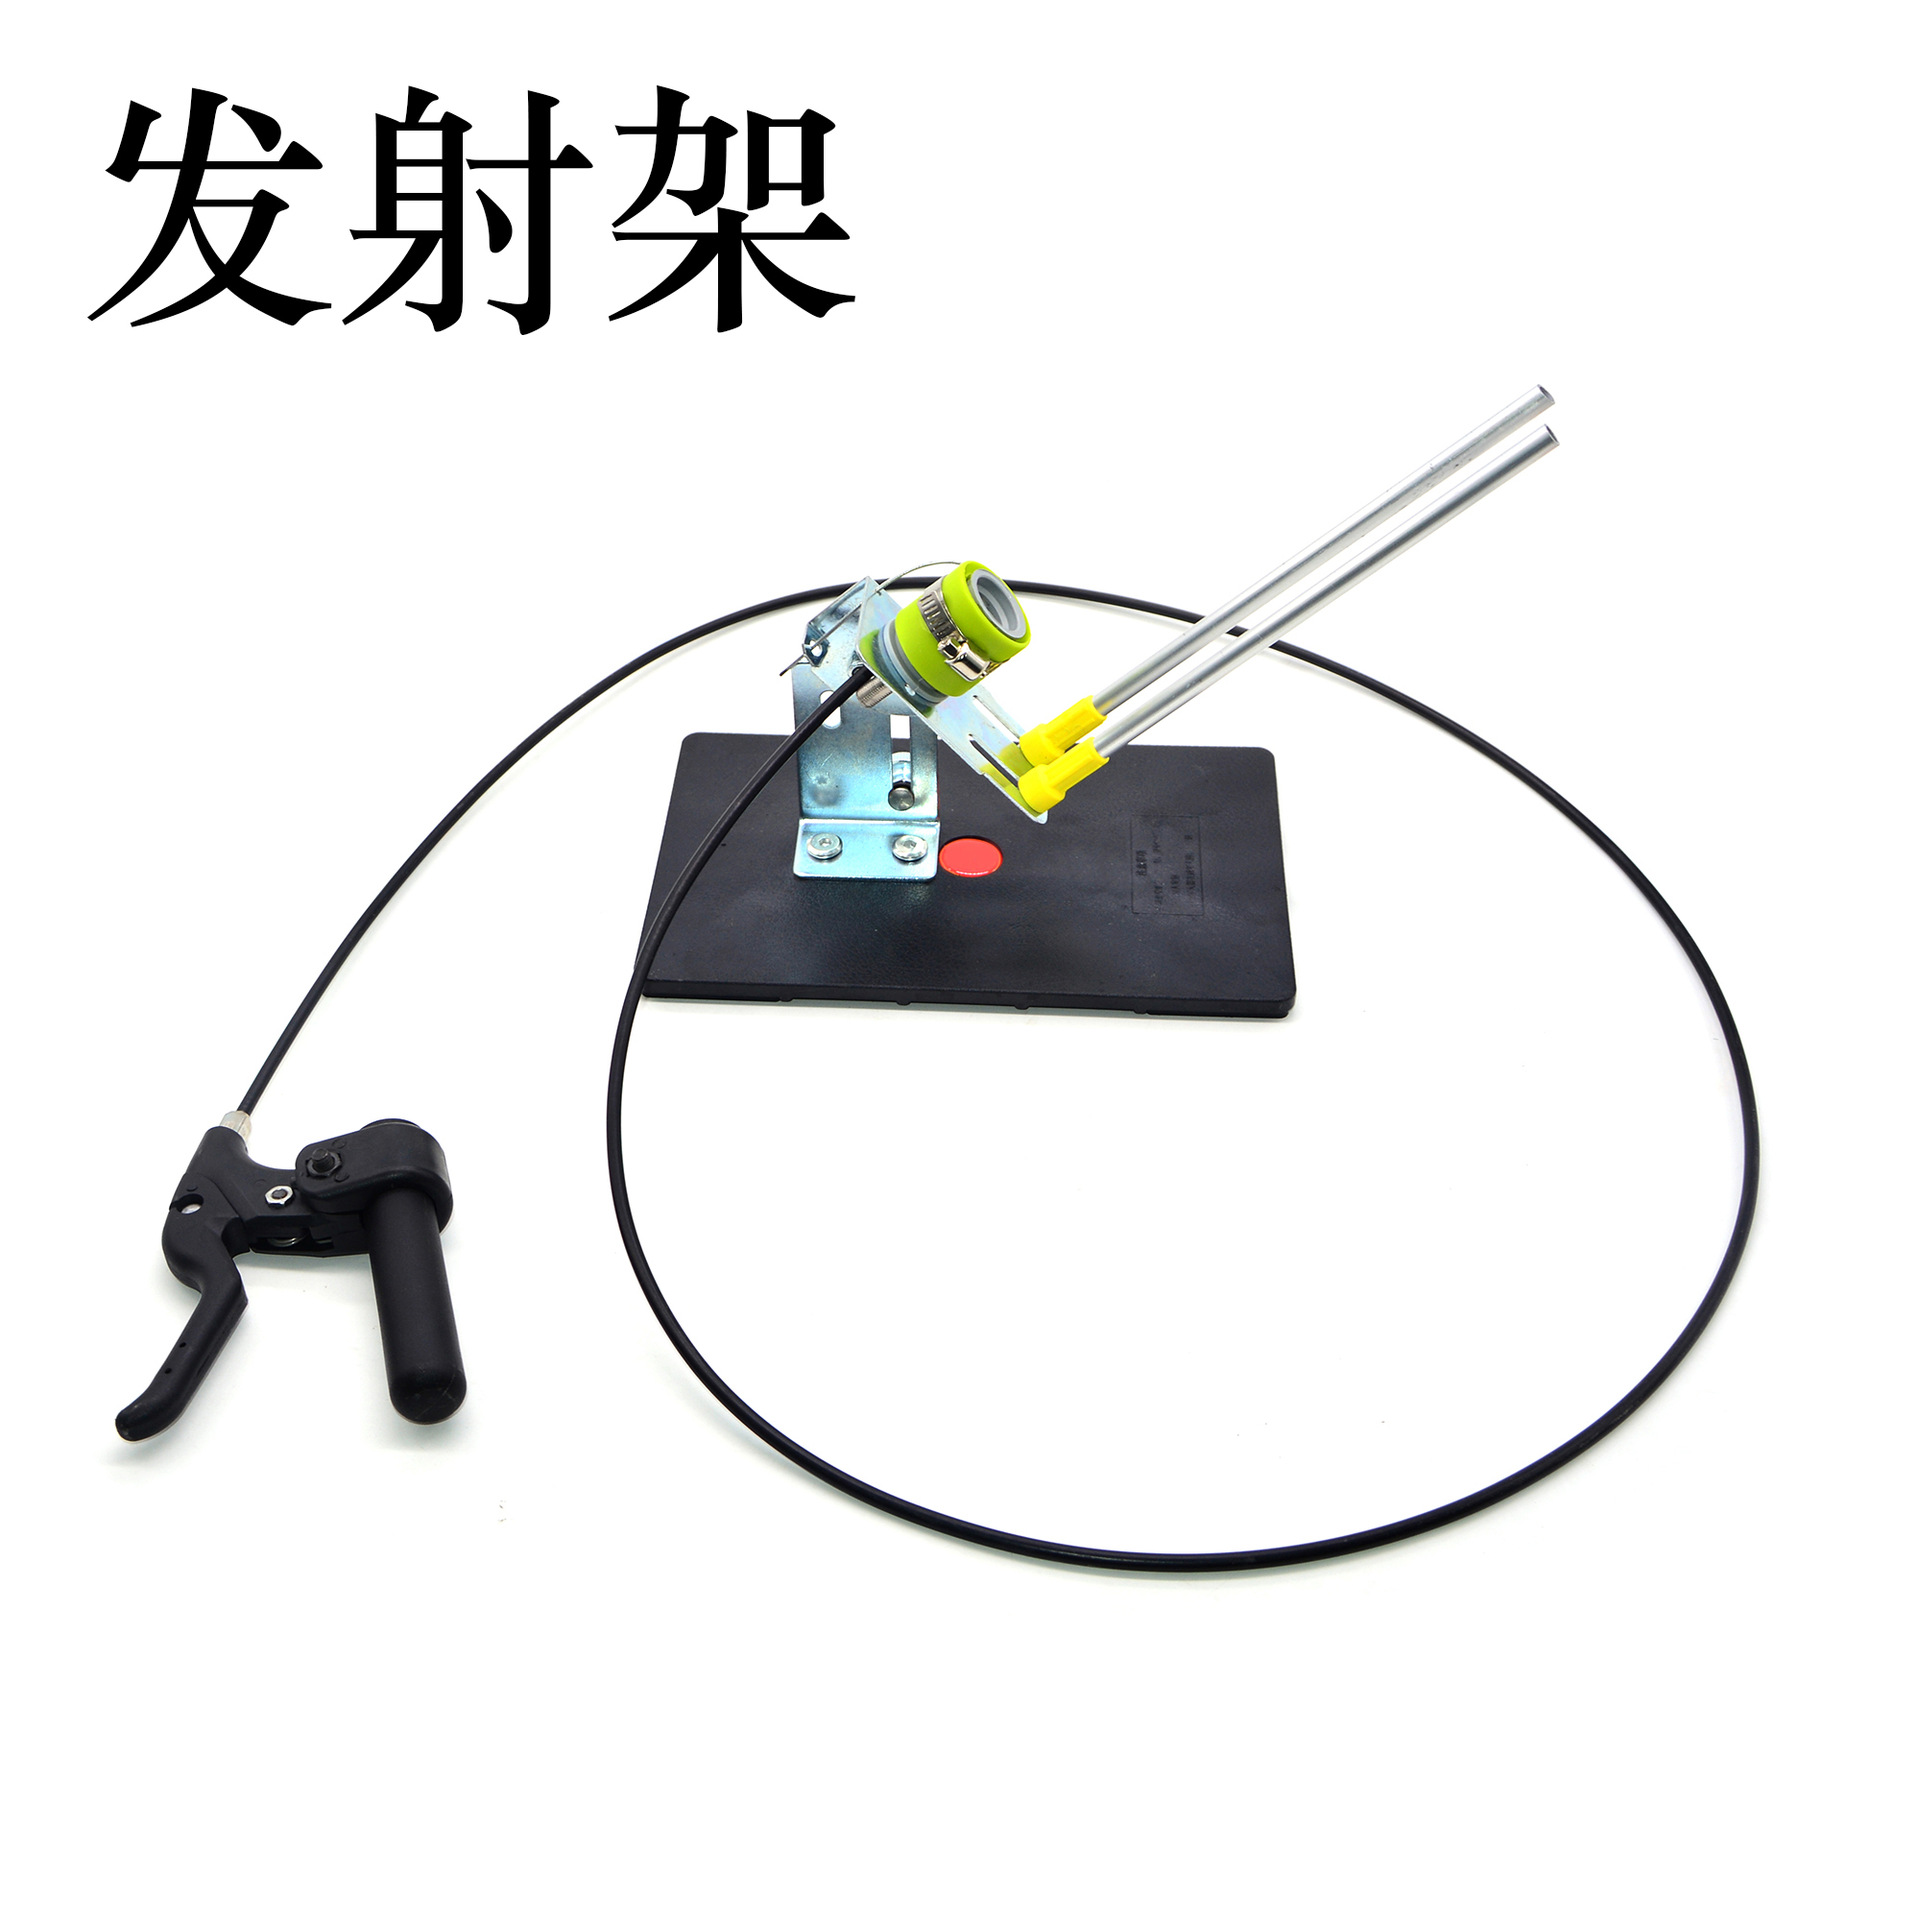
 kx1920-c water rocket set (launcher)
KX1920-C 水火箭套装(发射架) |
CN¥ 134.0 |
 accessories link
配件链接 |
CN¥ 1.0 |
 kx1918 water fire arrow set (medium)
KX1918 水火箭头套装(中号) |
CN¥ 16.0 |
 kx1919 water fire arrow set (large)
KX1919 水火箭头套装(大号) |
CN¥ 20.0 |
 kx1920-pj9 fire arrow medium
KX1920-PJ9 火箭头中号 |
CN¥ 8.0 |
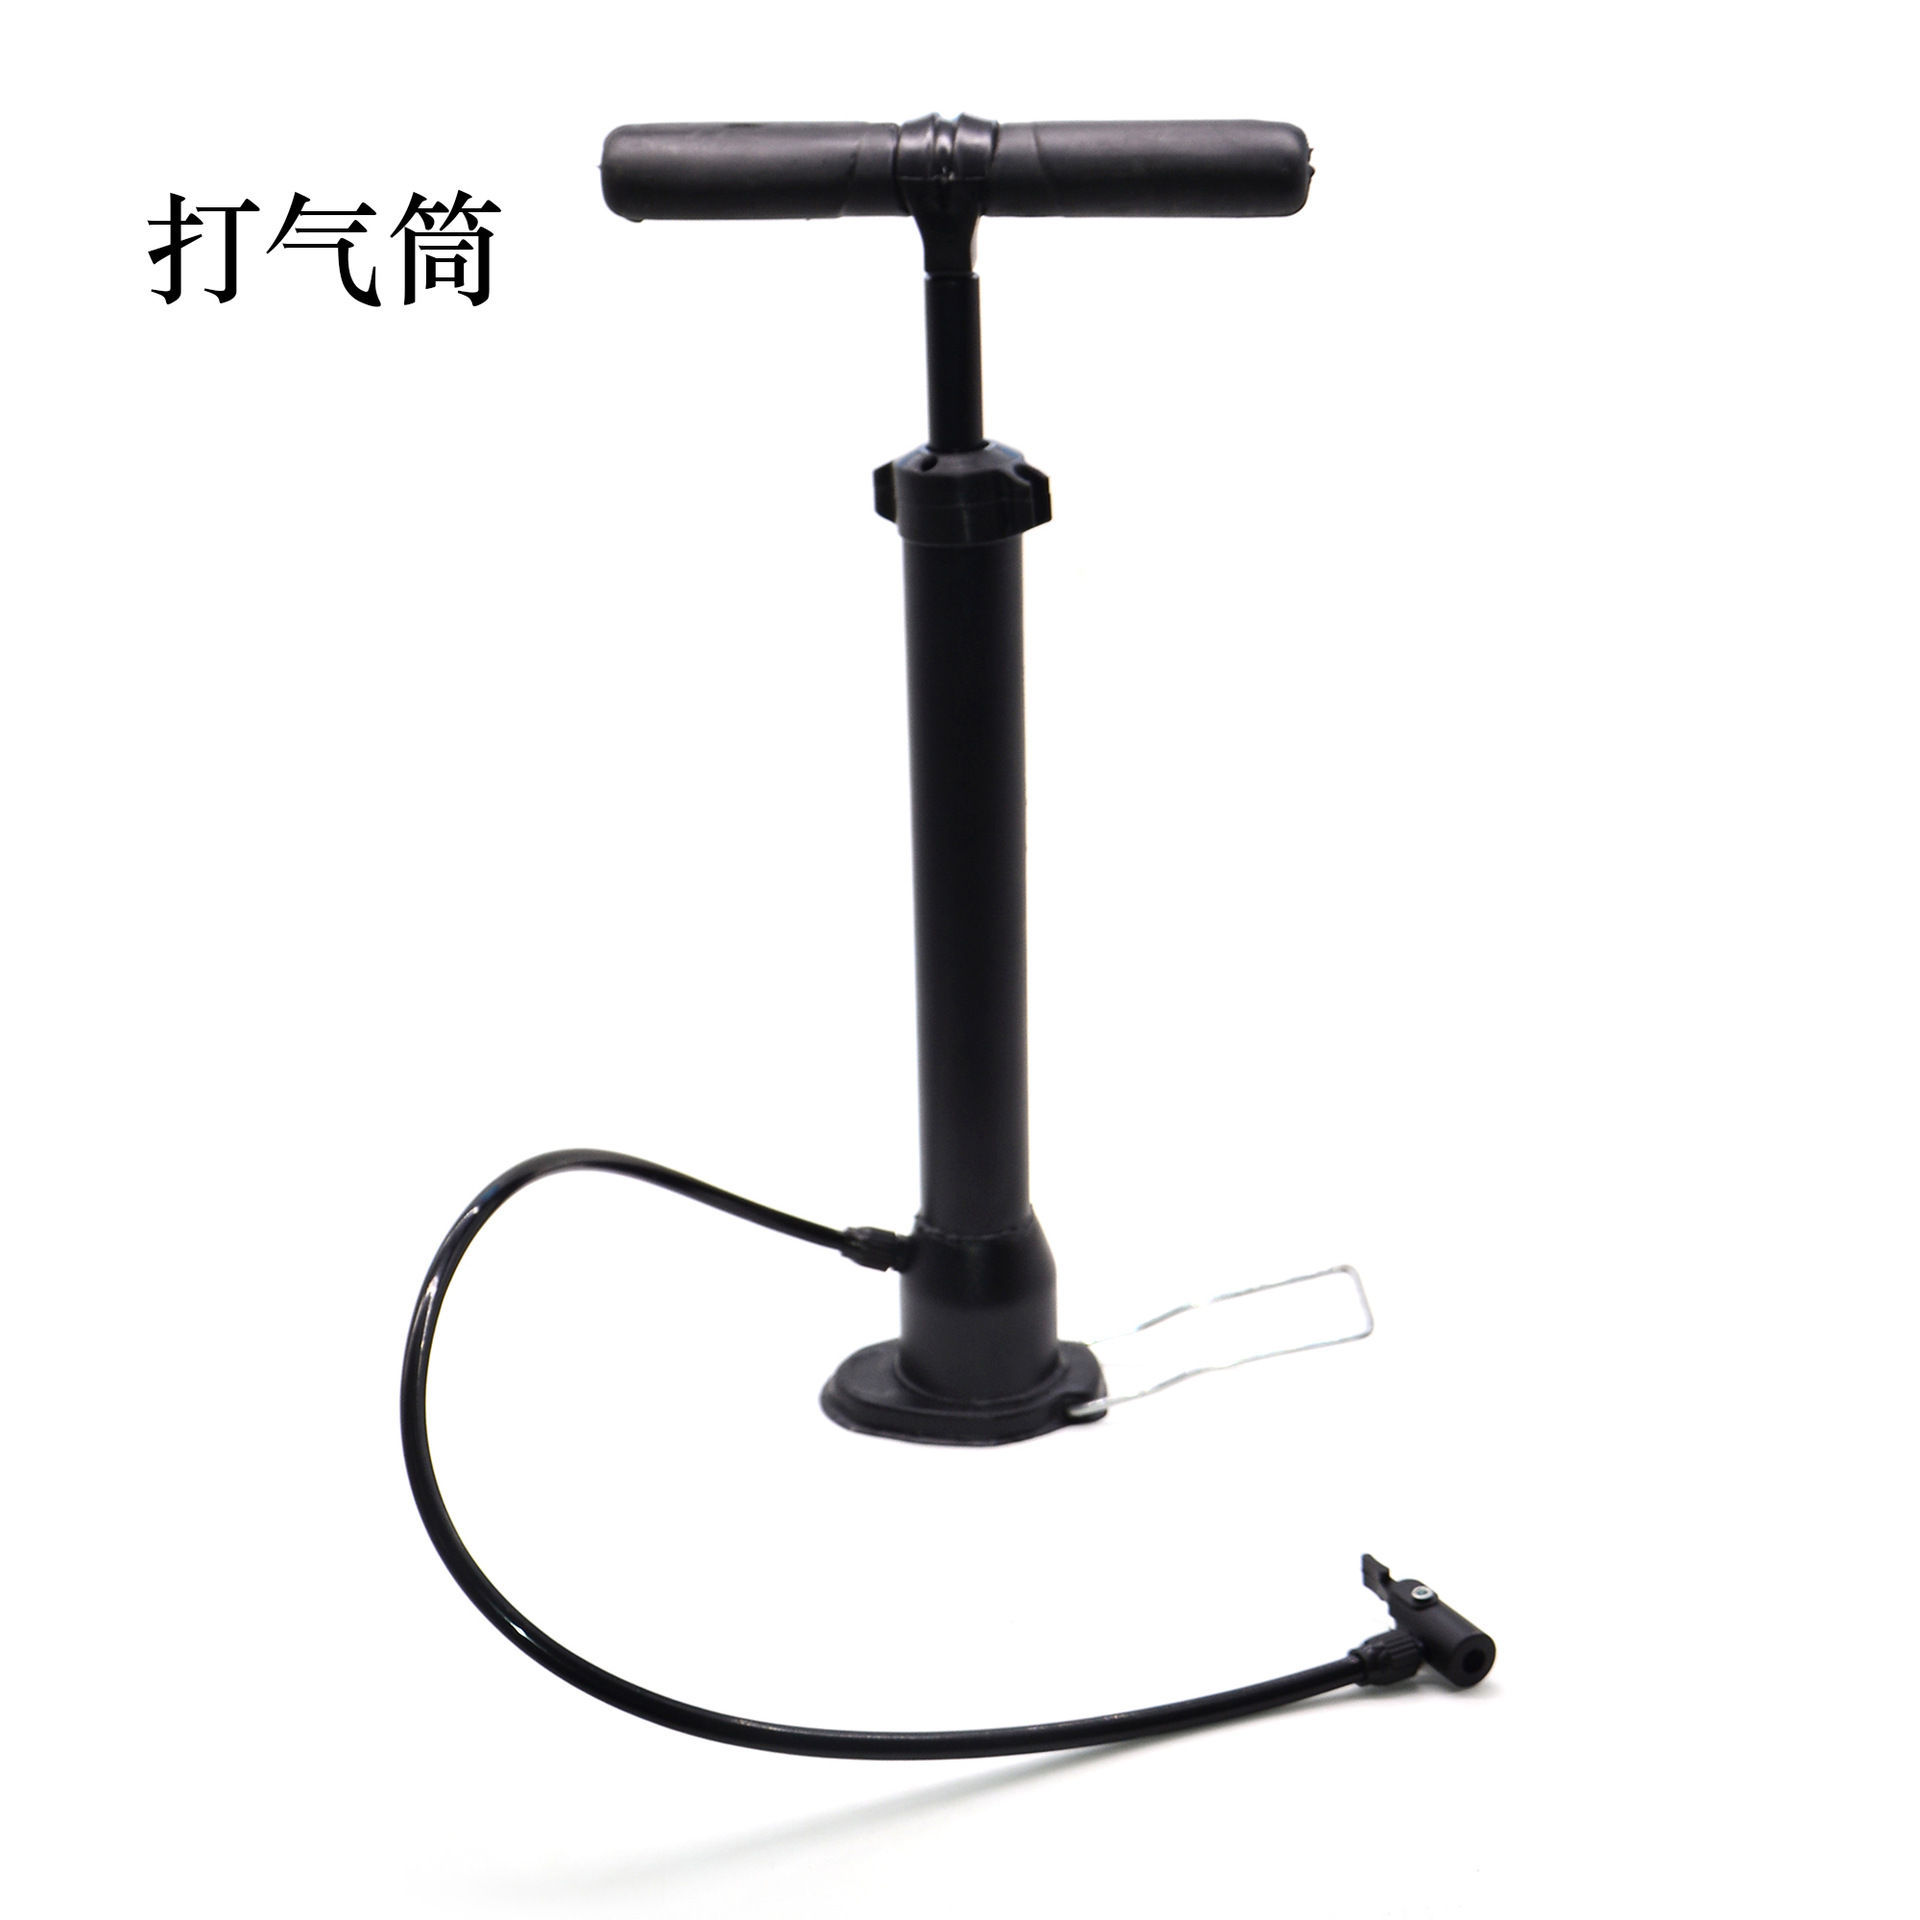
 kx1920-d water rocket set (tire pump)
KX1920-D 水火箭套装(打气筒) |
CN¥ 40.0 |
 kx192-a water rocket set
KX1920 -A 水火箭套装全套 |
CN¥ 190.0 |
 kx1920-pj10 fire arrow small size
KX1920-PJ10 火箭头小号 |
CN¥ 4.0 |
A water rocket is a toy designed using the ratio of mass and air pressure, and it serves as a case study in physics education. It can foster students' interest in physics learning, and the physical principles involved are an important foundation for understanding mechanics in physics.
Water rockets, also known as pneumatic water spray rockets or water propelled rockets, are made using discarded beverage bottles to create the power chamber, body, nose cone, tail fins, and parachute.
KX1918 Water Rocket Head Set (Medium Size)
KX1919 Water Rocket Head Set (Large)
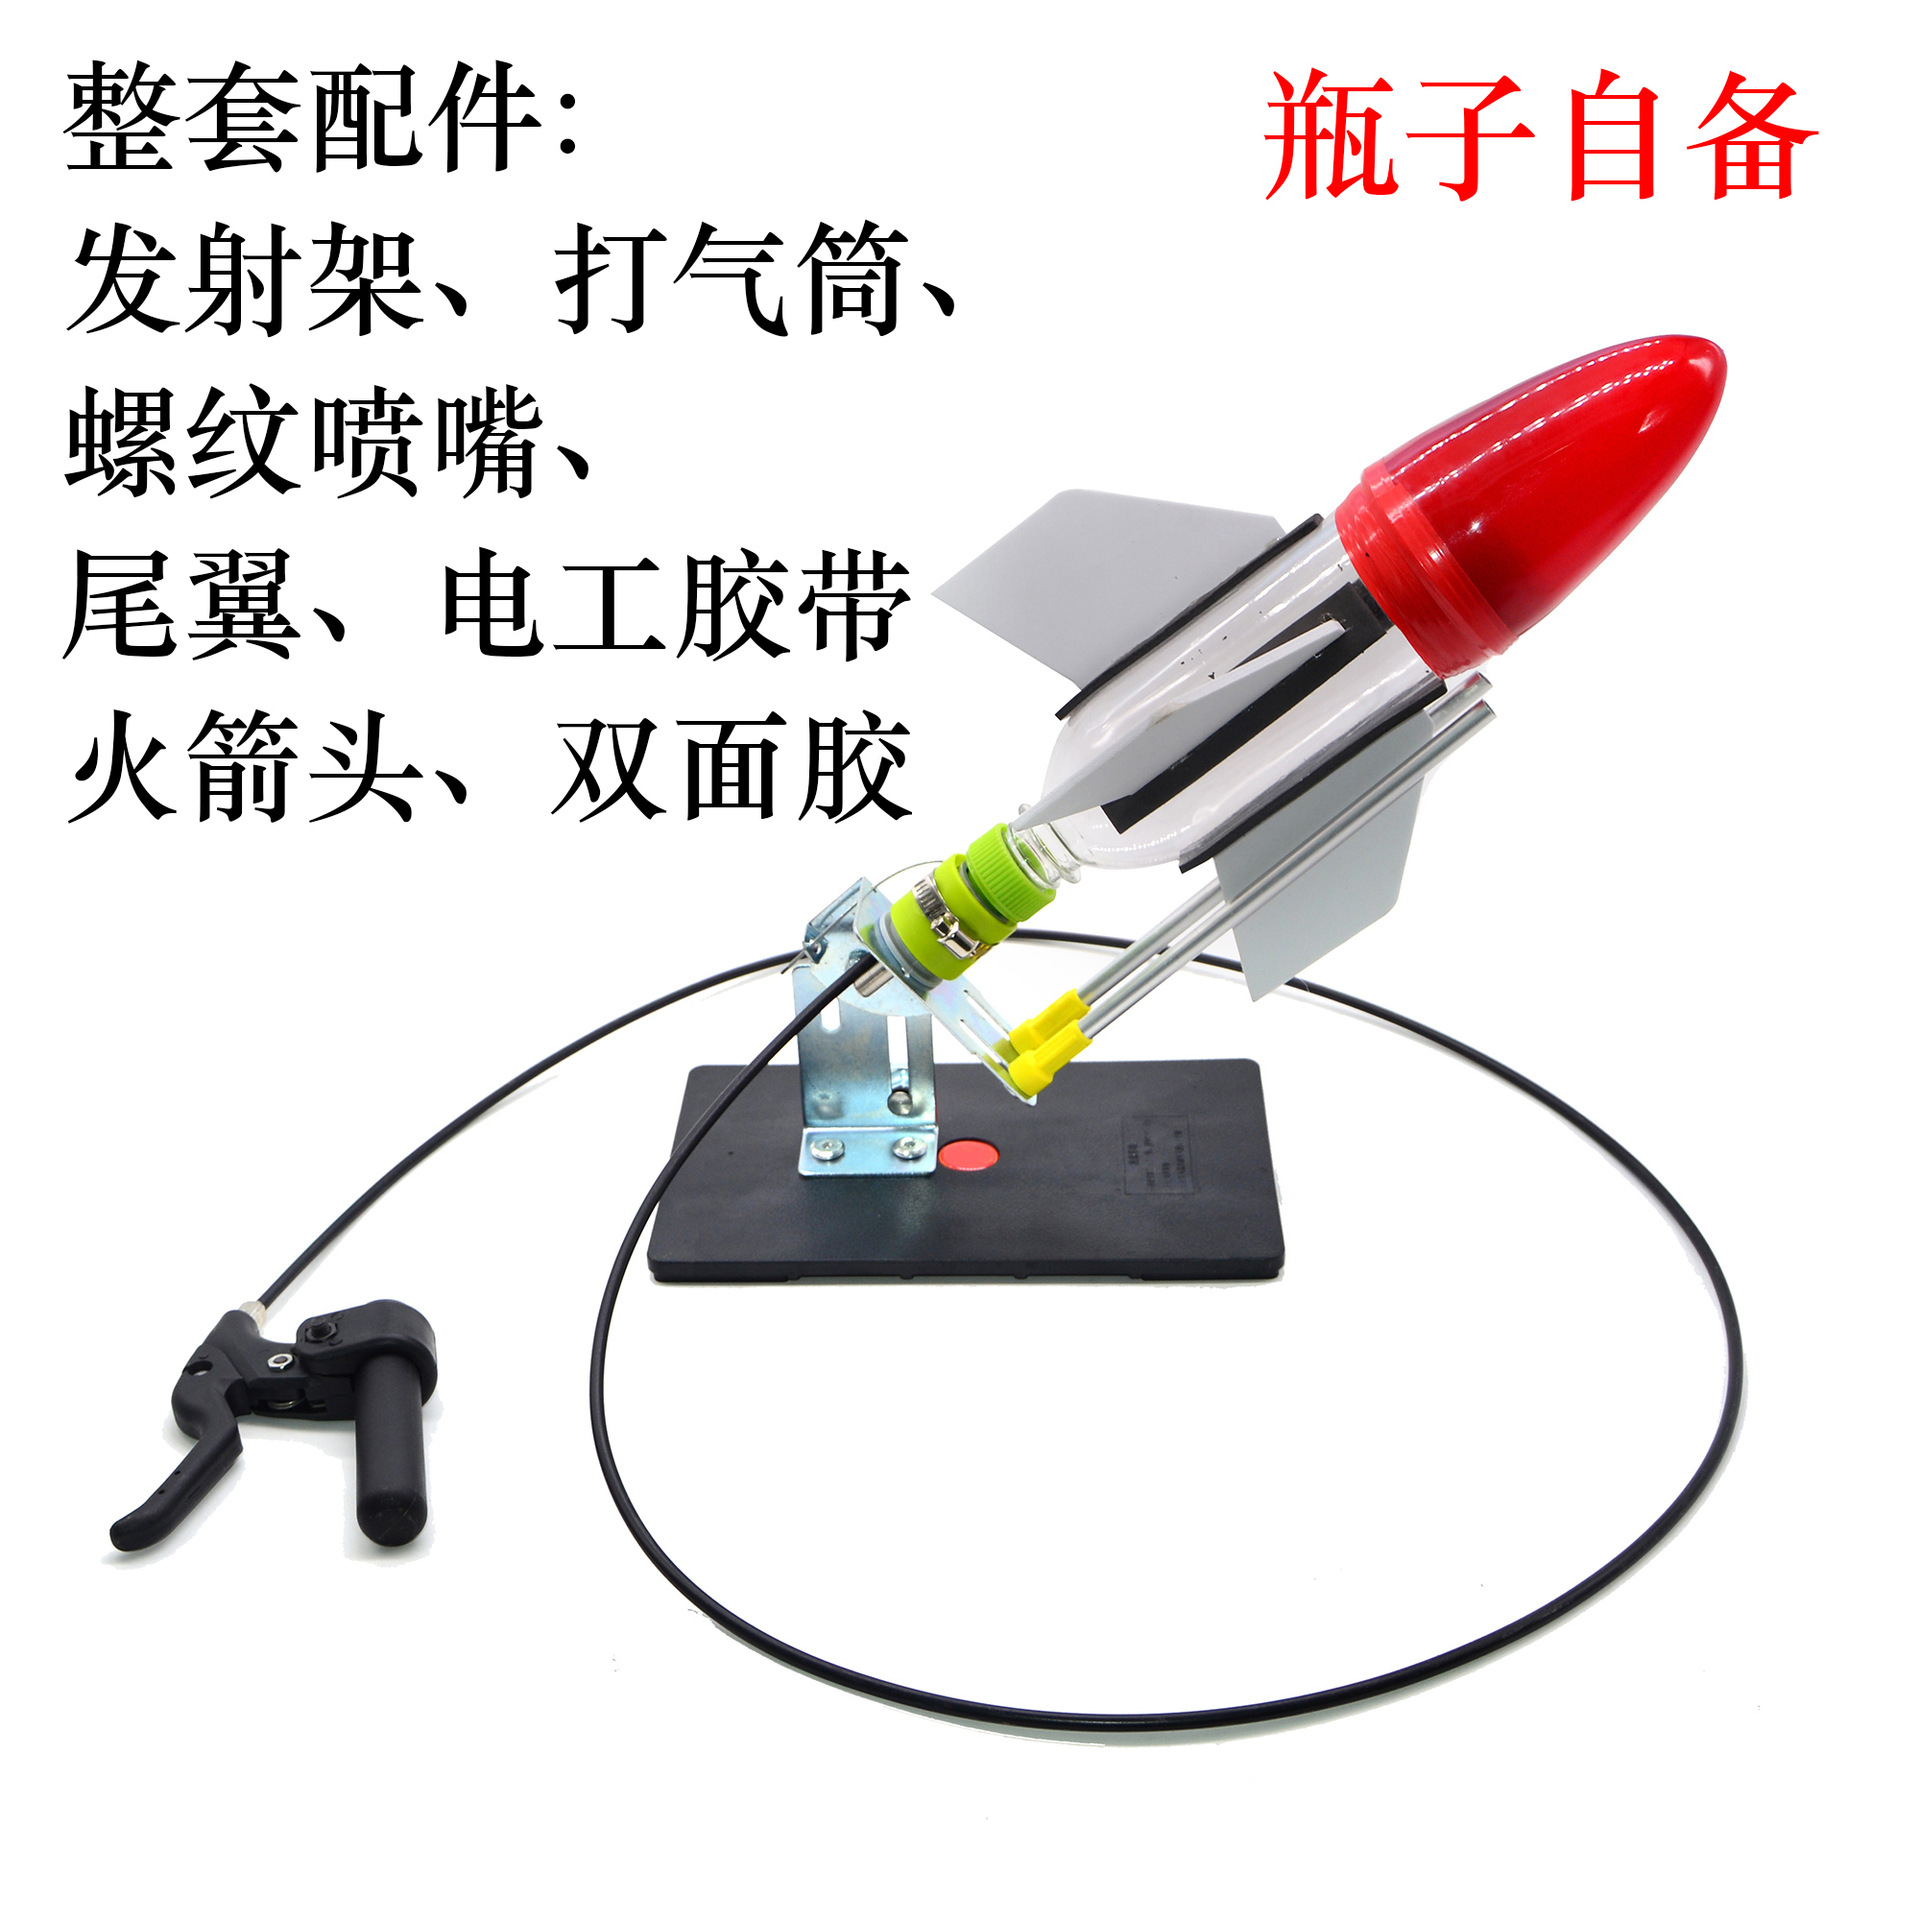
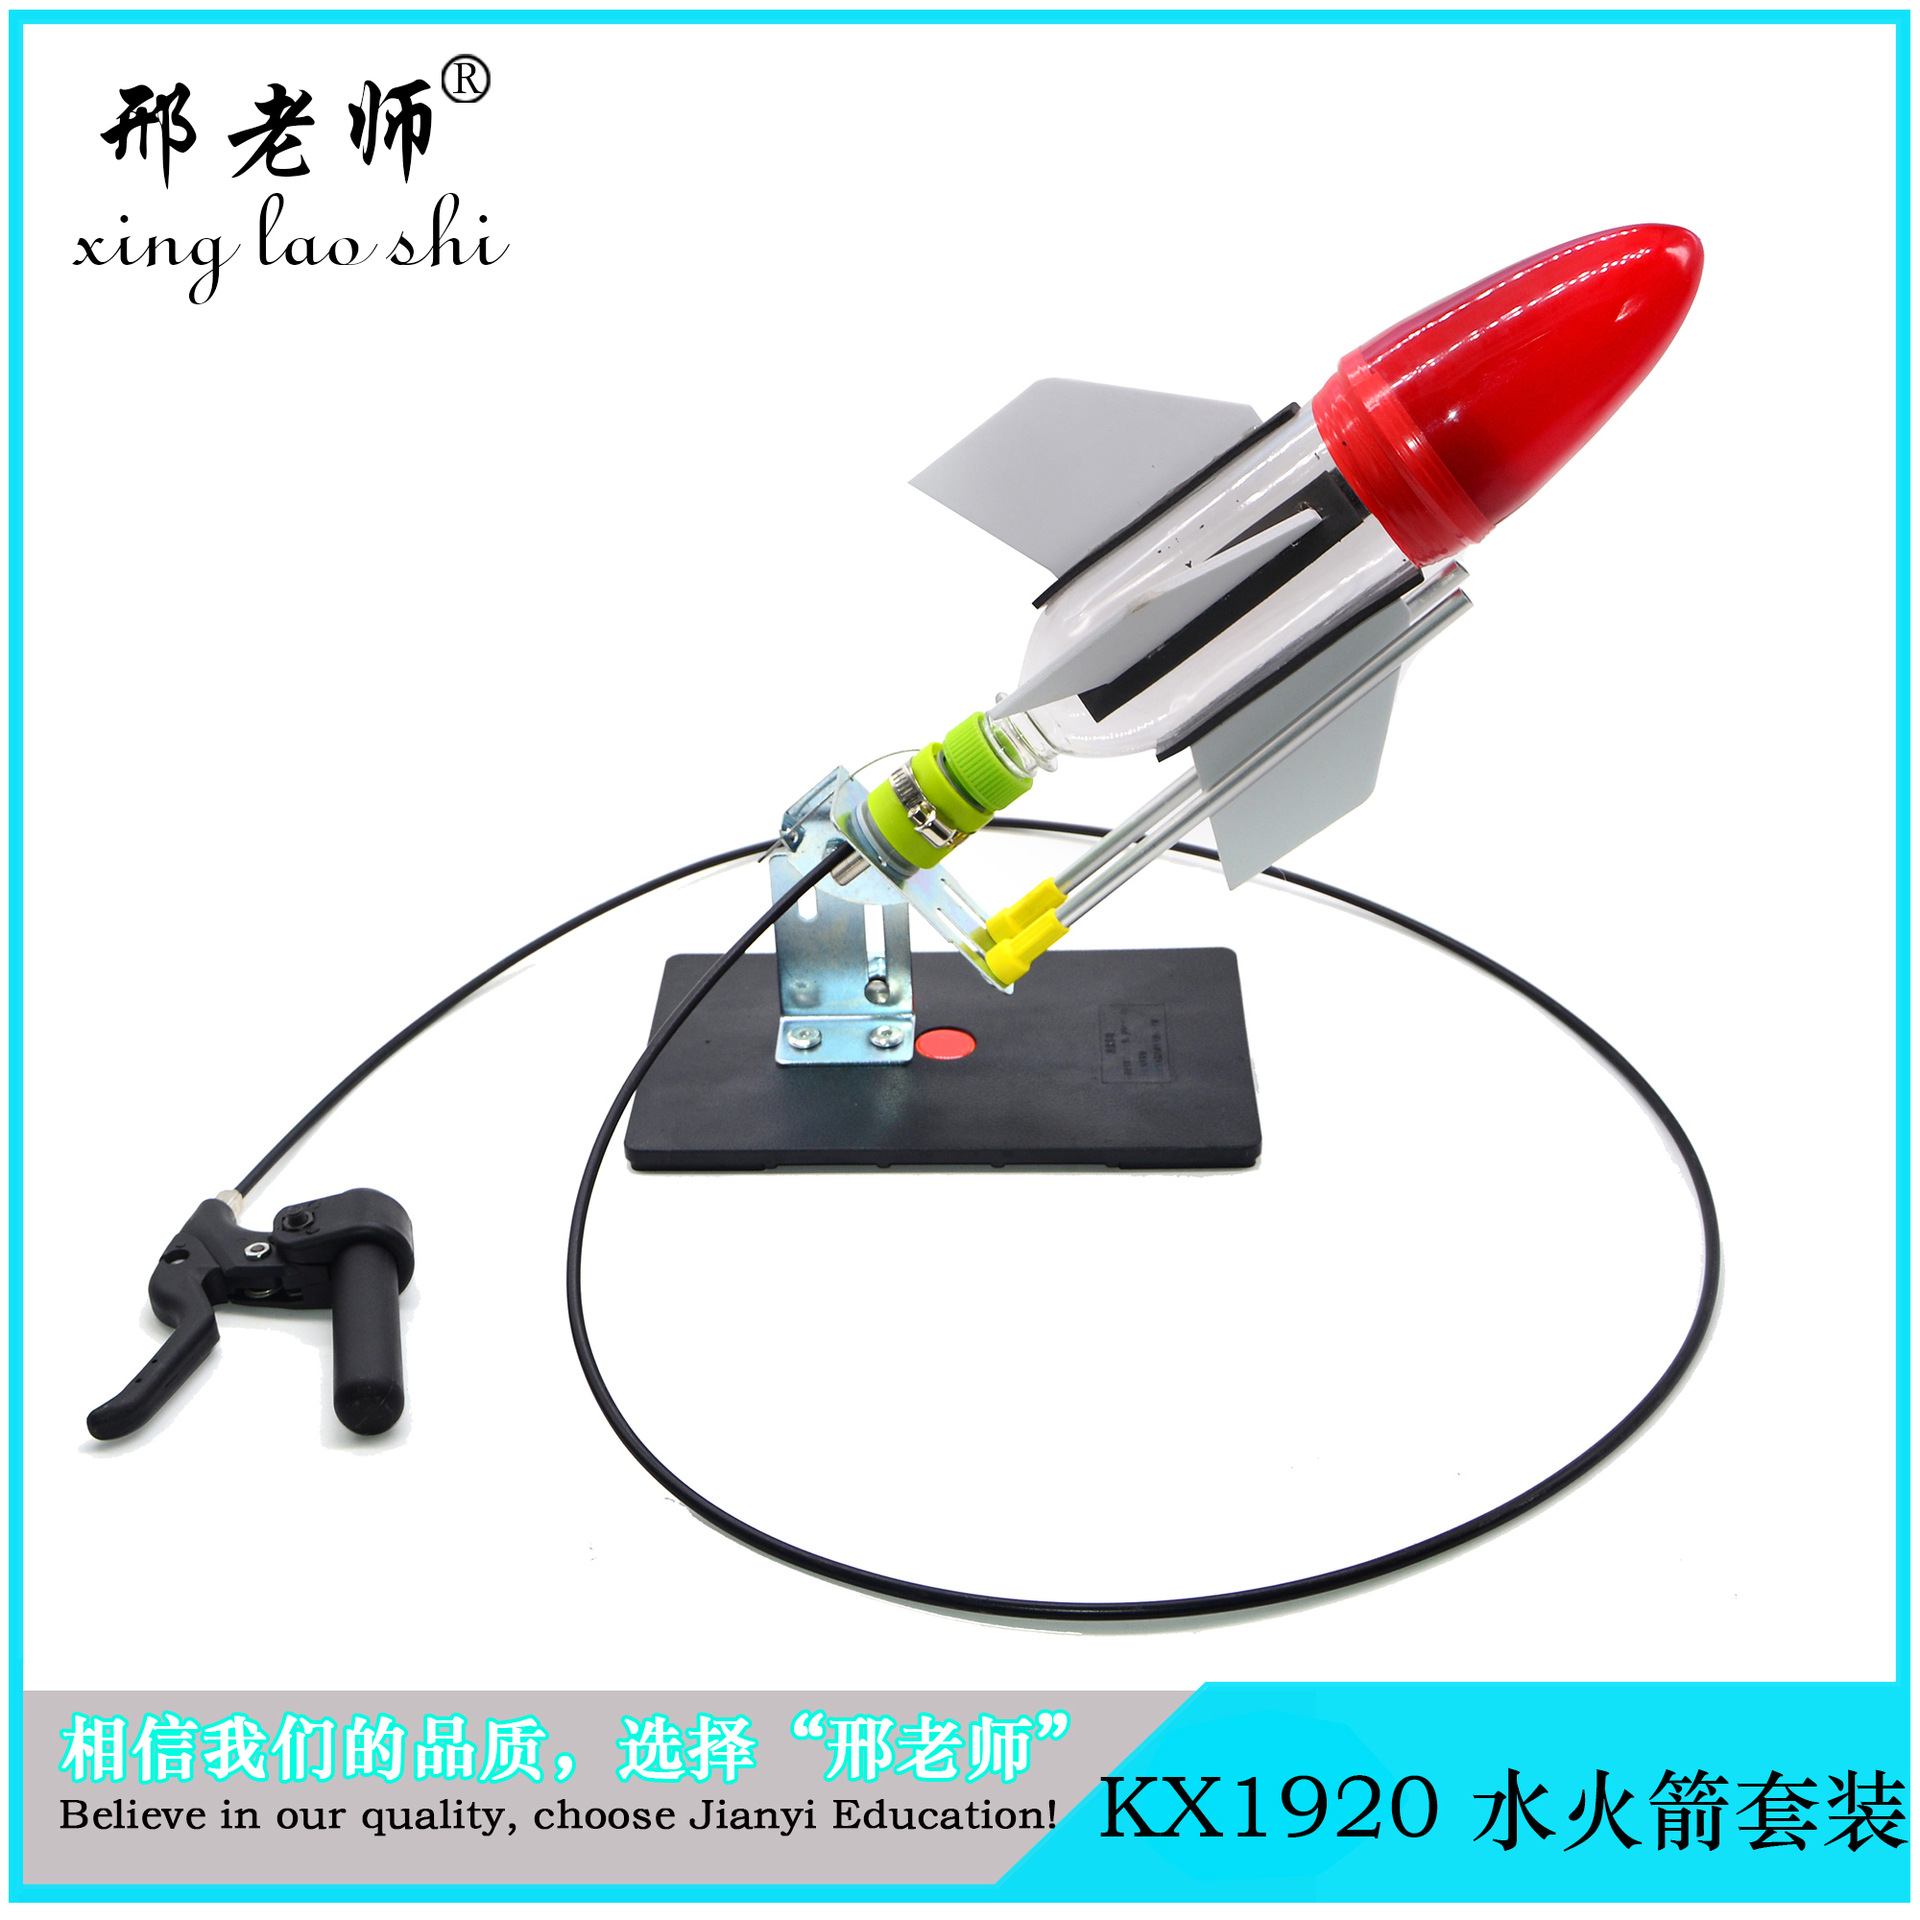
KX1920 -A Water Rocket Set (Complete Set)
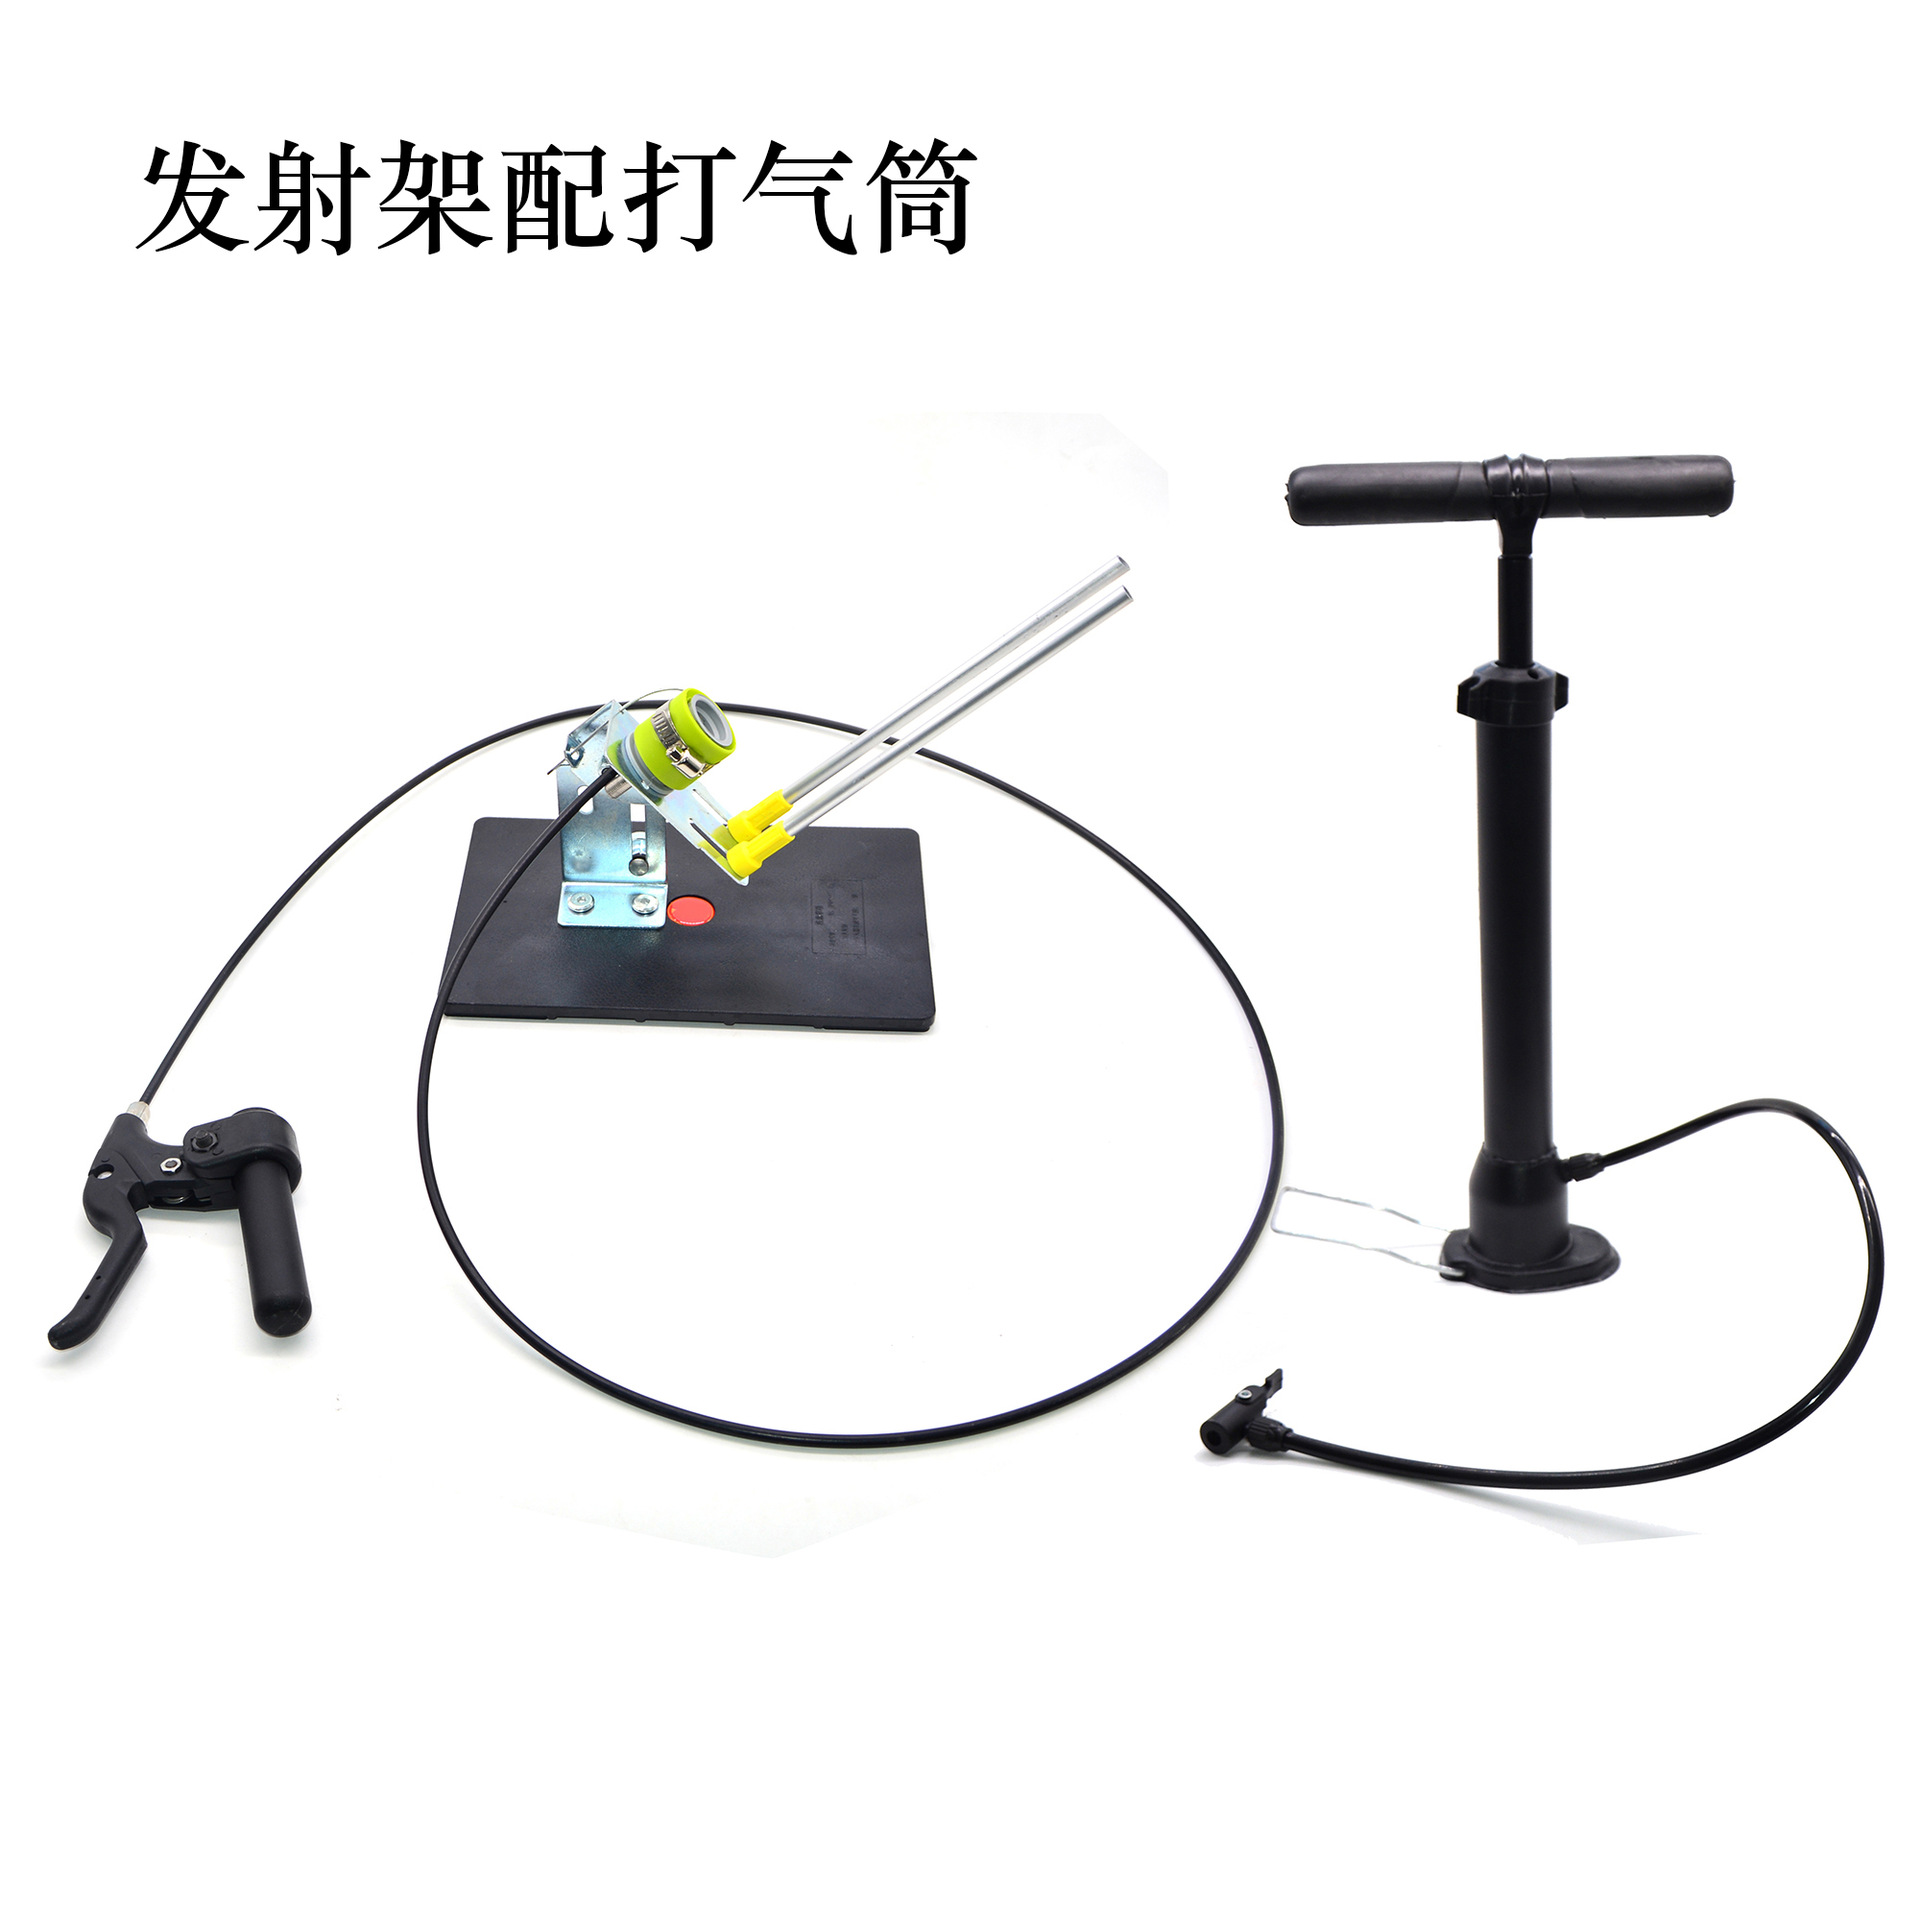
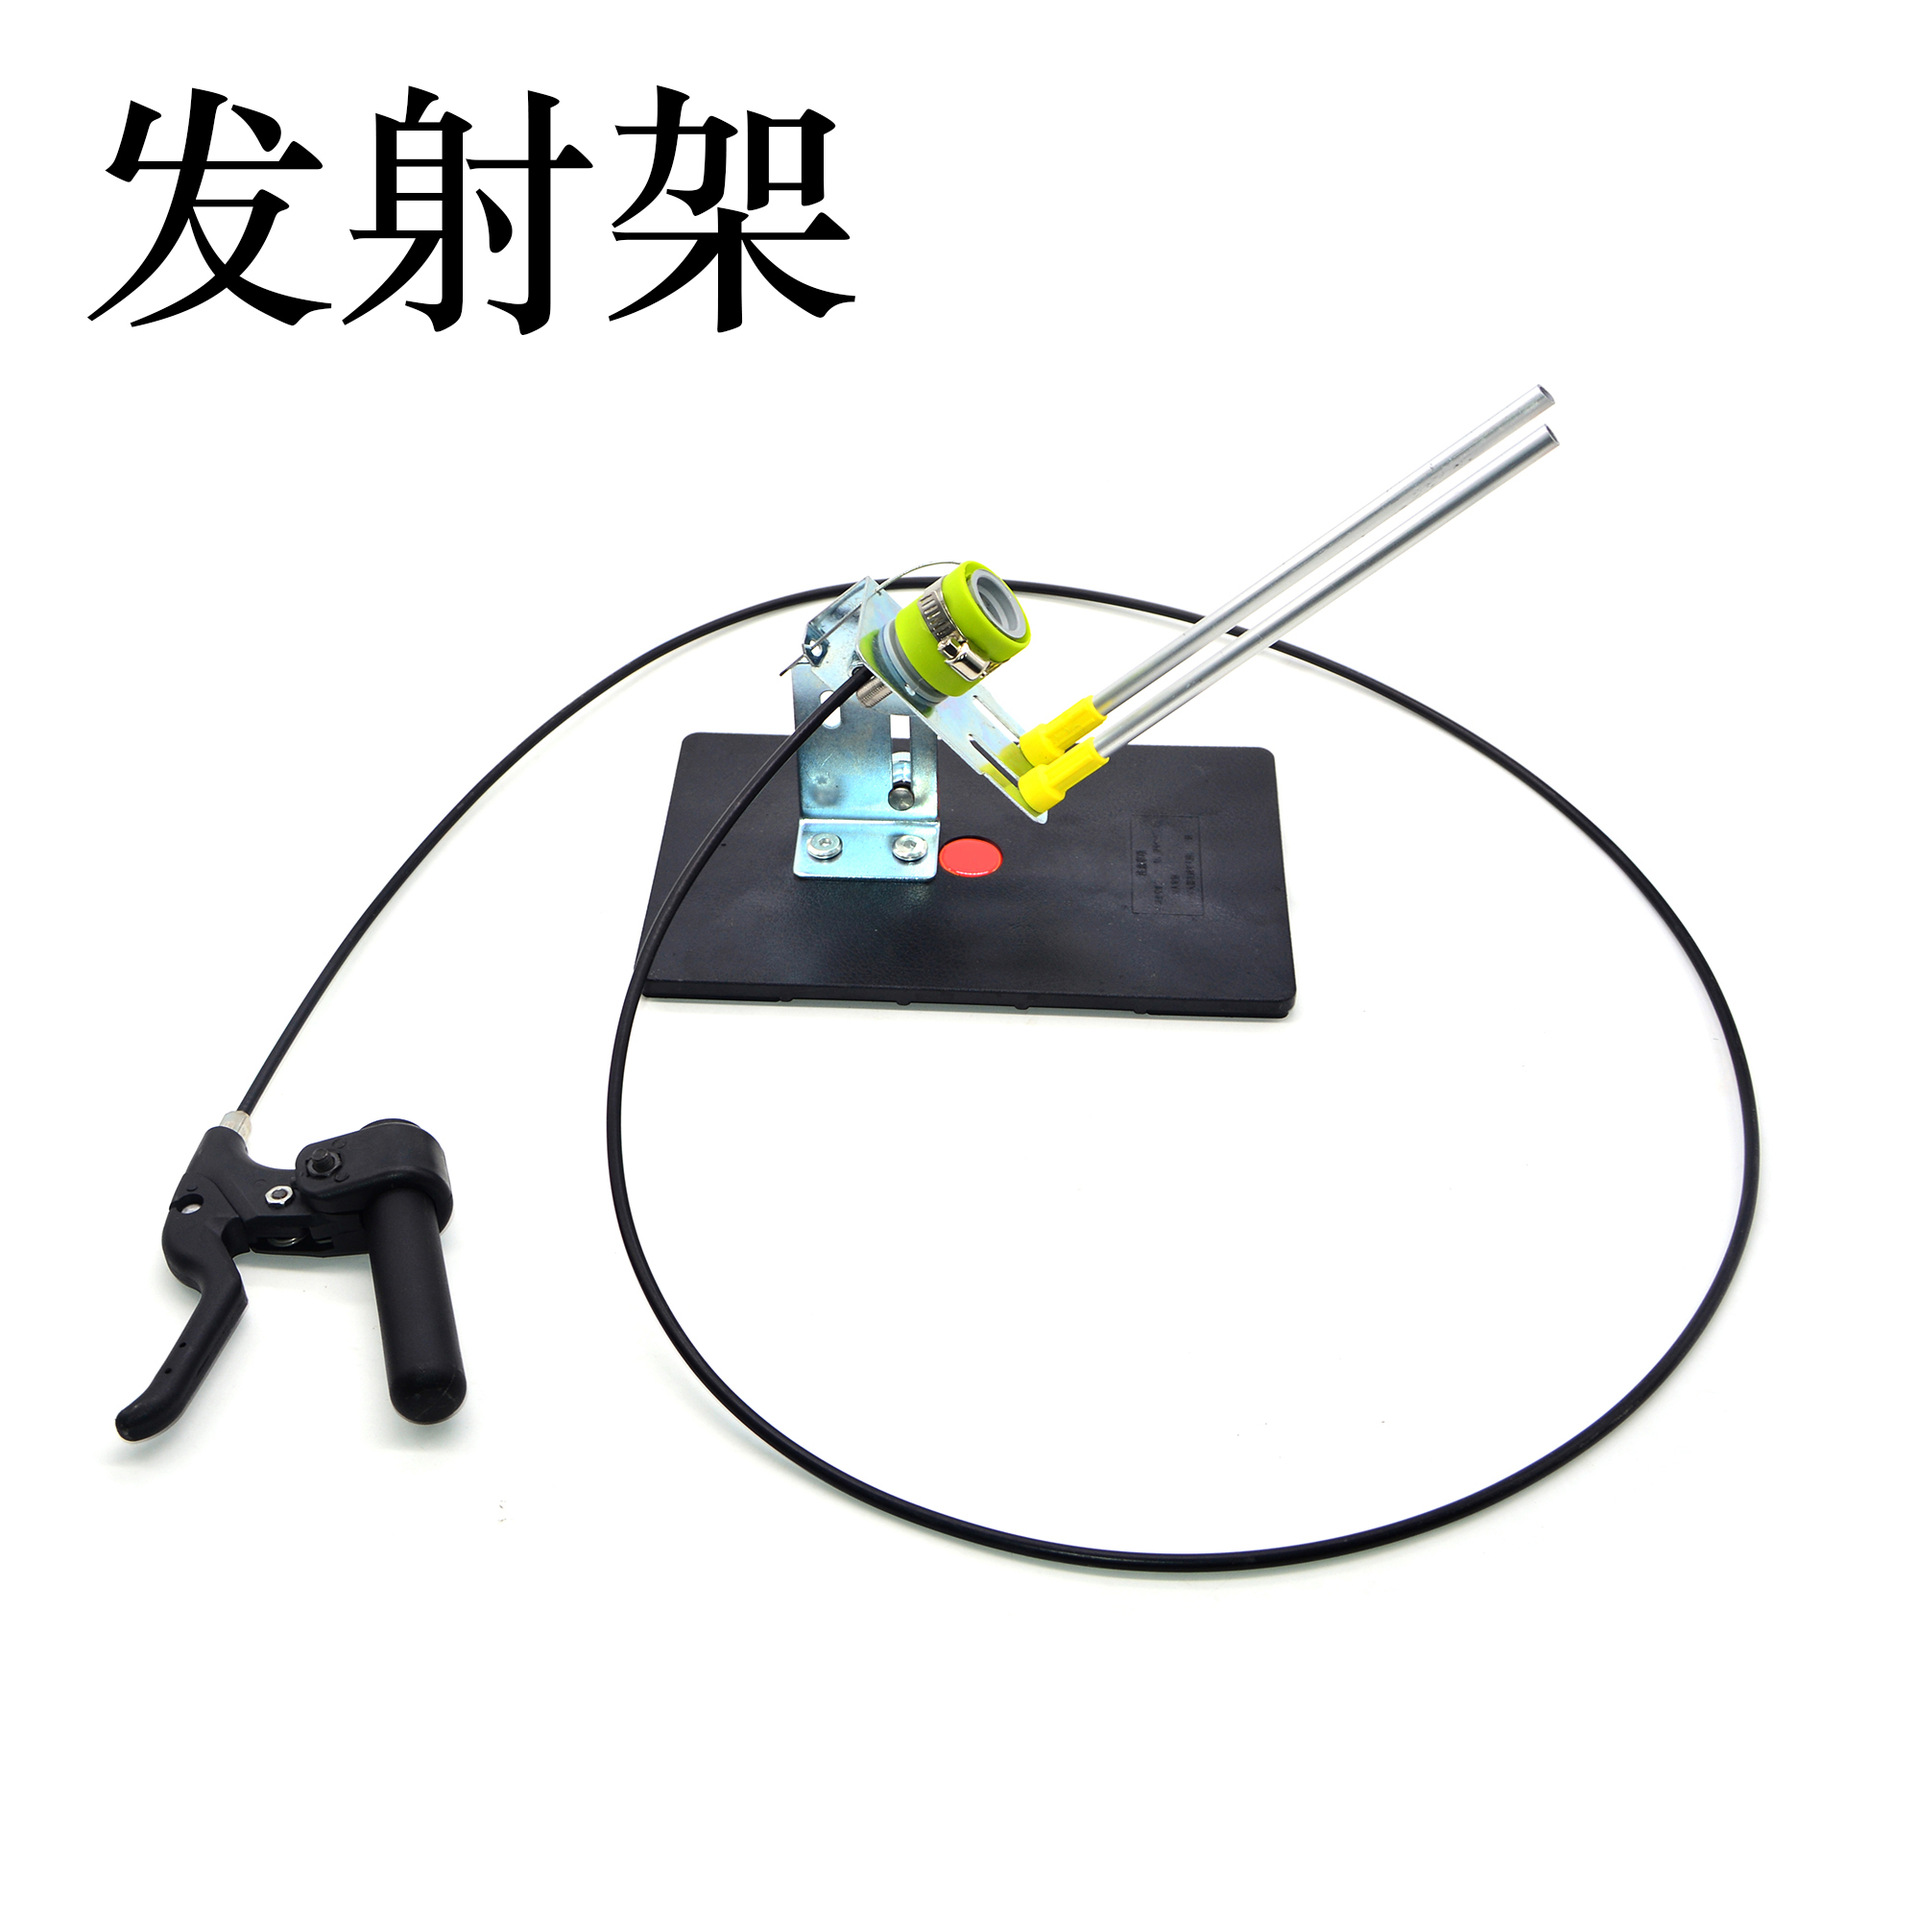
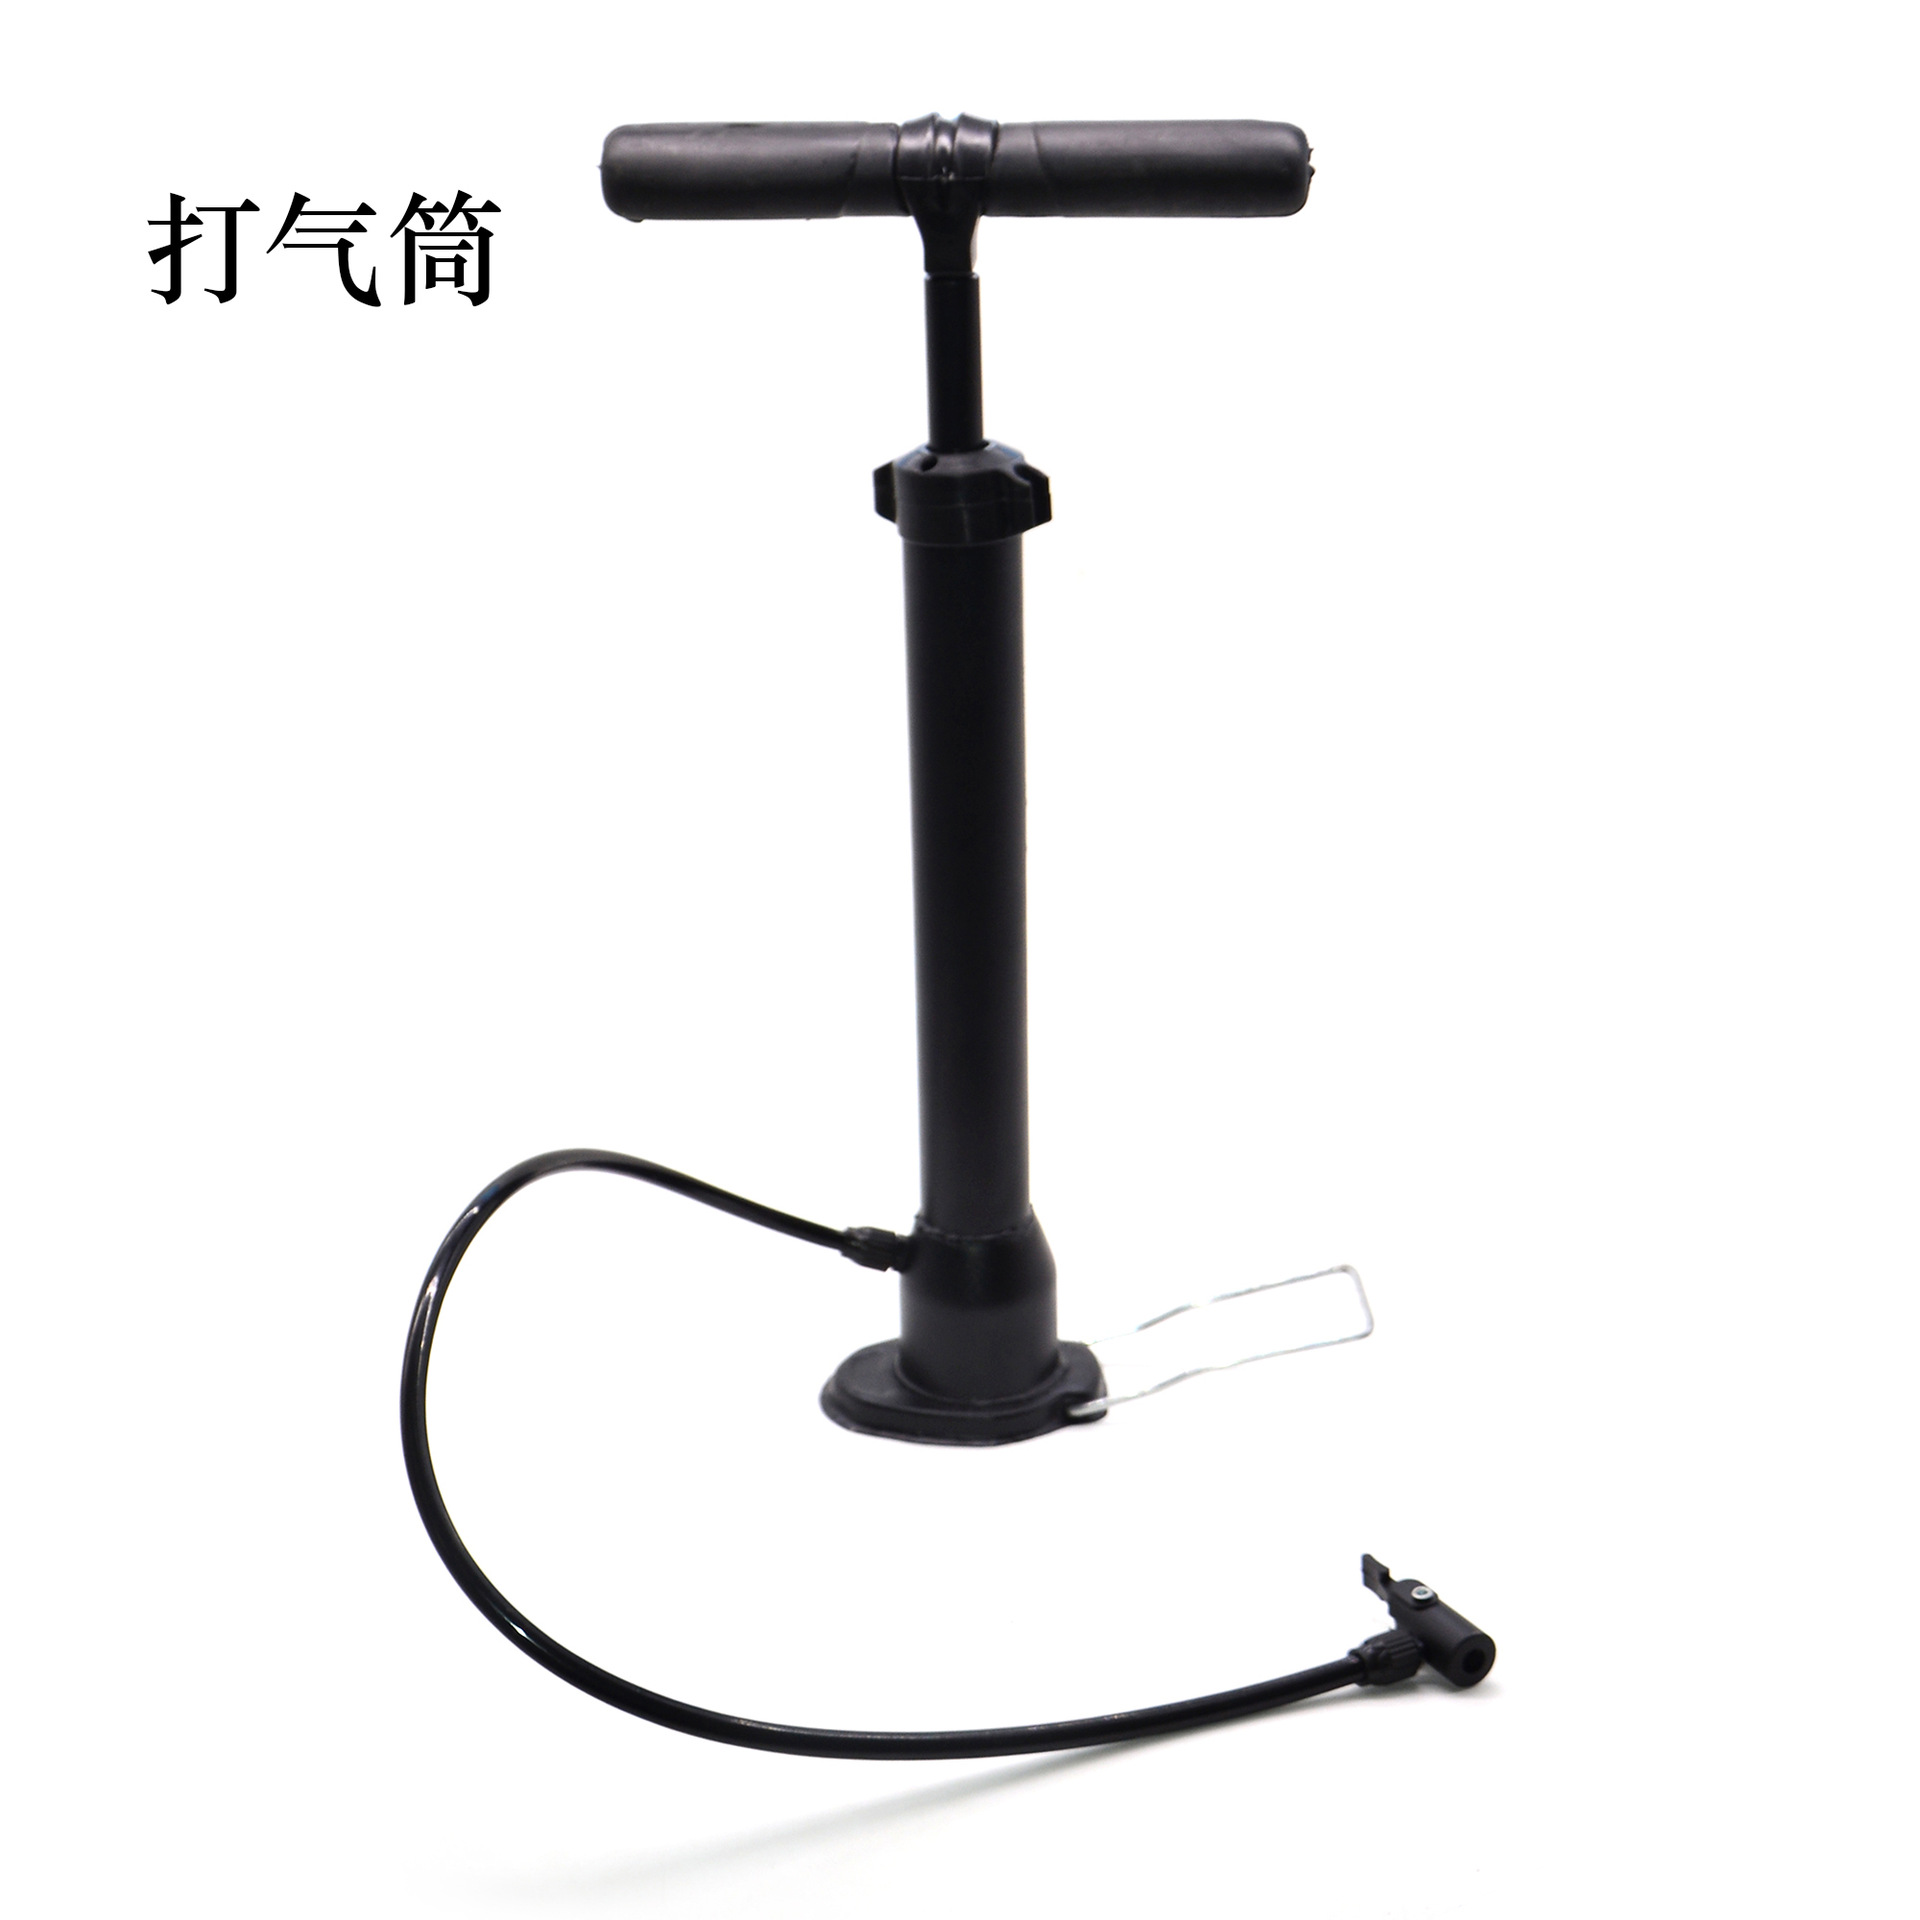
KX1920-B Water Rocket Set (Launch Pad and Air Pump)
KX1920-C Water Rocket Set (Launch Pad)
KX1920-D Water Rocket Set (Blow-up Pump)
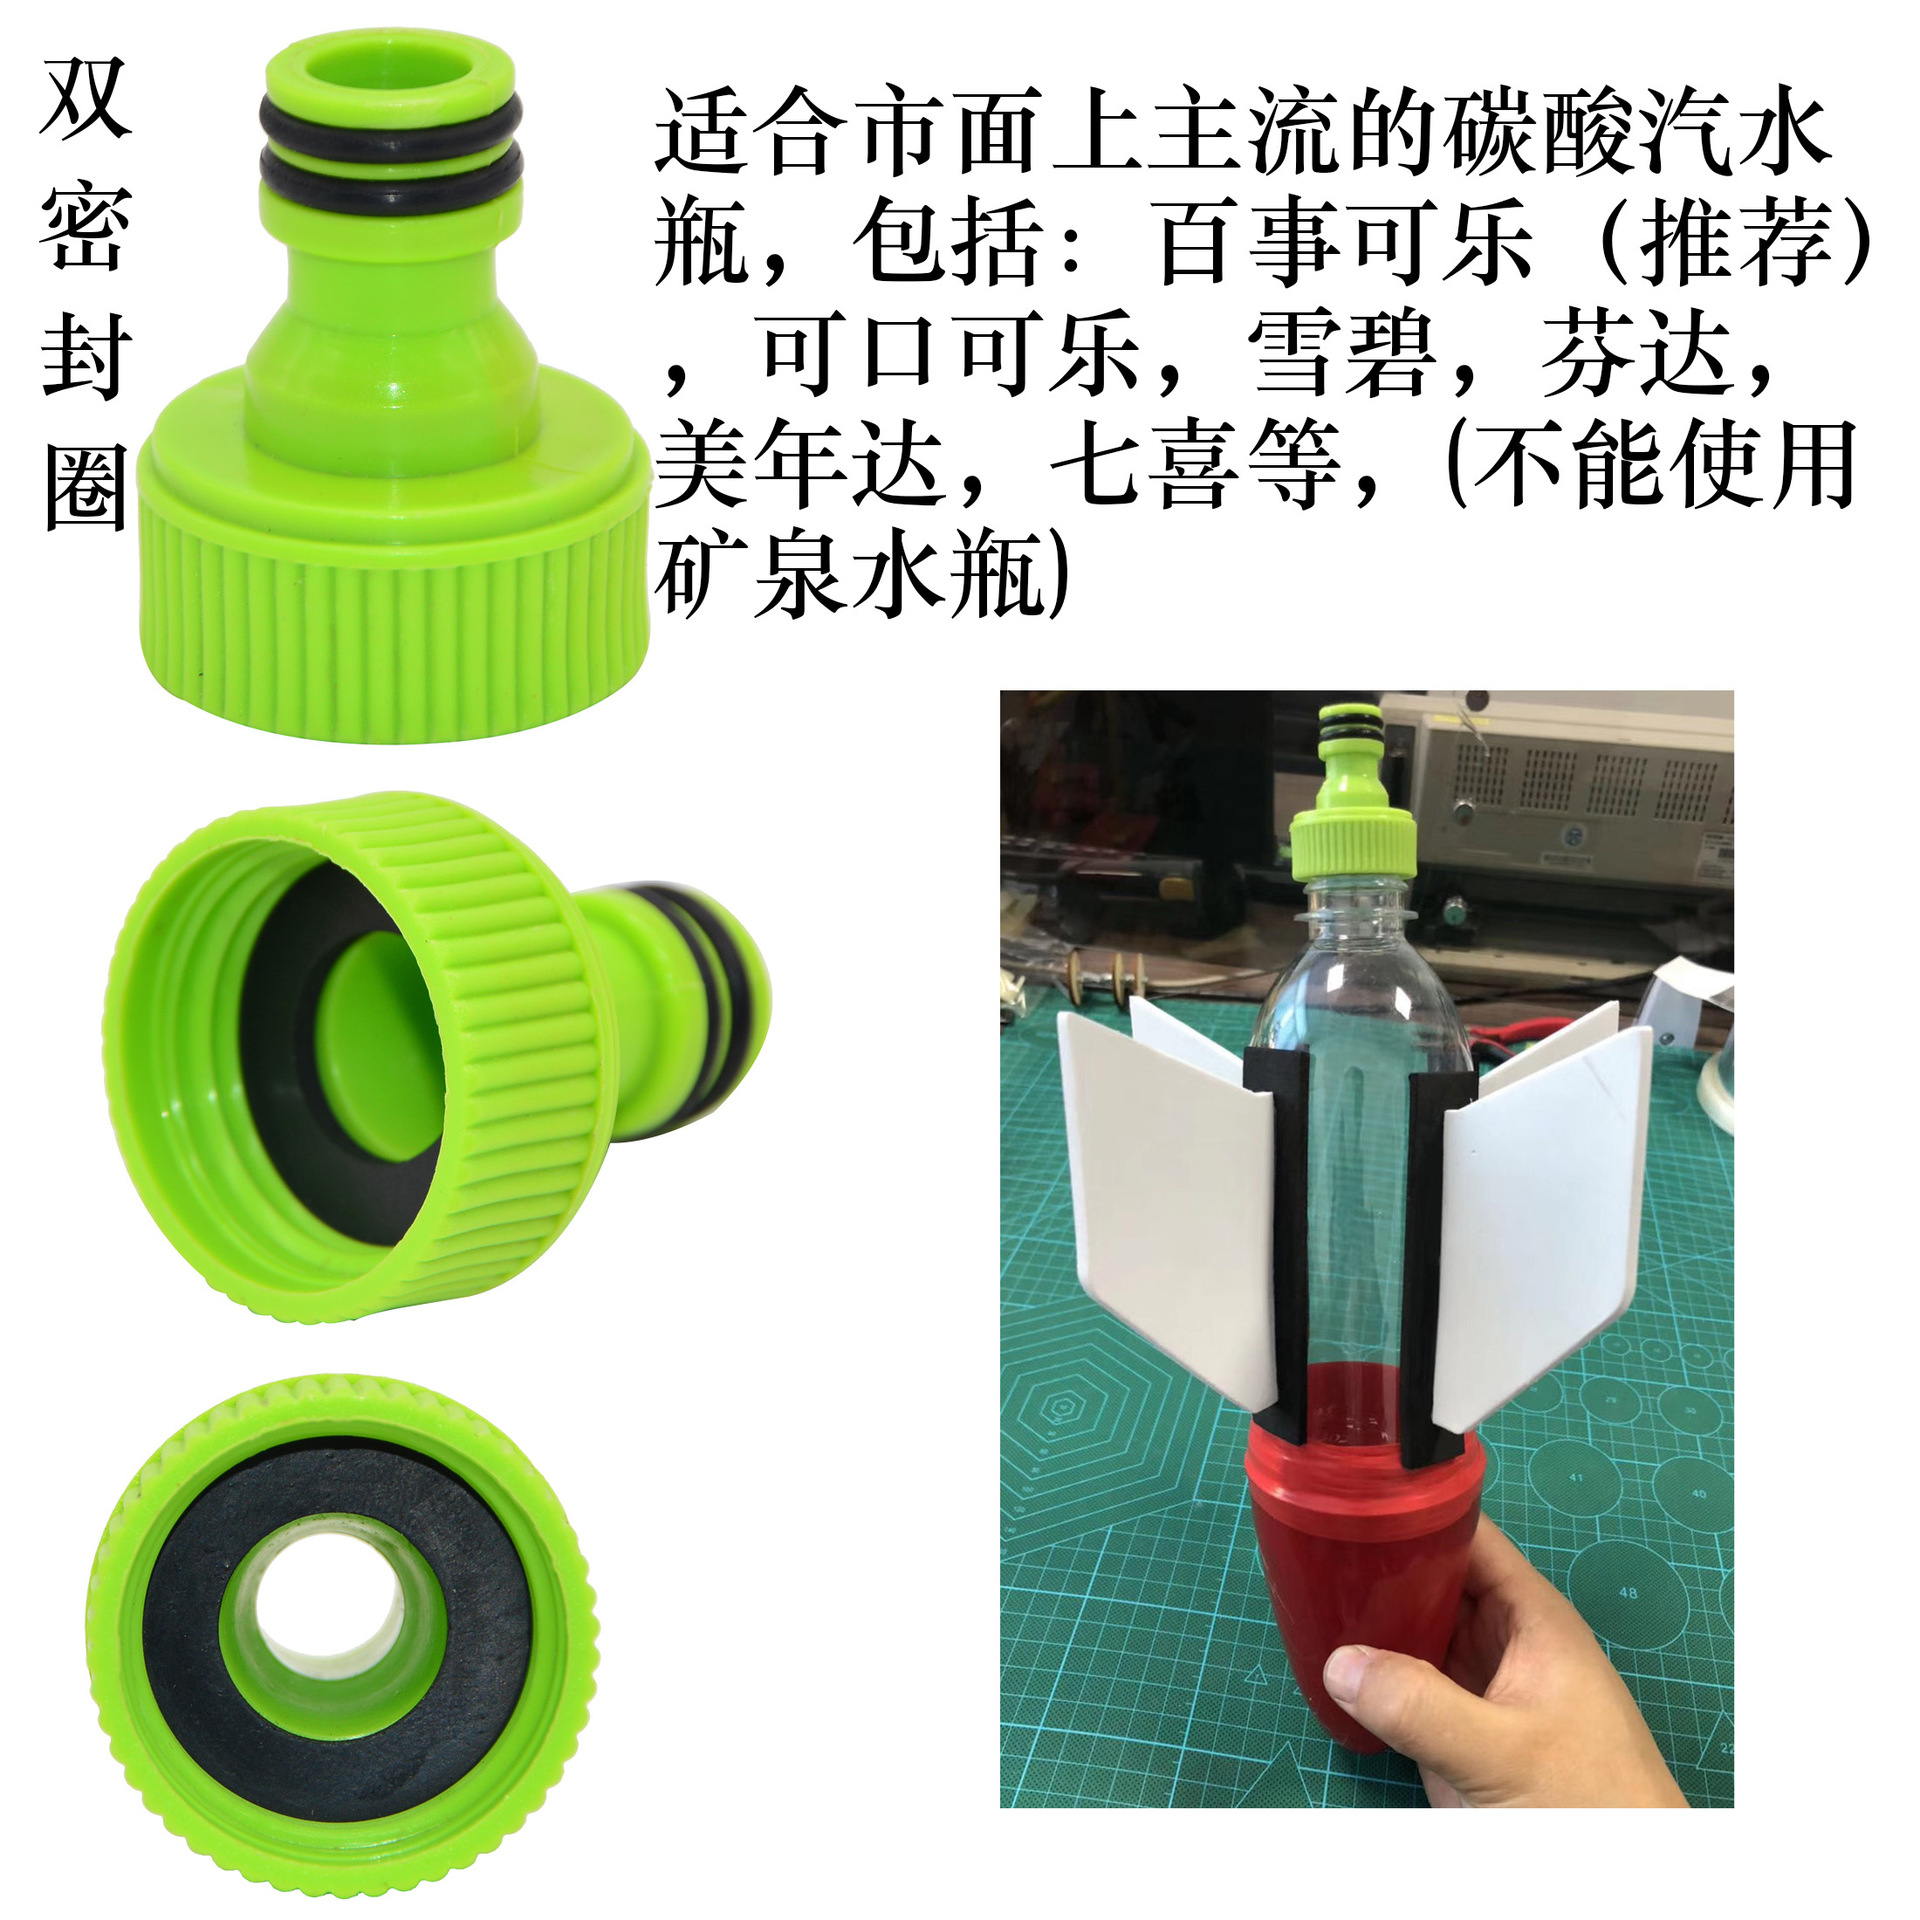
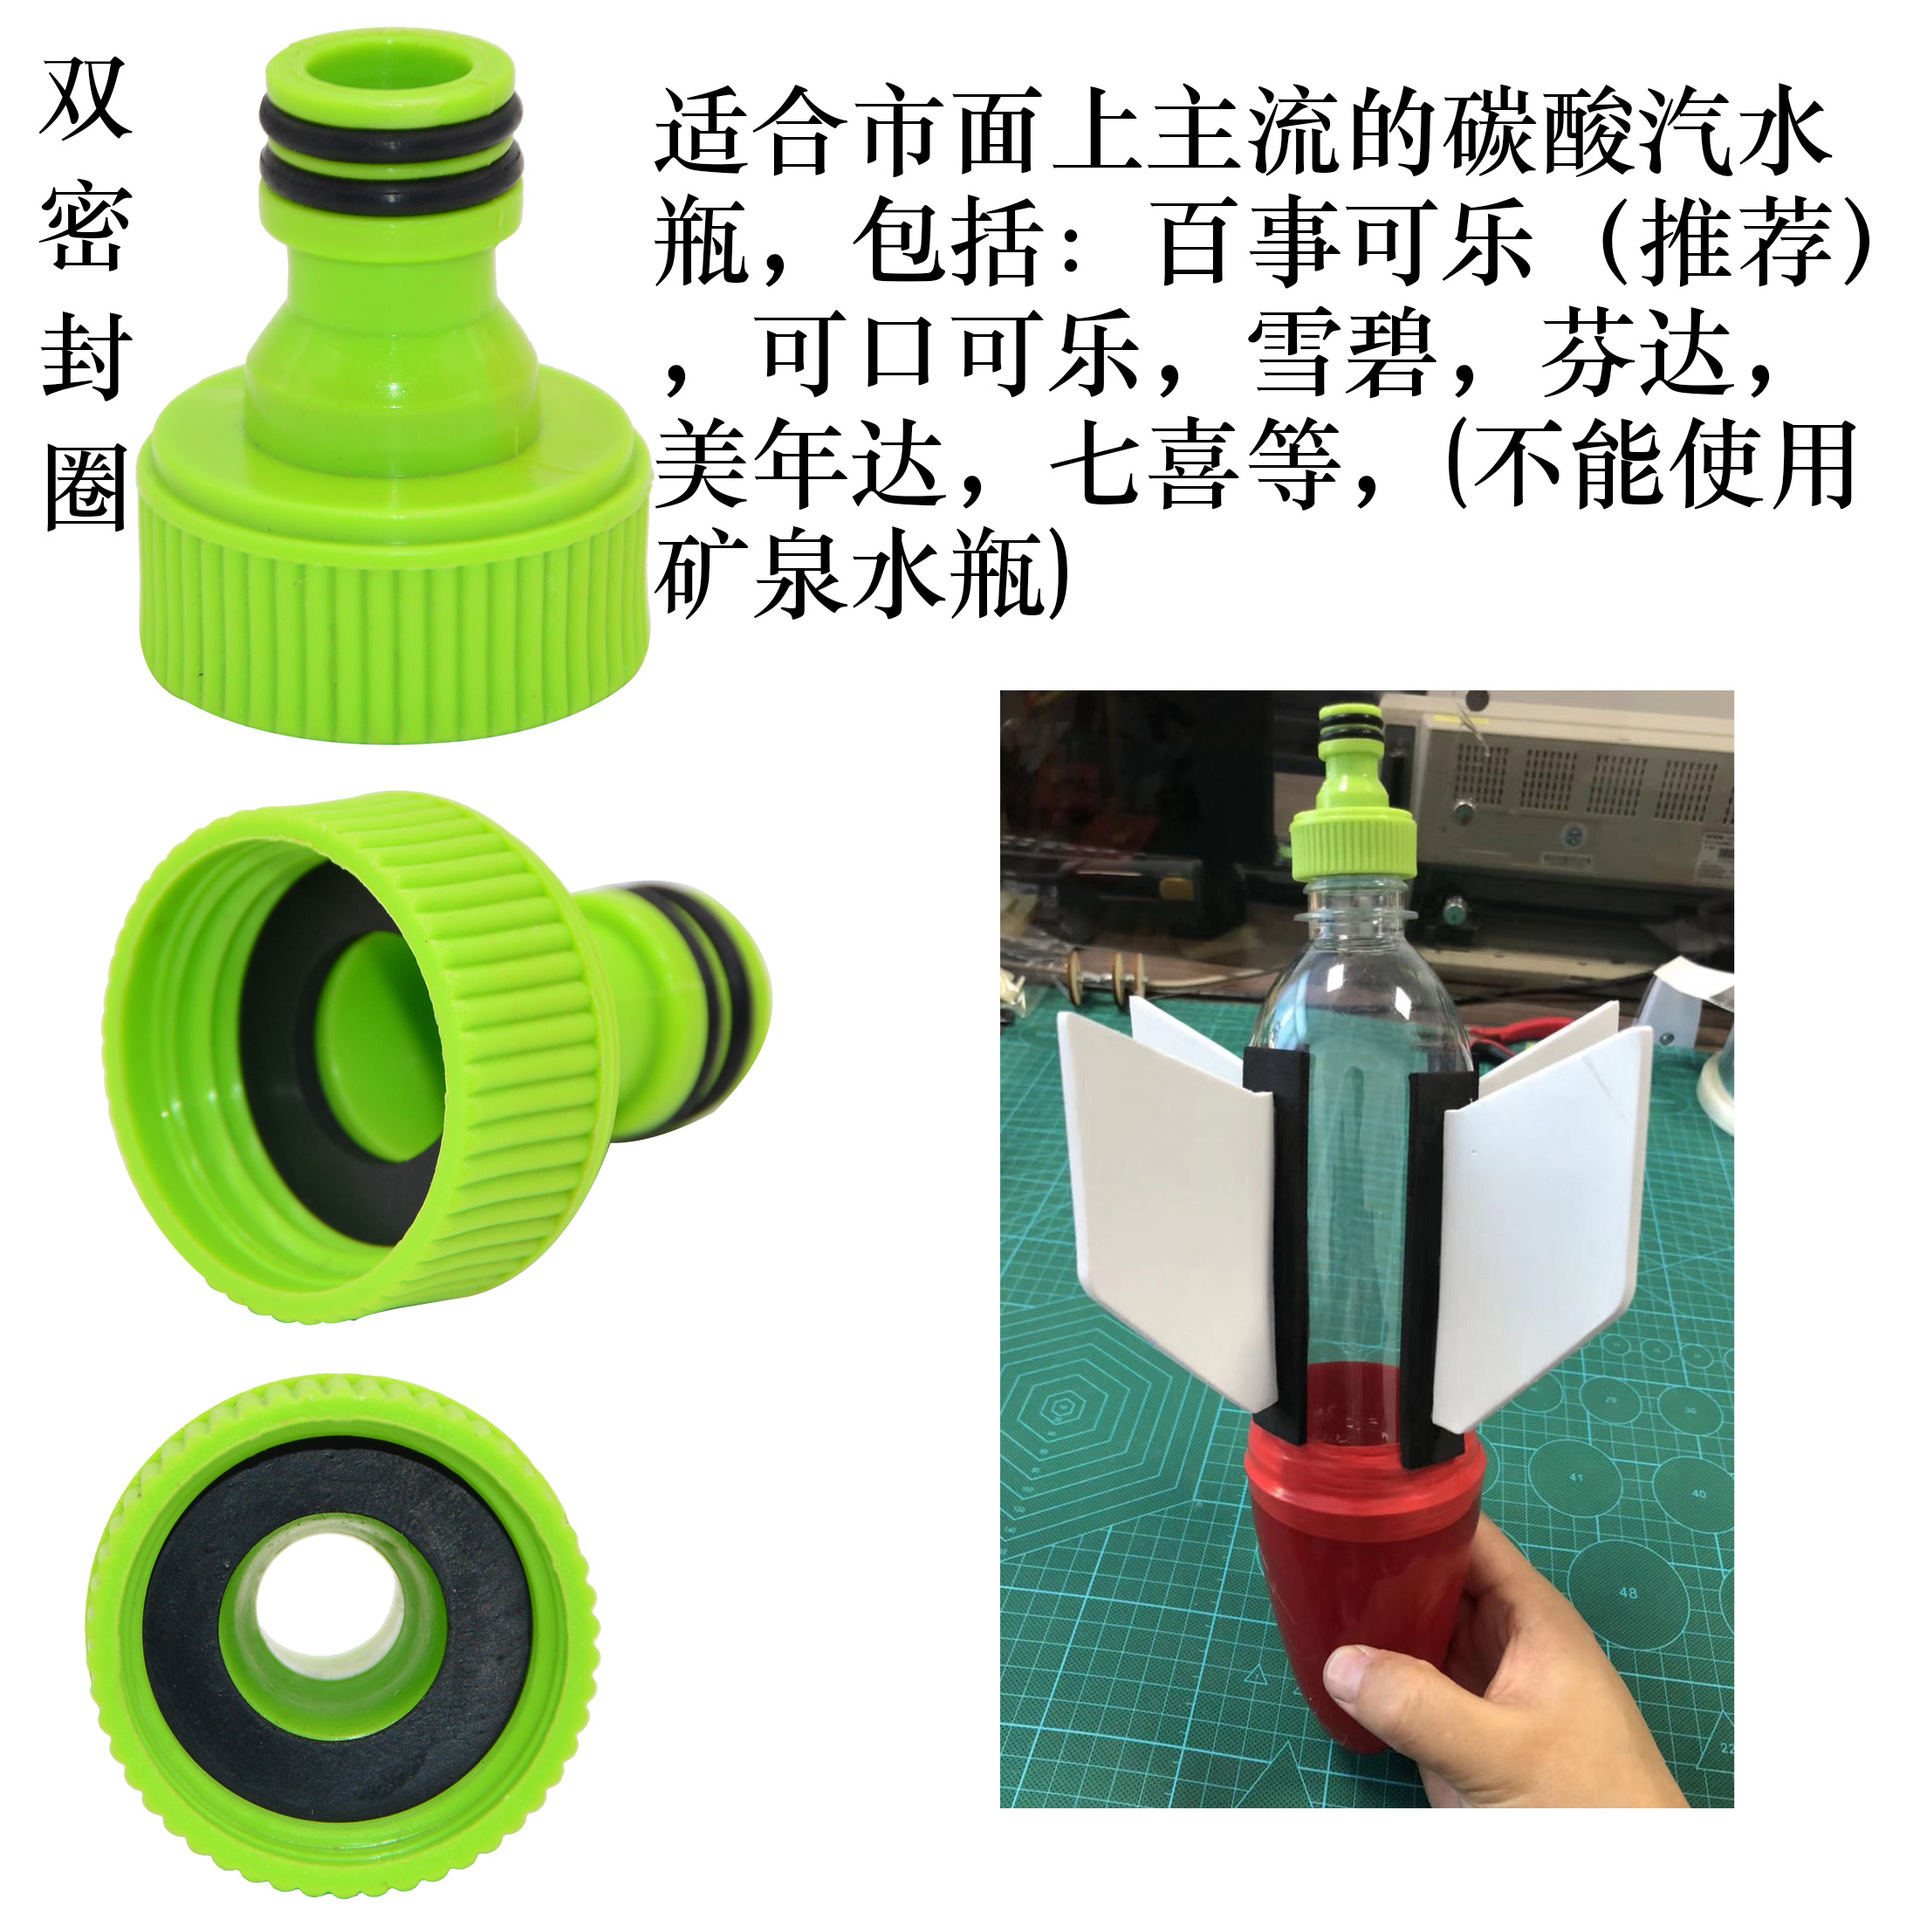
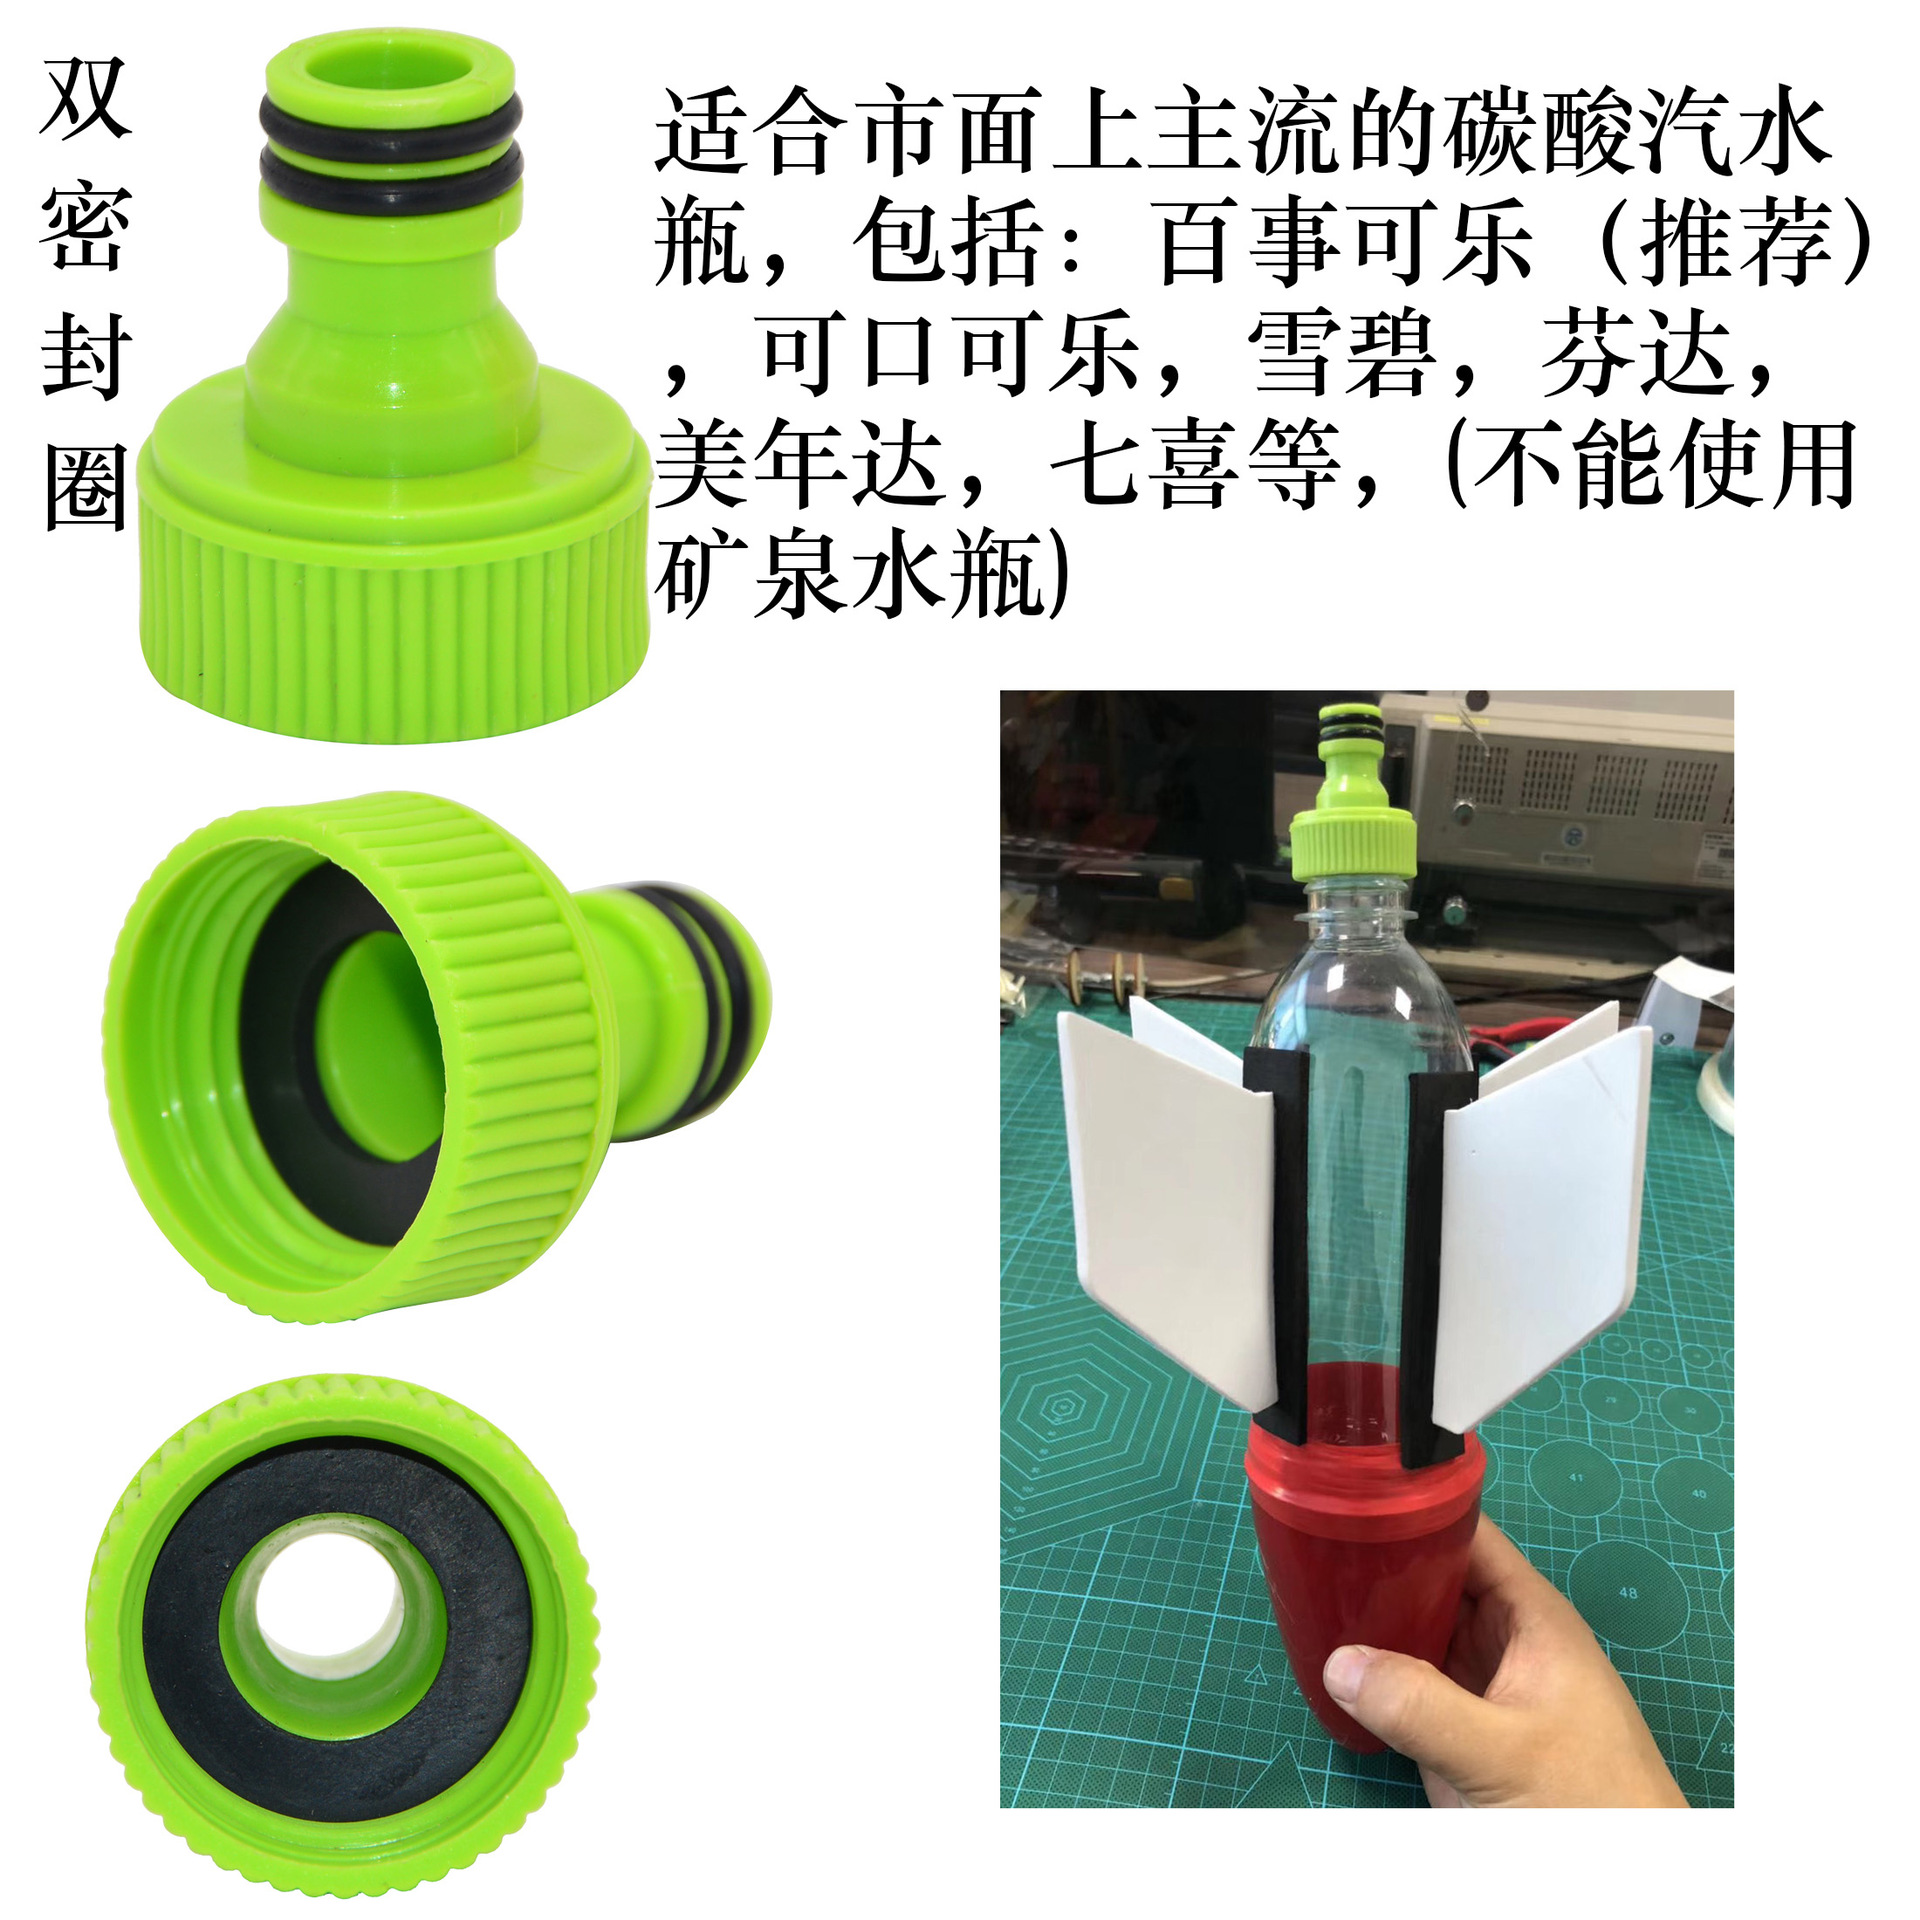
KX1920-KX805 Threaded Nozzle
KX1920-PJ8 Rocket Head Large Size
KX1920-PJ9 Medium Rocket Head
Rocket Head: Specifications:
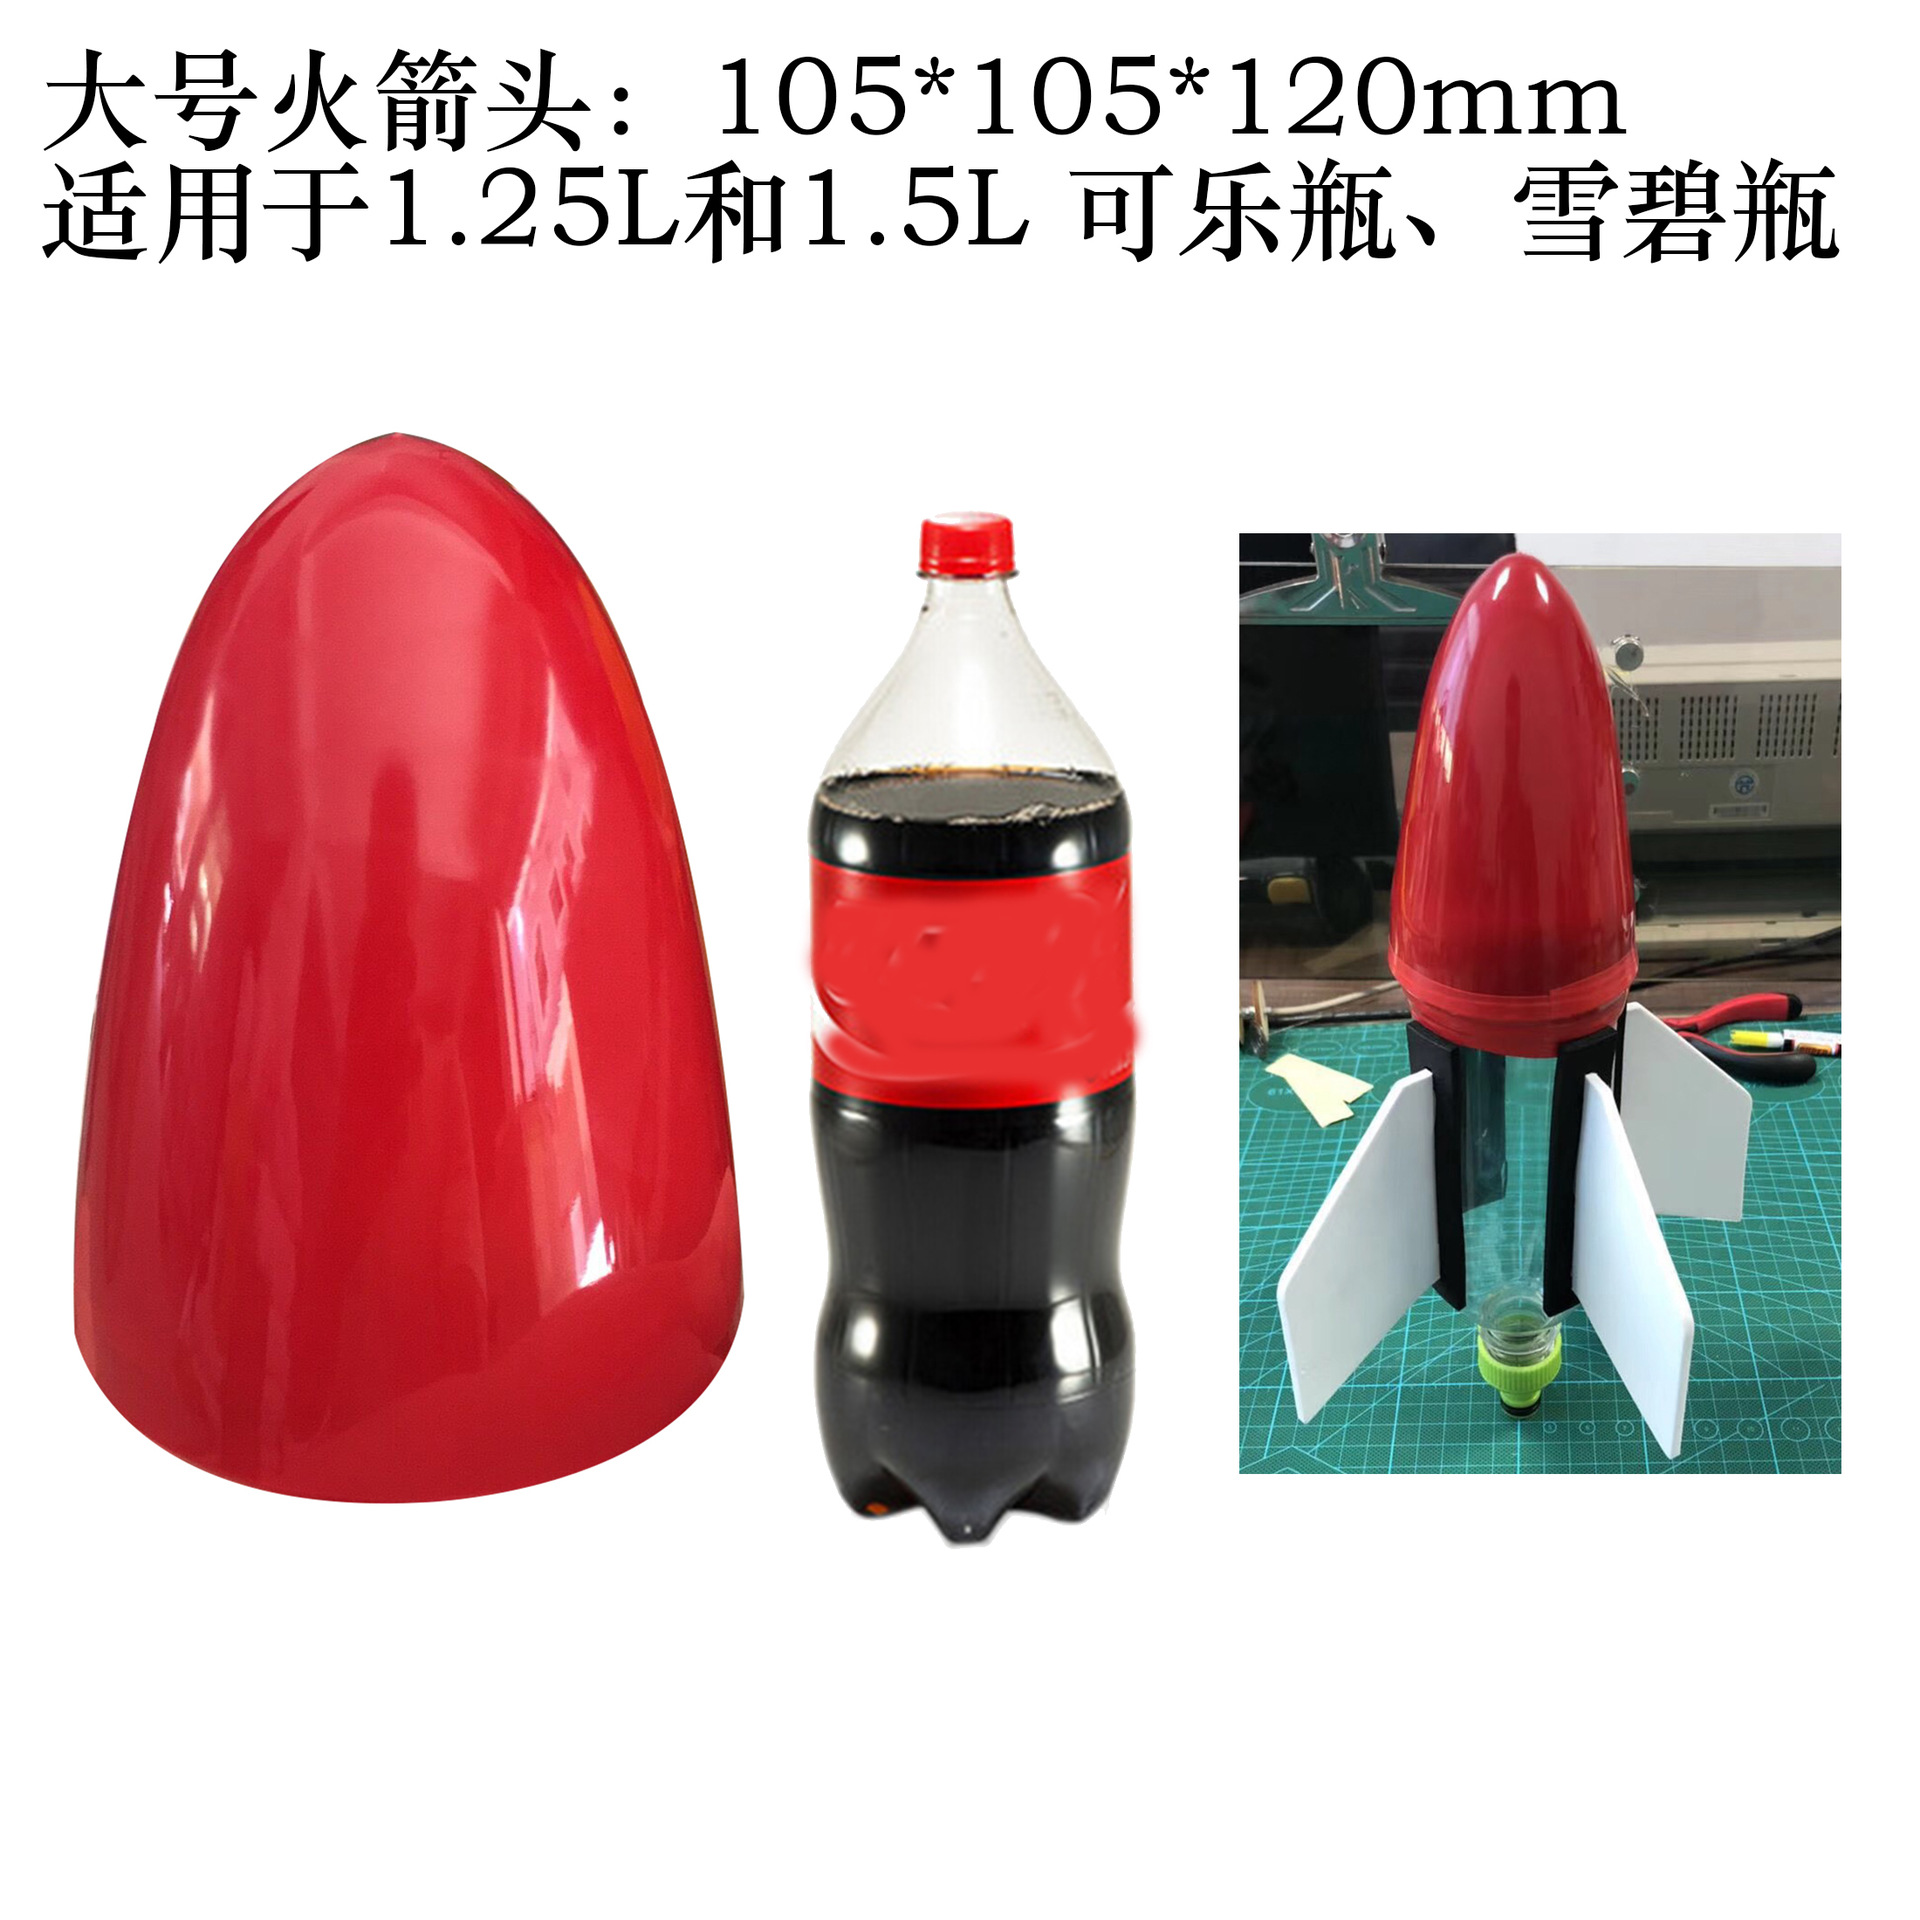
Large rocket head: 105*105*120 mm, suitable for 1.25L and 1.5L Coke bottles, Sprite bottles
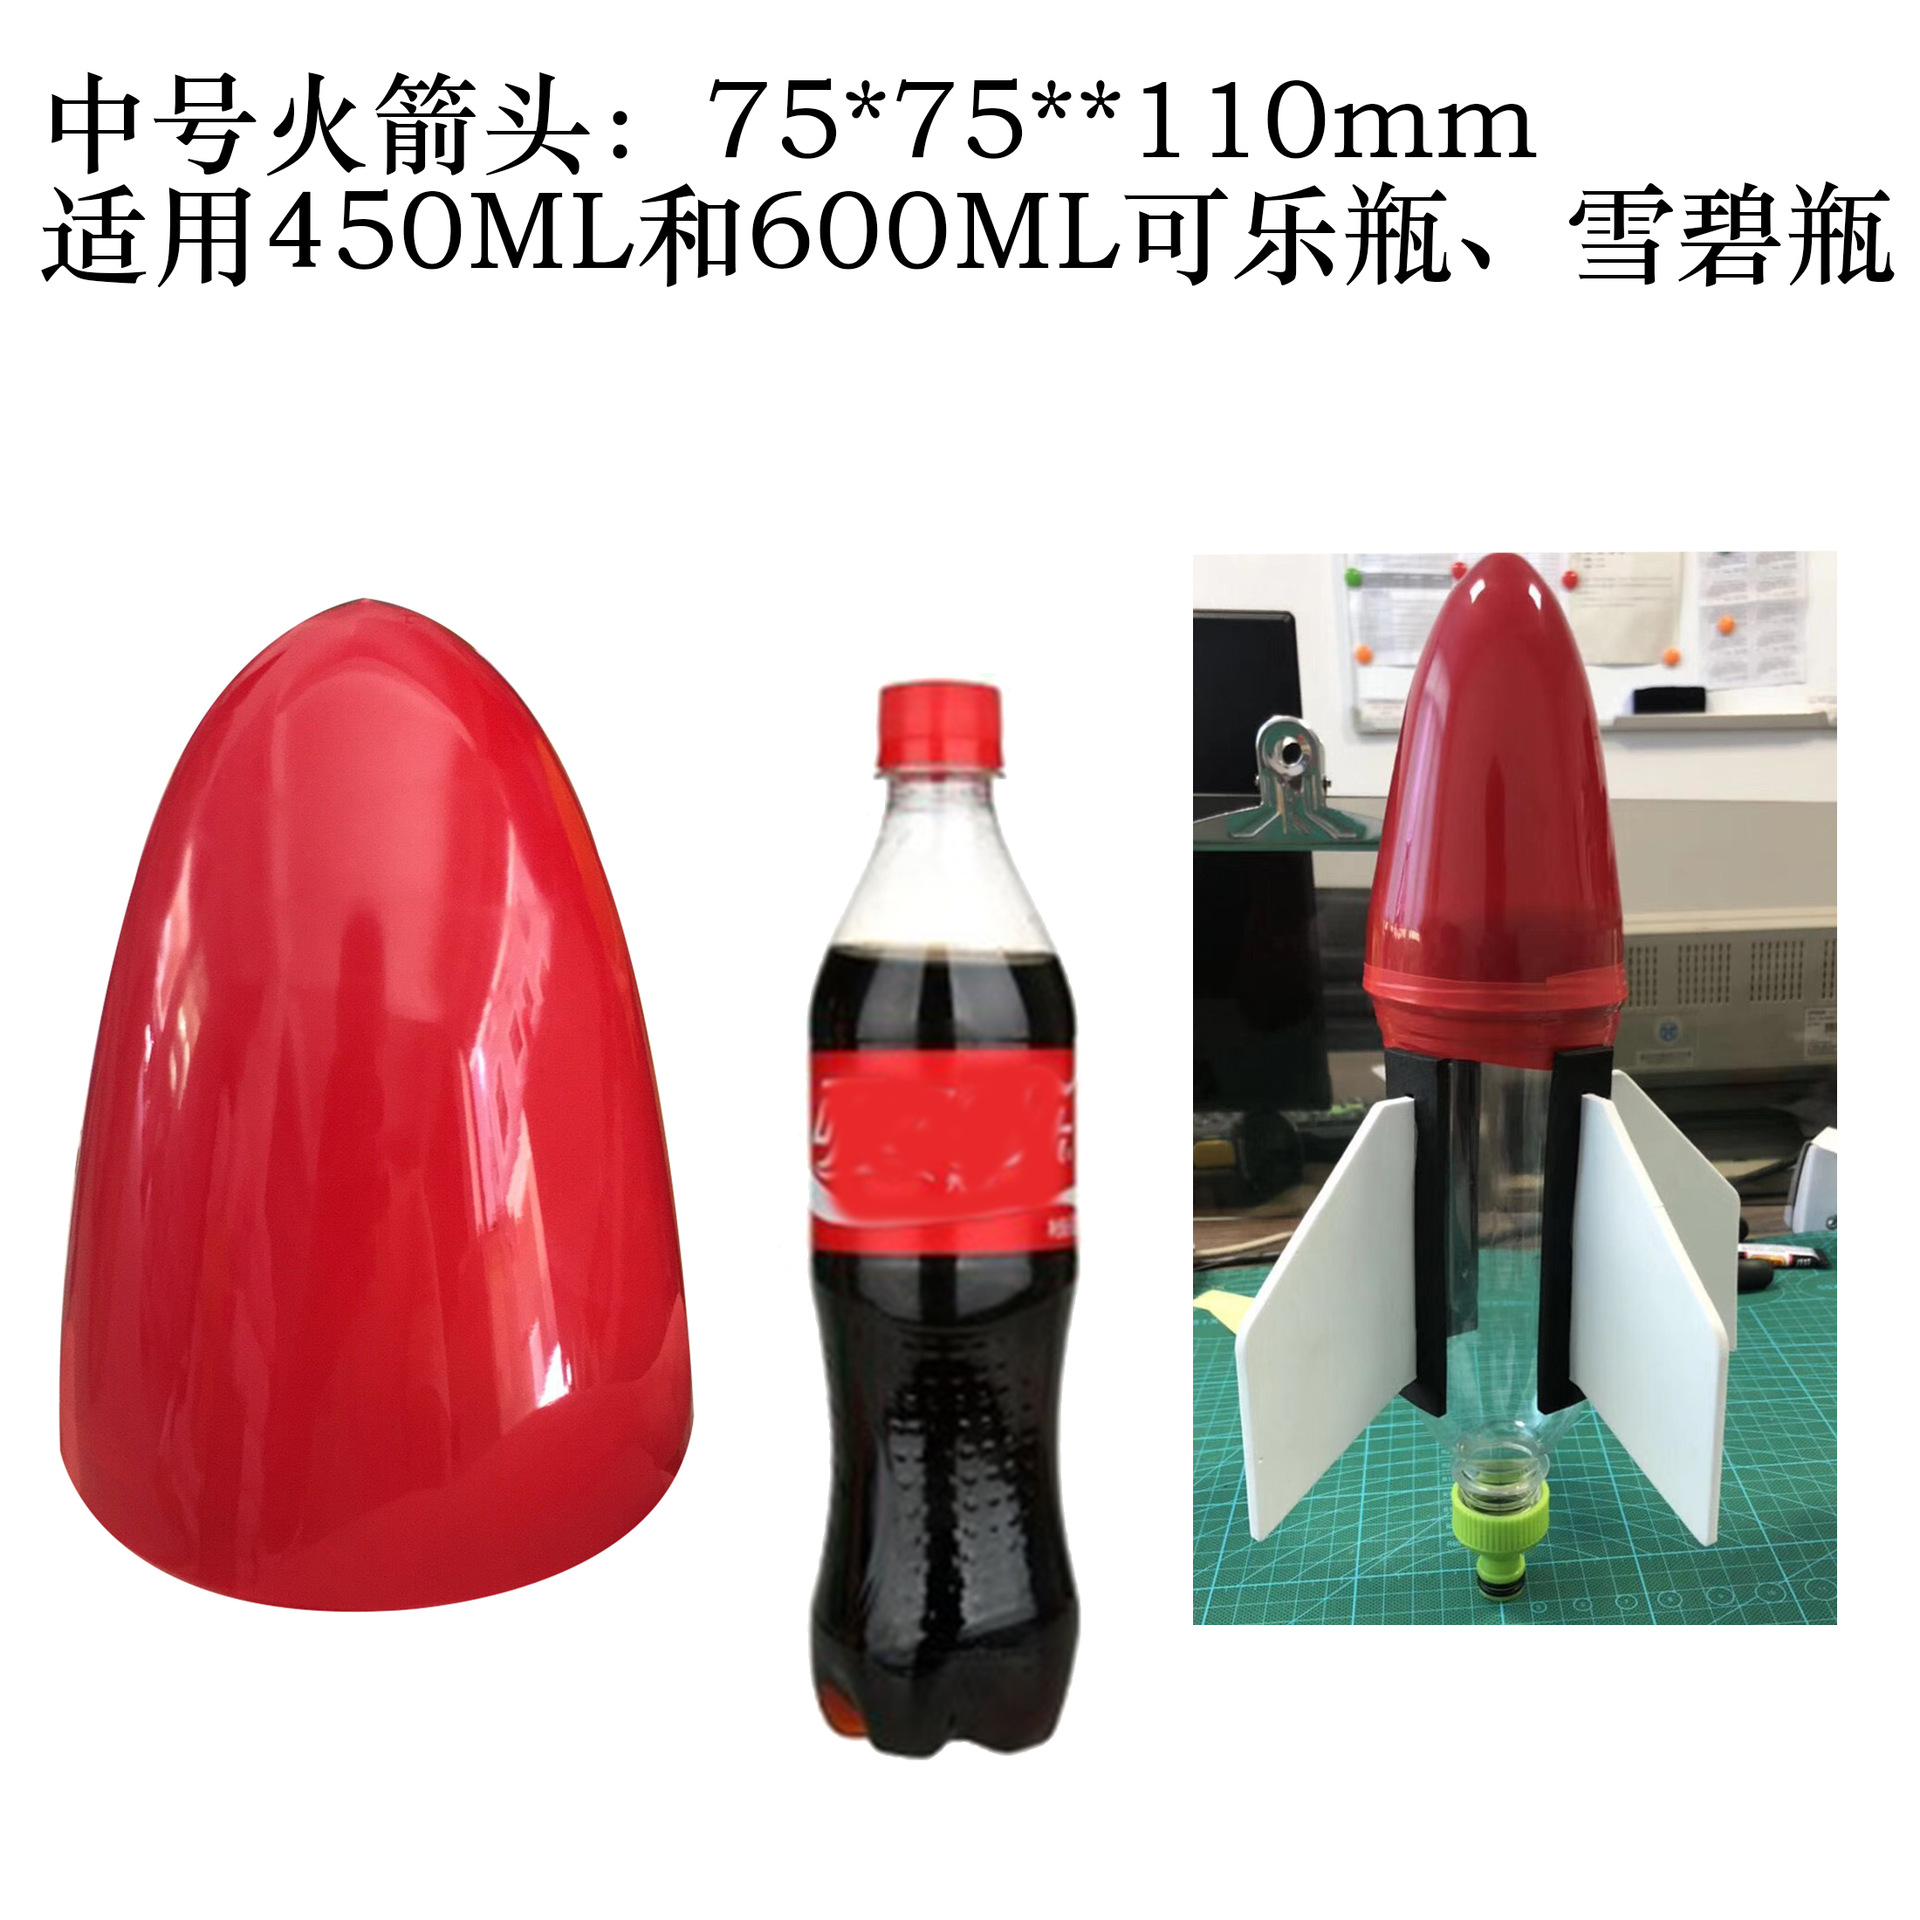
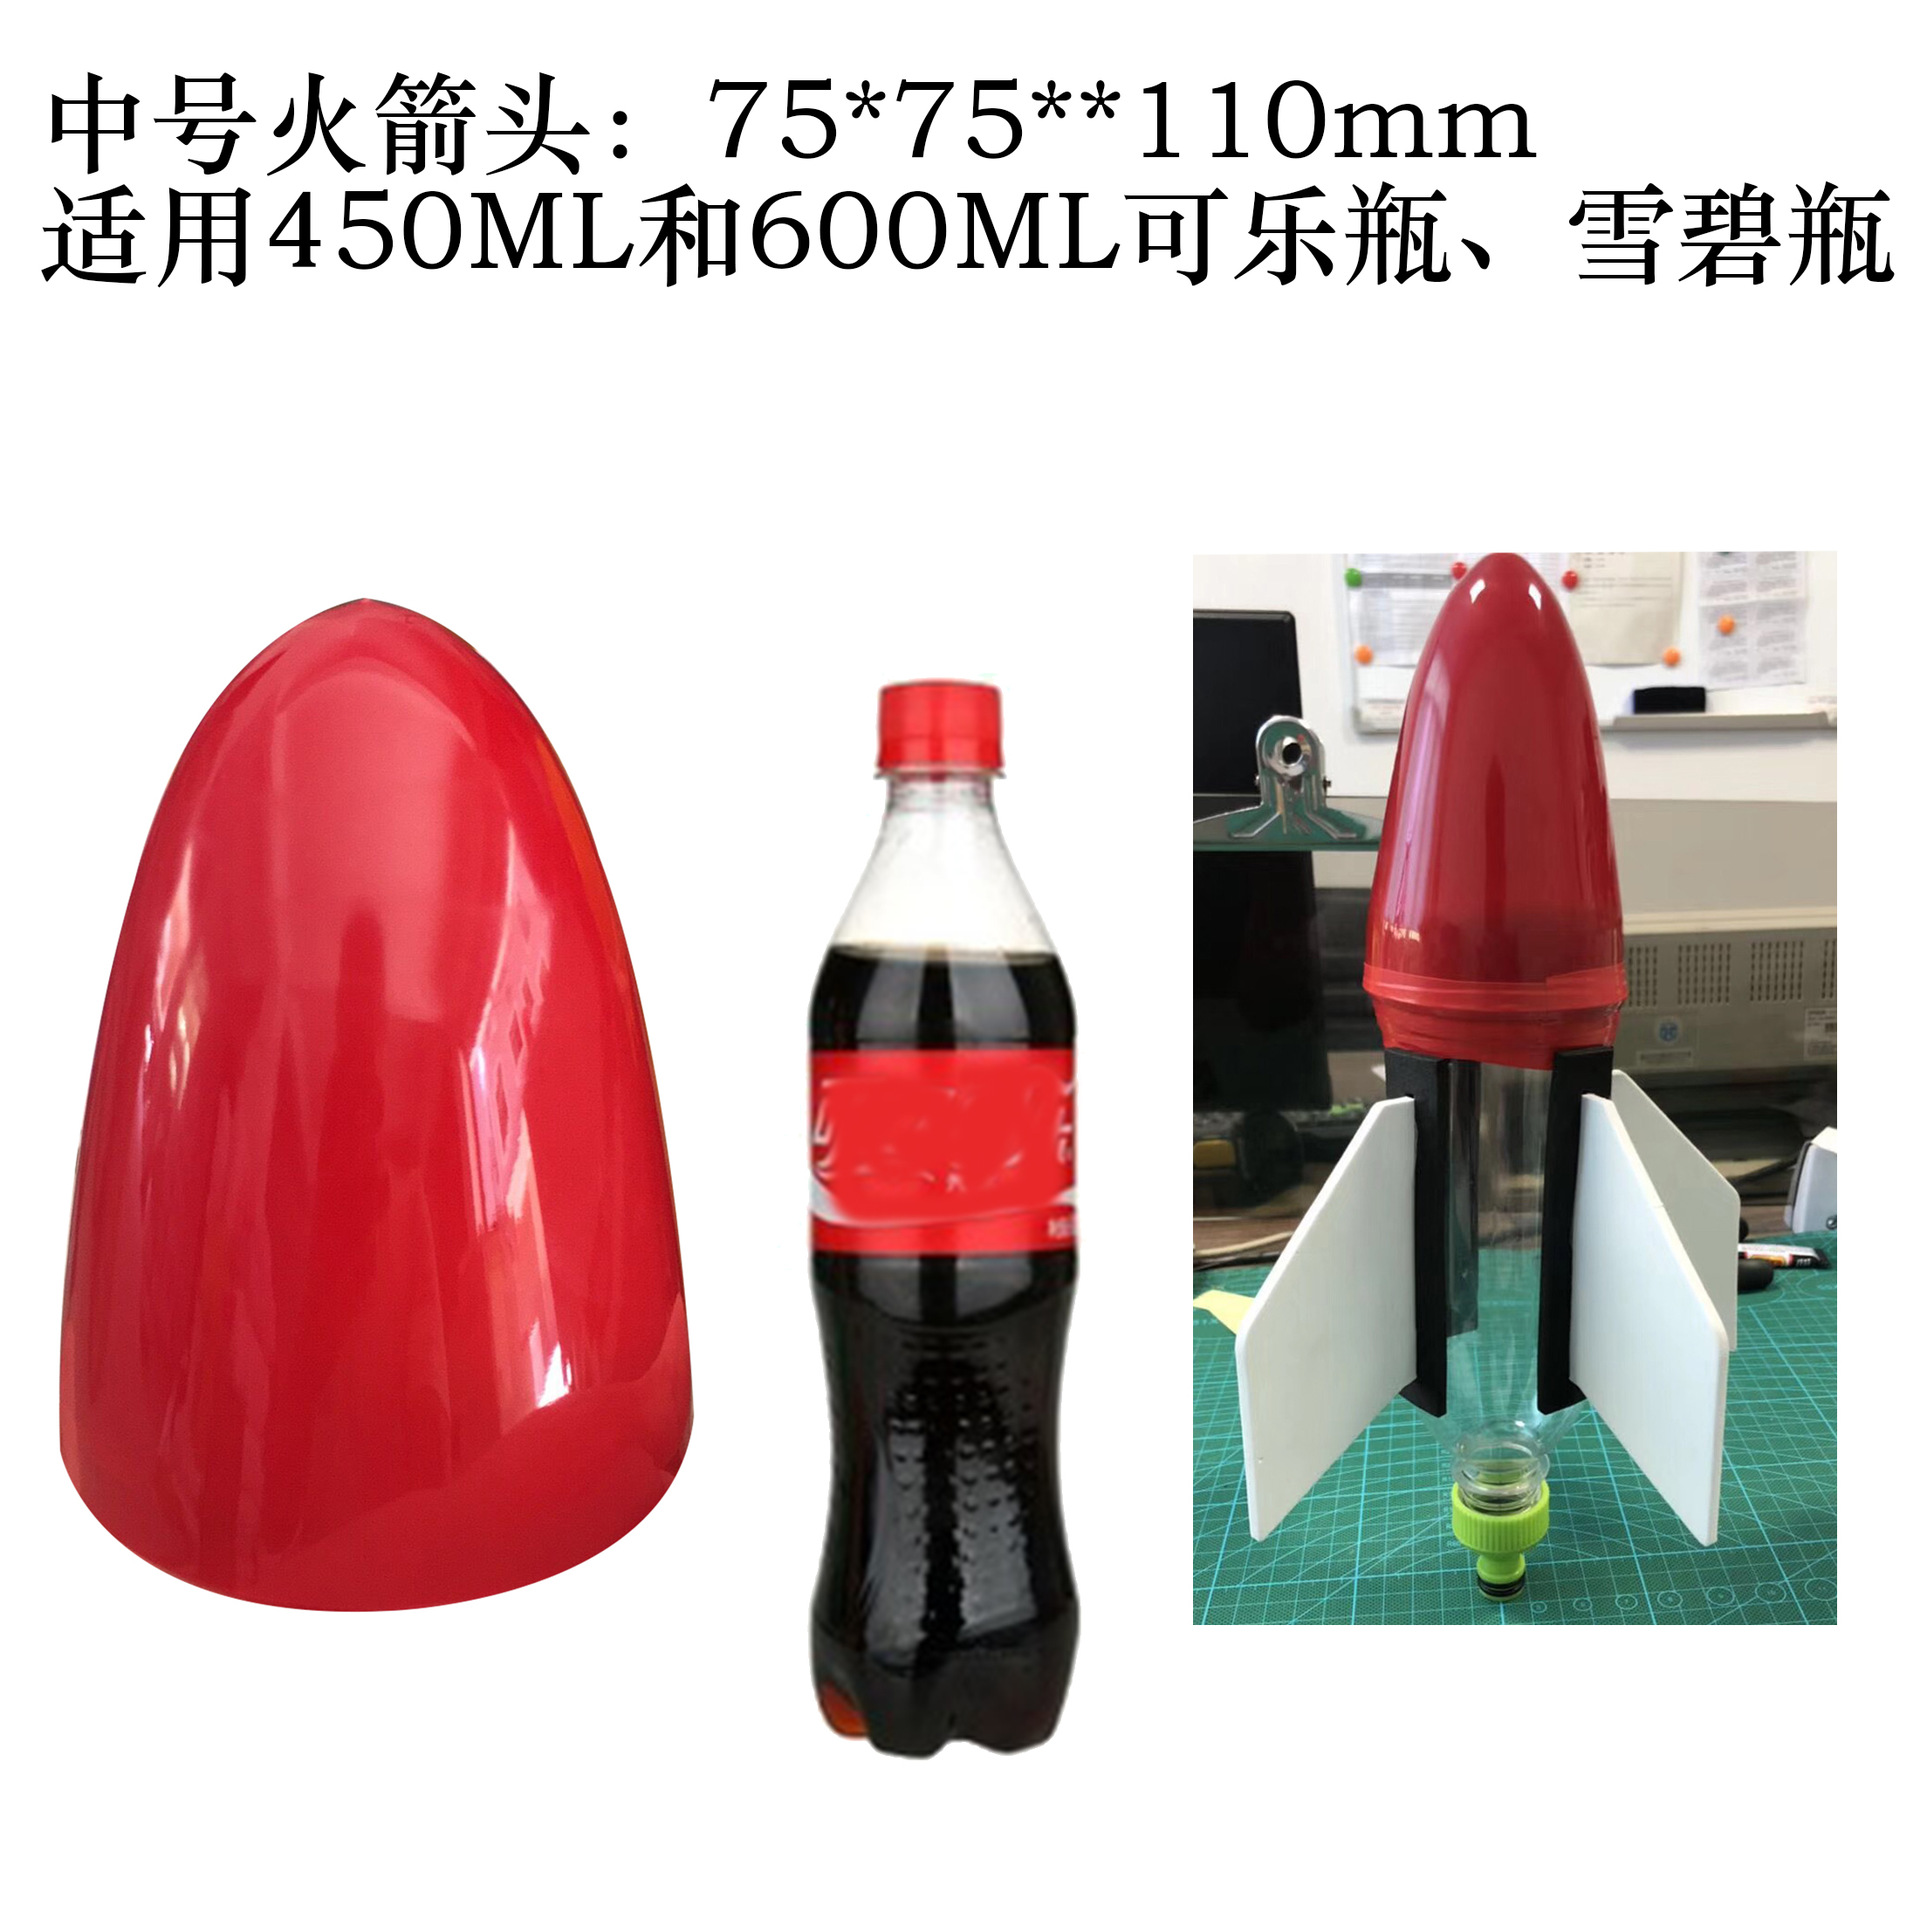
Medium-sized rocket head: 75*75**110 mm, suitable for 450ML and 600ML Coke bottles, Sprite bottles
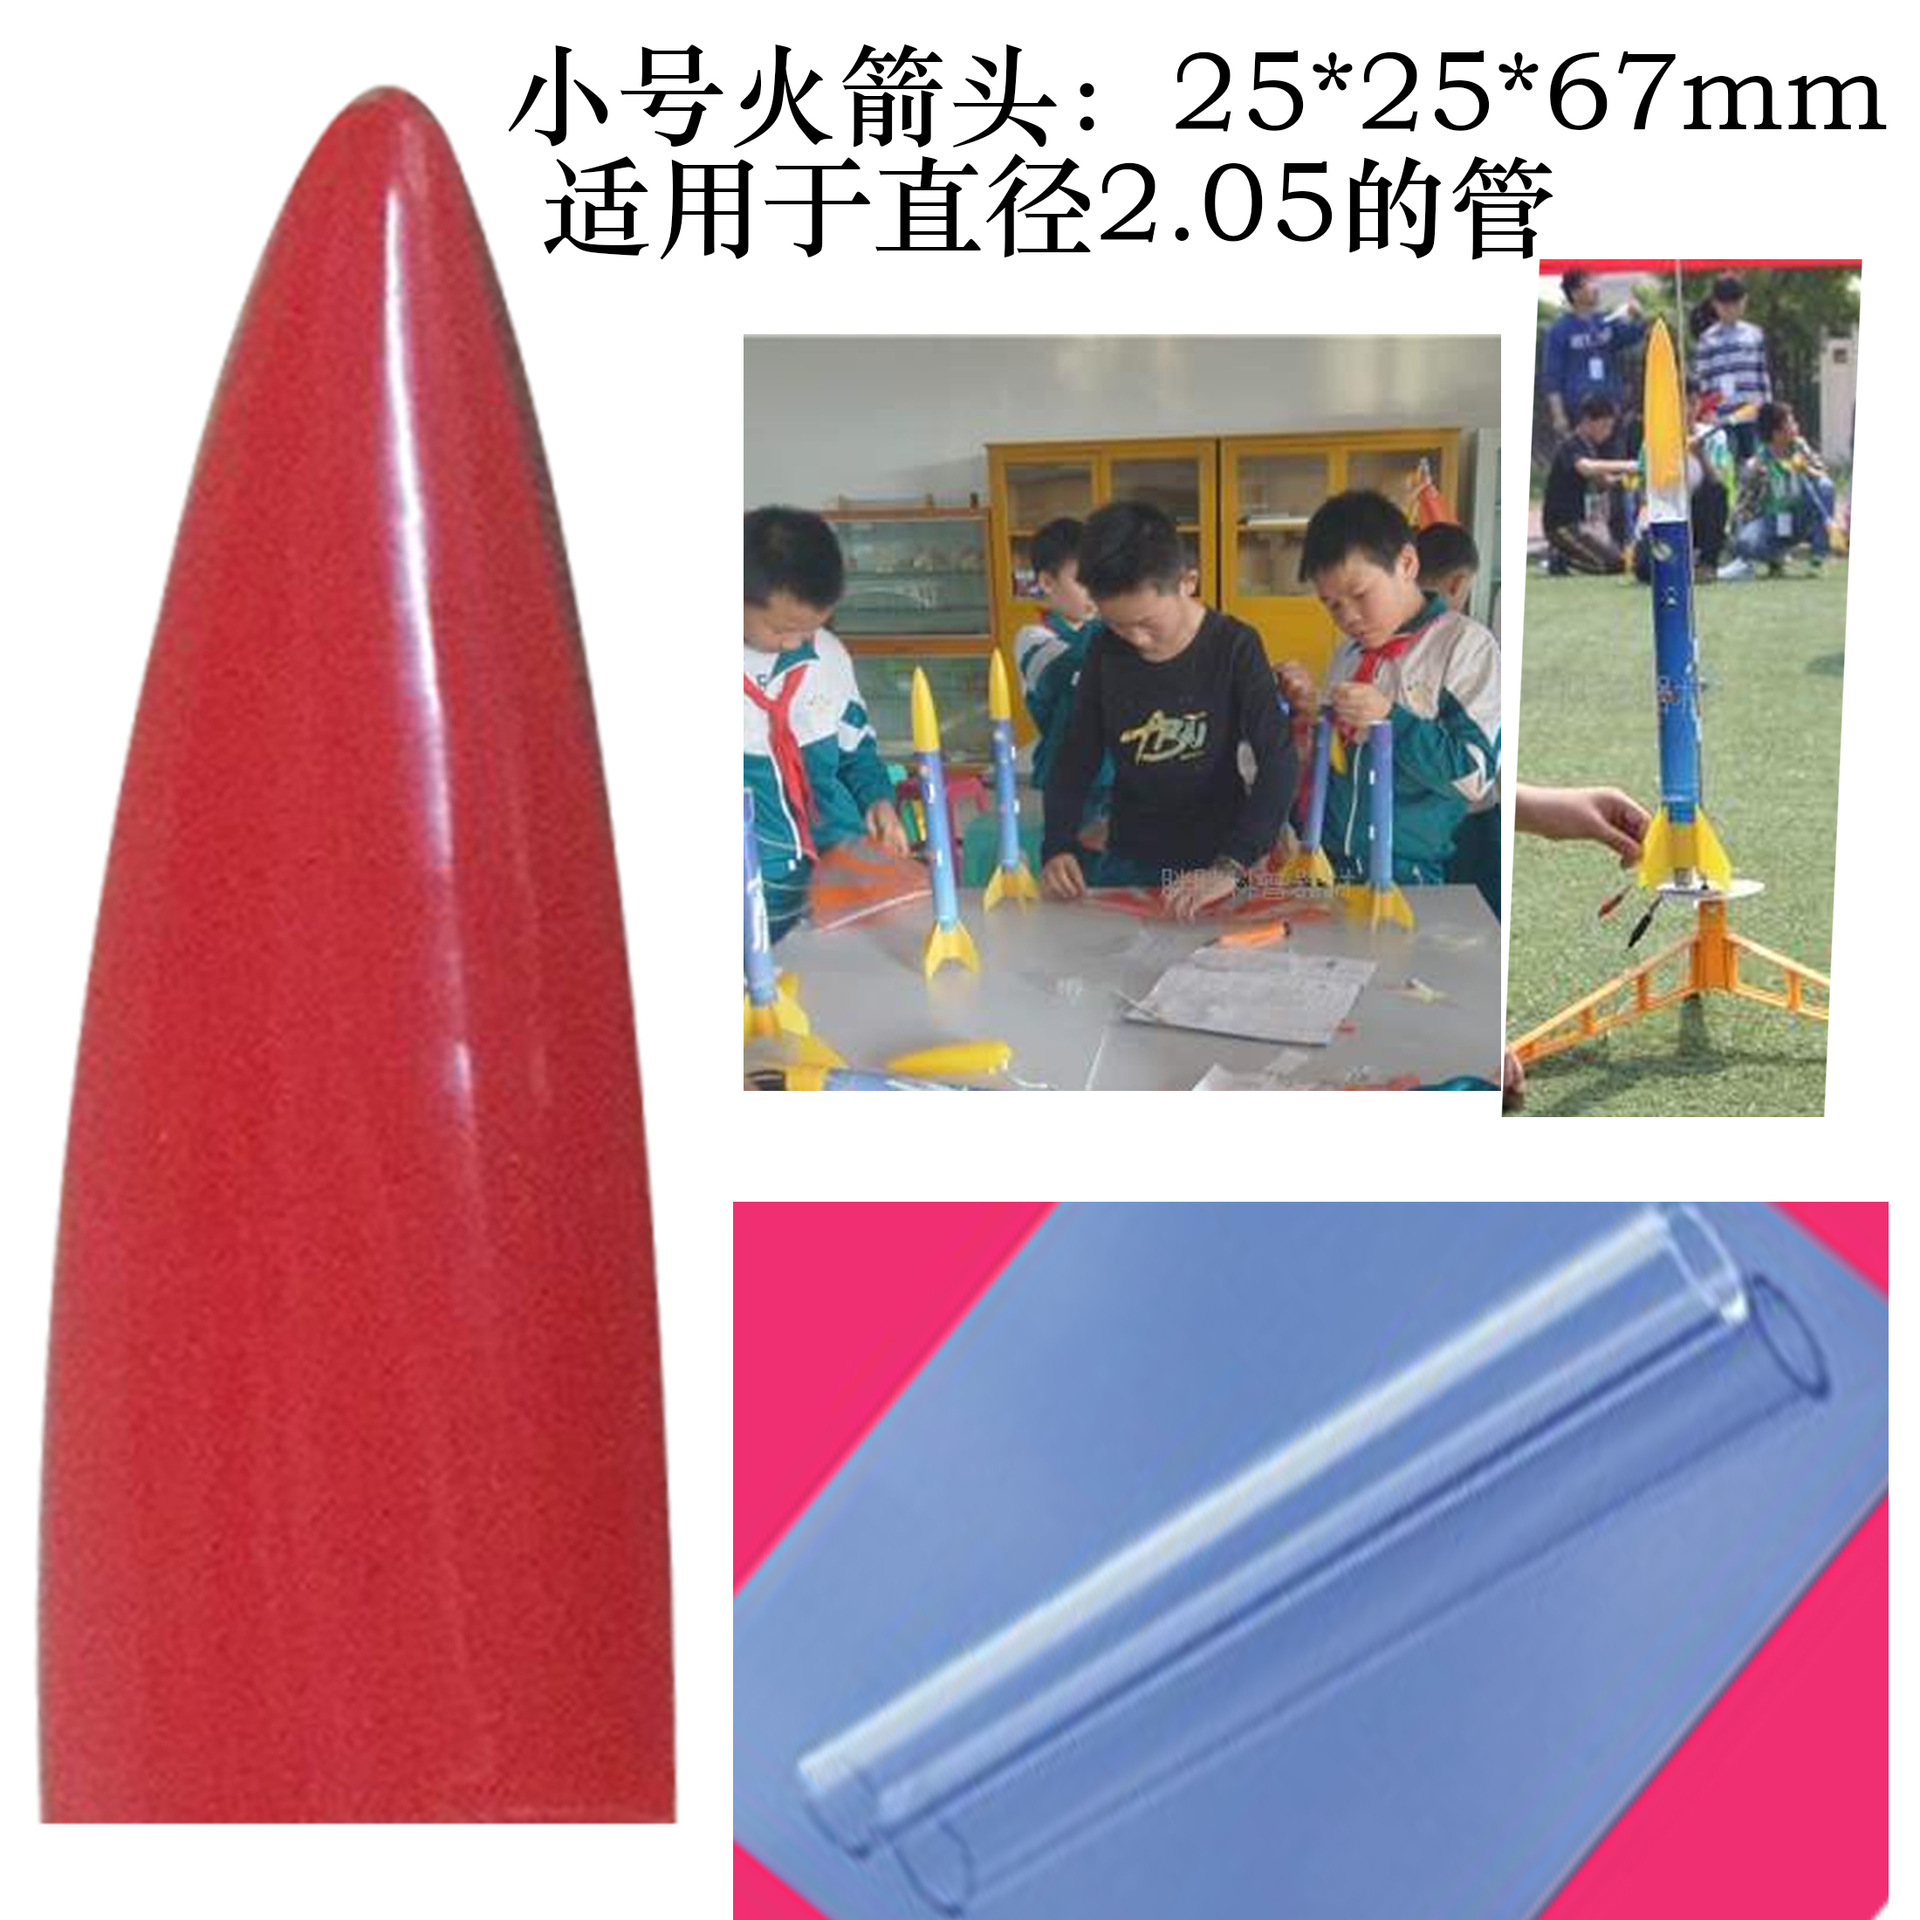
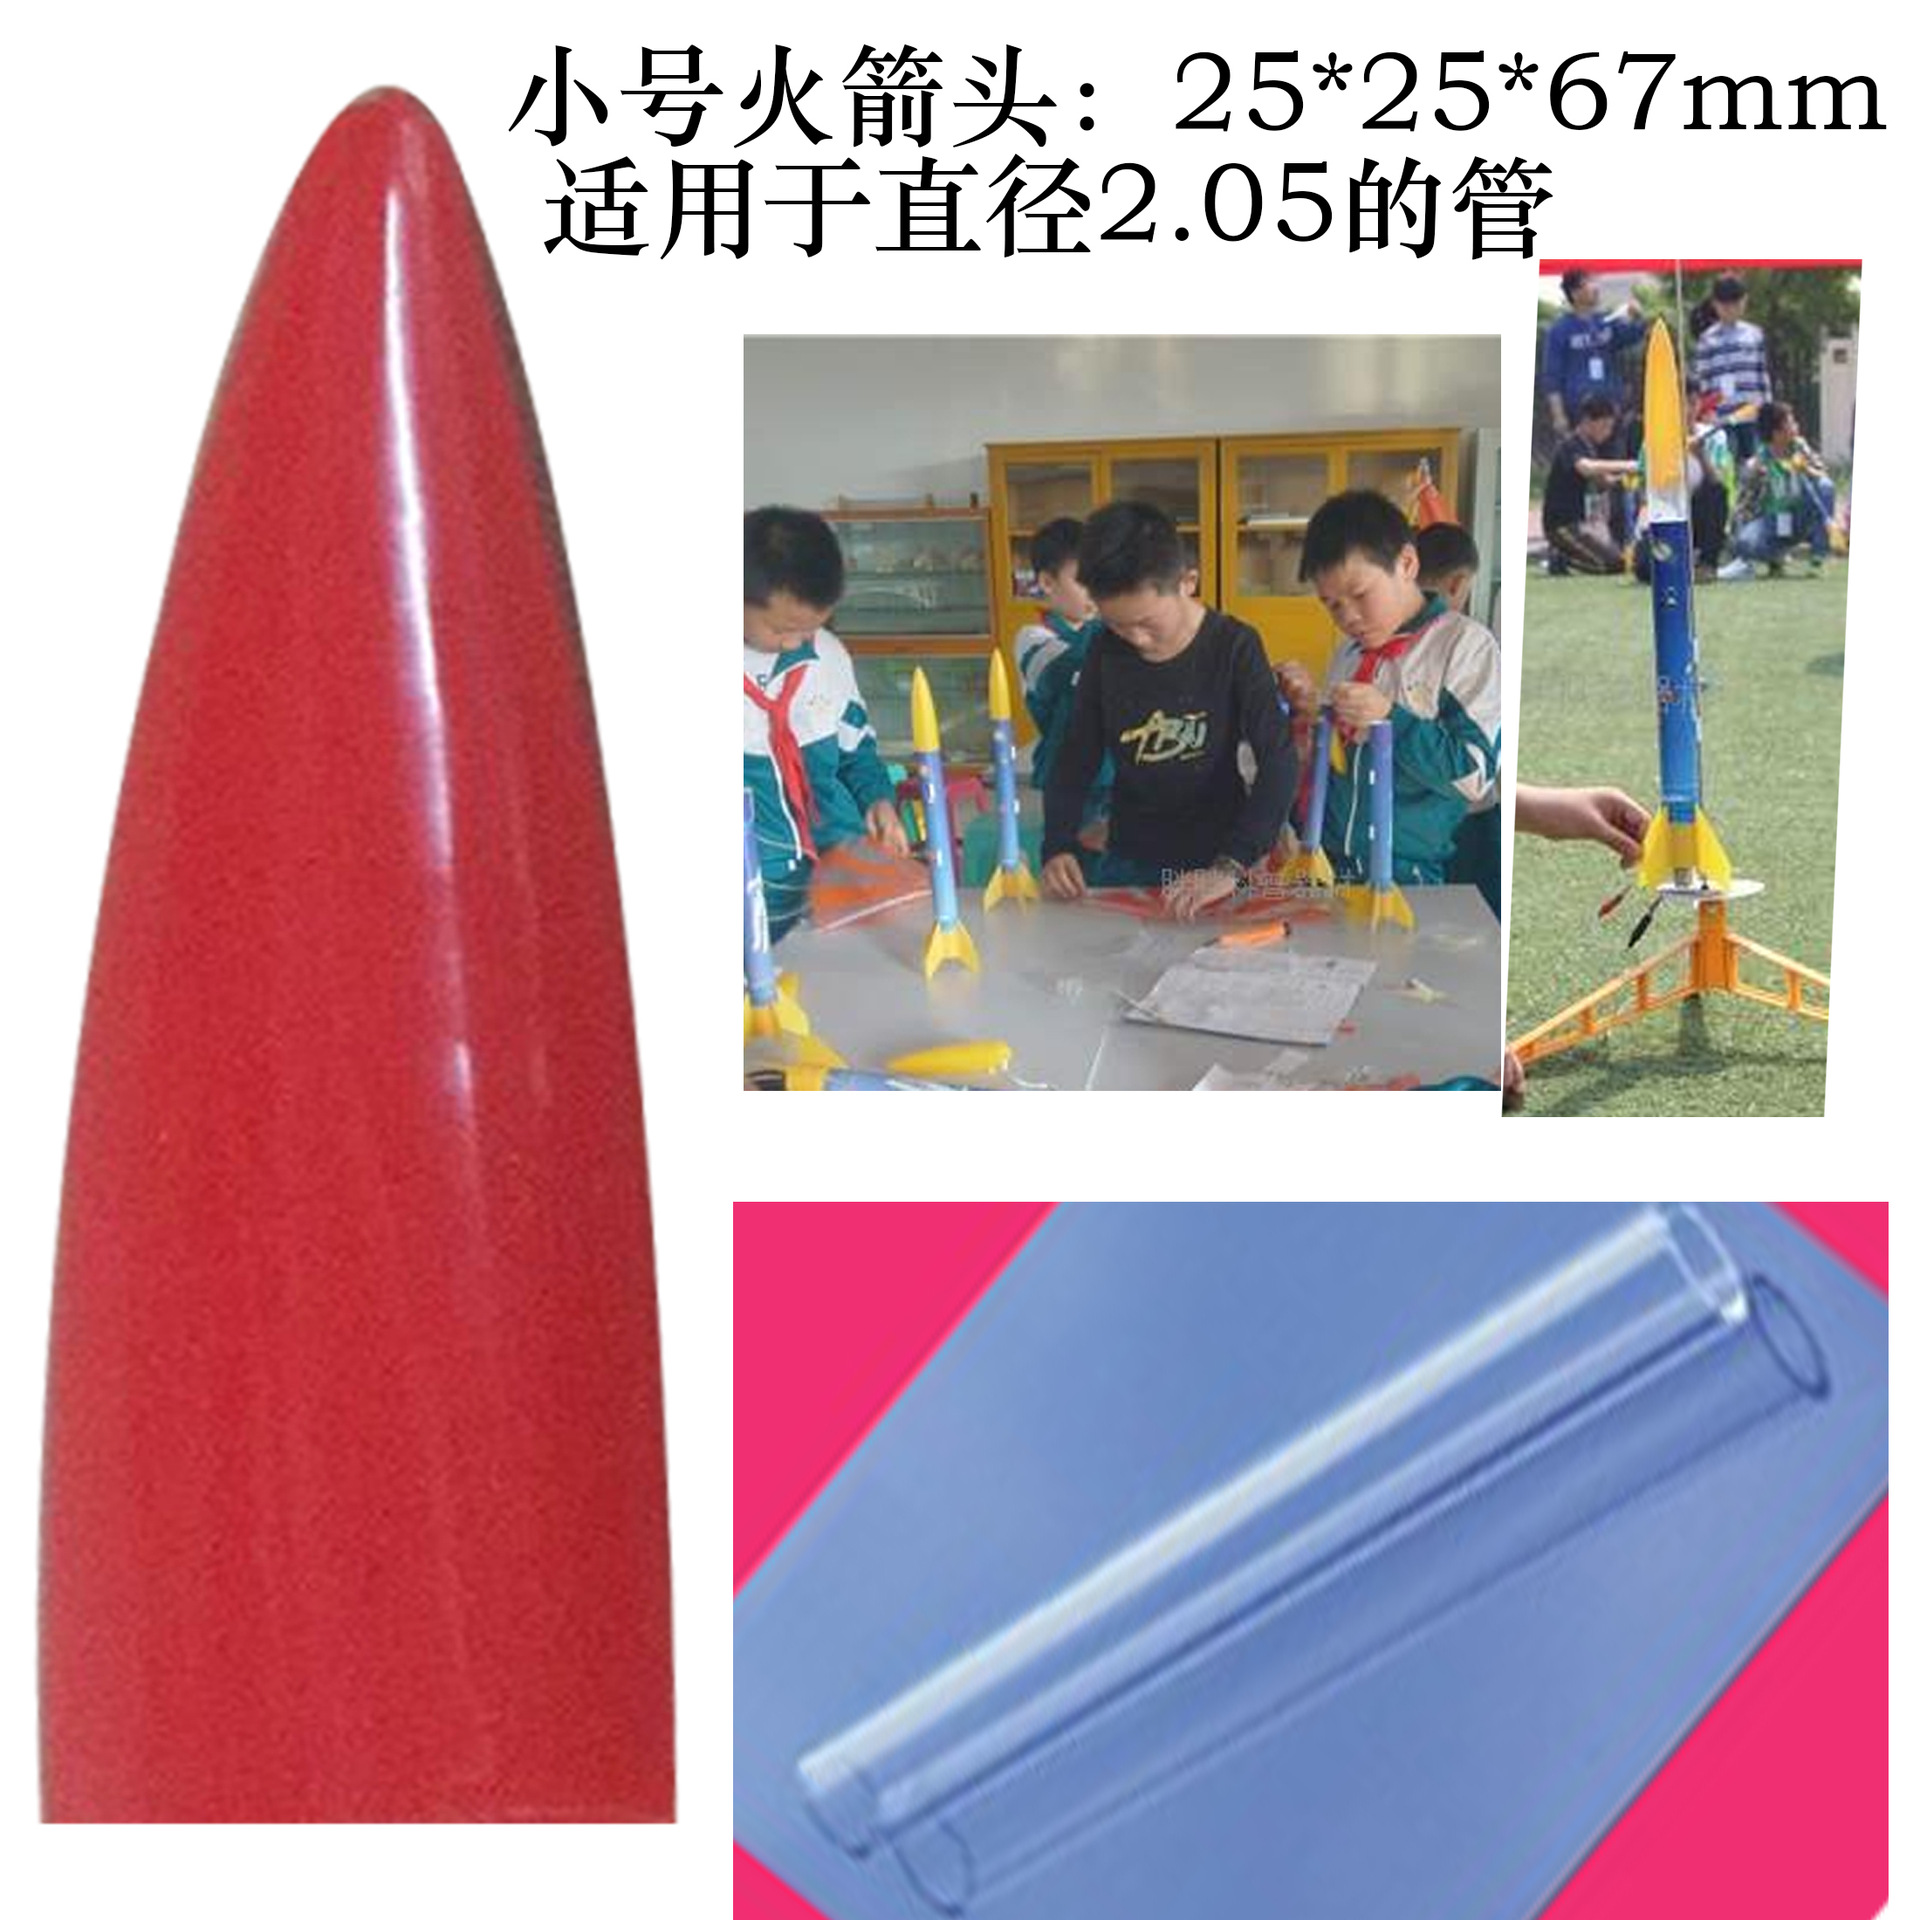
Small rocket head: 25*25*67 mm, suitable for tubes with a diameter of 2.5

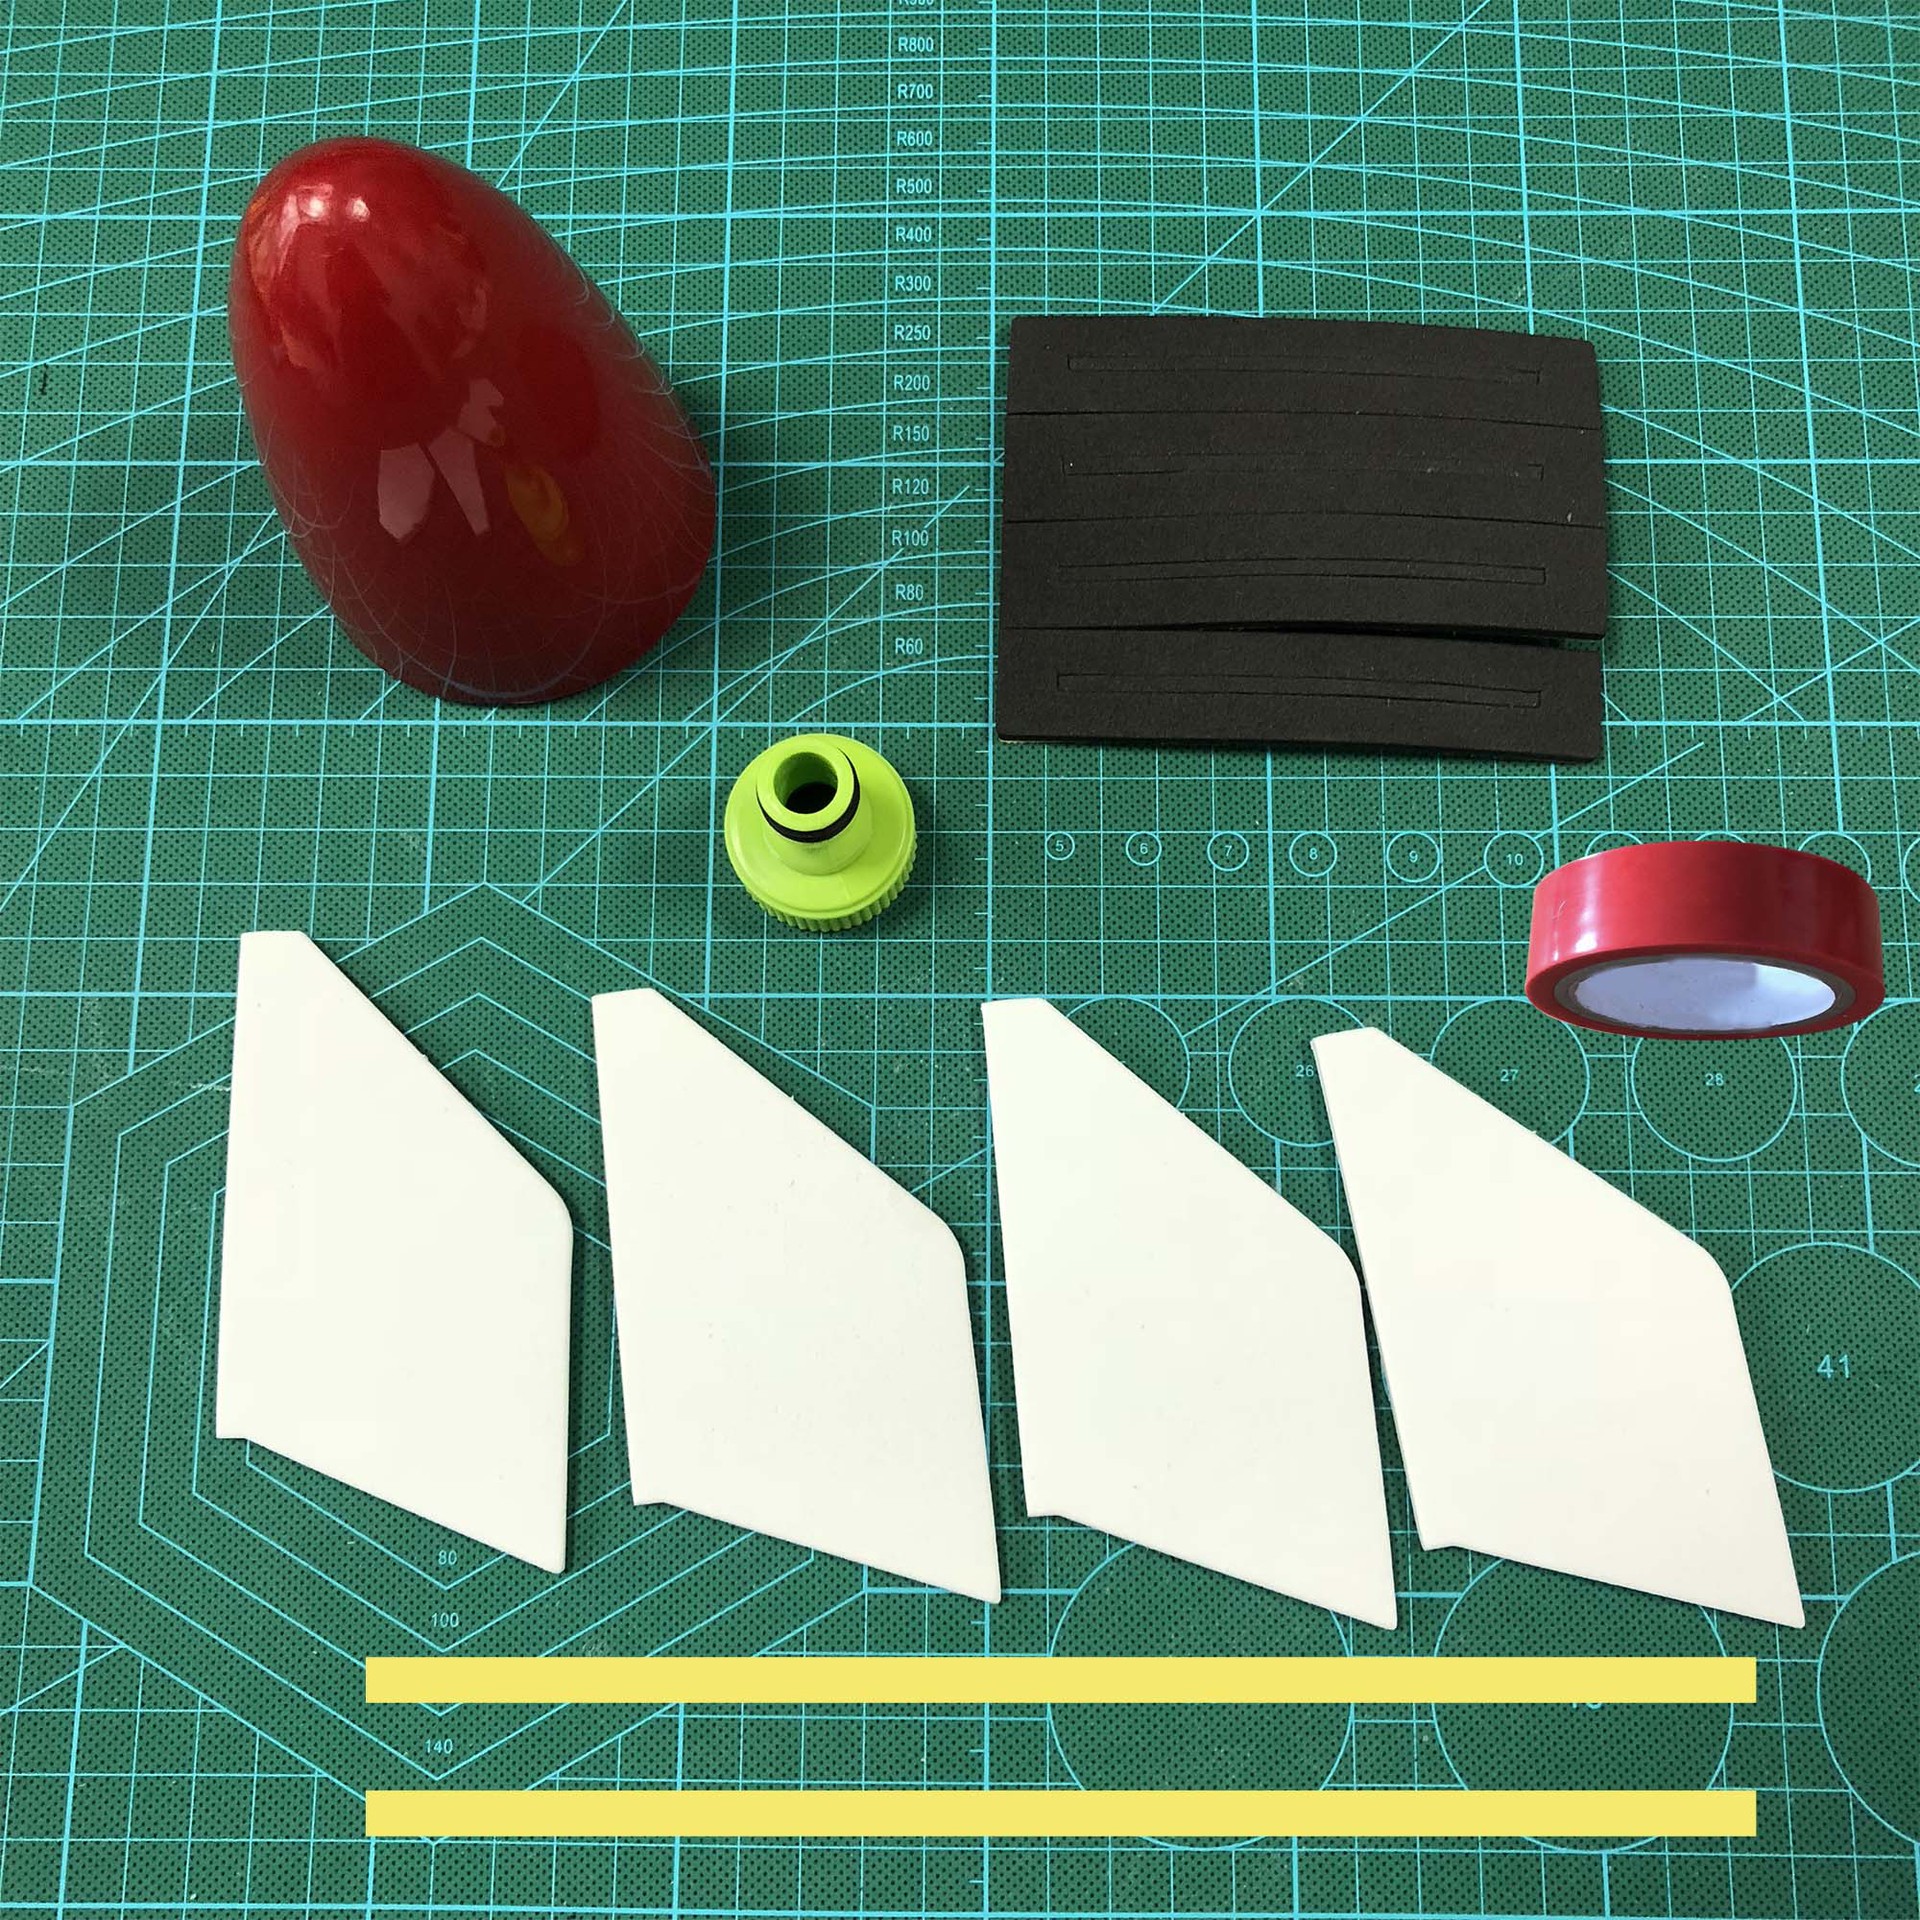
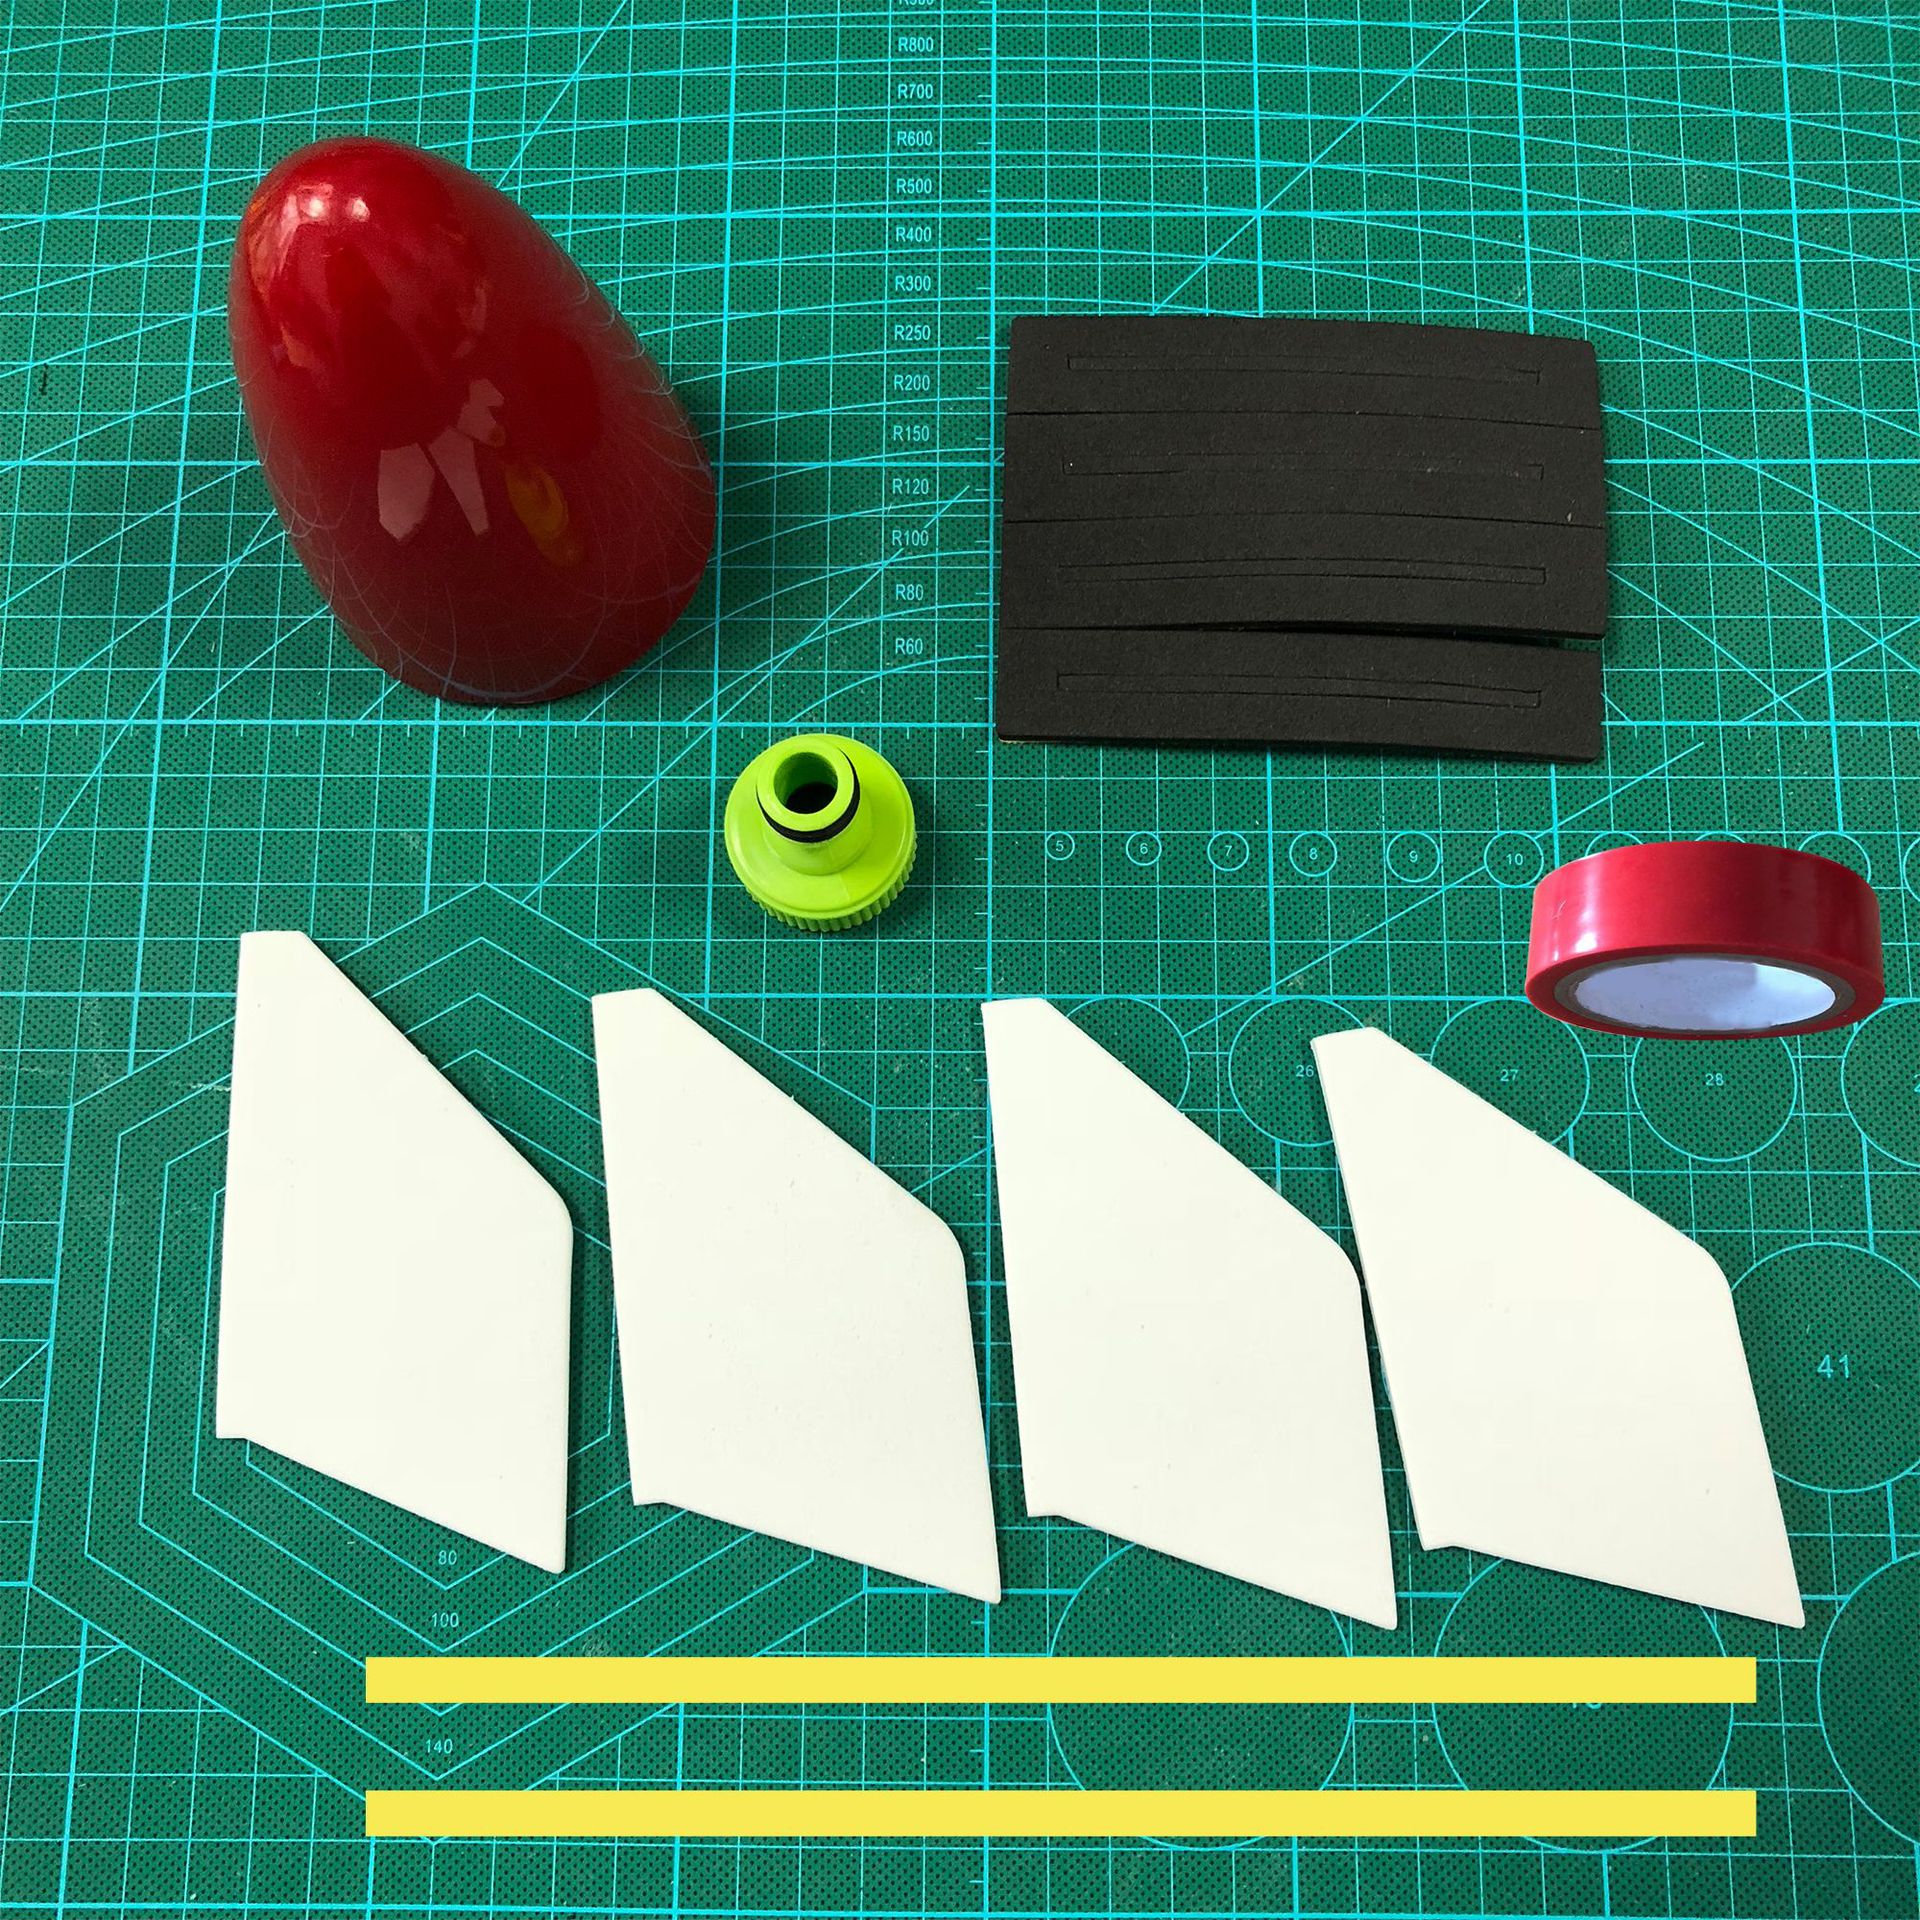


Rocket Head: Specifications:
Large rocket head: 105*105*120 mm, suitable for 1.25L and 1.5L Coke bottles, Sprite bottles
Medium-sized rocket head: 75*75**110 mm, suitable for 450ML and 600ML Coke bottles, Sprite bottles
Small rocket head: 25*25*67 mm, suitable for tubes with a diameter of 2.5
1. Streamlined design reduces flight resistance while enhancing aesthetics;
2. Shift the center of gravity of the water rocket forward to maintain flight balance and direction, without the need for additional weights;
3. Water rockets falling from high altitude provide maximum protection for the rocket body.
Usage: Put it on the bottle, and if necessary, cut off a portion based on the size of the bottle.
, to reduce weight, wrapped and reinforced with electrical tape.
Regarding the bottles: Suitable for mainstream carbonated soda bottles available on the market, including: Pepsi (recommended), Coca-Cola, Sprite, Fanta, Mirinda, 7Up, etc. Mineral water bottles are not allowed.

1 Rocket Overview
Water rockets, also known as pneumatic water spray rockets or water propulsion rockets, are made from discarded beverage bottles to form the power chamber, body, nose cone, tail fins, and parachute. Three parts of water are filled, and air is injected using a pump until a certain pressure is reached before launch. This method utilizes the mass ratio between water and air (water has 771 times the density of air). Compressed air expels the water from the nozzle at the rear of the rocket at high speed. Due to counterforce, the water rocket rises rapidly, flies through the air by inertia glide with acceleration, and follows a flight path similar to that of a missile. After reaching a certain height, a parachute opens, allowing the rocket model to descend slowly.
The water rocket is a hands-on and brain-stimulating science education material that combines education with entertainment and has high technological content. It helps students gain an intuitive understanding of the launch and recovery processes of missiles and carrier rockets, as well as the principles and differences between missile flight and aircraft flight. It explains Newton's laws of motion, the second and third laws (inertia, conservation of energy, action and reaction), and introduces basic knowledge in aerodynamics and flight mechanics. This enables young people to understand space technology, foster their love for it, and help cultivate, train, and supply talent for the space industry. (Competitions have been held multiple times across the country~~)

2 Launch Principles
A bottle sealed with a rubber stopper creates a closed space. The gas is injected into the enclosed container, causing the air pressure inside to increase. When it exceeds the degree of contact between the rubber stopper and the bottle mouth, the mouth separates from the stopper freely, and water inside sprays backward, generating a reaction force that propels the rocket. The difference between a water rocket and a traditional rocket lies in the fact that the propellant medium changes from high-temperature air to water. Before launching a water rocket, air is pumped in to a certain pressure. Due to the principle of pressure gradient, air naturally flows toward the nozzle. However, because water blocks the path ahead, the water is pushed forward by the air, giving the rocket its forward velocity.
3 Rocket Manufacturing
Material preparation
2–6 2.25L Coke bottles, scissors, single-edge blades, stoppers, ball-type air needles, ballpoint pens, staplers, double-sided tape, colored decorative paper, tablecloths, and other lightweight, airtight materials
Production Process
1. Pressure plug manufacturing: Use a small knife to cut off the thicker end of the rubber plug. The cut diameter should be 2.3 cm. Pass it through the hole and install the valve core, tube, and nut. Push the rubber plug firmly into the bottle mouth so that the part exposed outside the mouth does not exceed about 2 mm. Use scissors to make a hole in the middle of the beverage bottle cap with a diameter of approximately 12 mm, so that only the valve core is visible when tightening the cap.
2. Production of flanges: Cut four flanges from hard paper sheets. To ensure better stability during the rocket’s flight, the flanges must have high hardness. If the paper is not hard enough, two or three sheets can be glued together. After cutting the flanges, fold the “glue claws” alternately to both sides and attach them symmetrically to the lower side surface of the rocket using transparent tape.
3. Take one of the Coke bottles and cut it into three equal parts with a spacing of about 1/3. As shown in Figure 2, keep the mouth of the bottle and the middle section. Turn the second Coke bottle upside down. As shown in Figure 3, place the mouth of the first bottle on the bottom of the second bottle, and then cover the middle part of the first bottle with the mouth of the second bottle. After sealing, attach them tightly with double-sided tape. Then find a piece of cardboard and cut out four balance wings. Wings that are too large are too heavy, while those that are too small cannot provide sufficient balance.
4. Make a parachute: Fold a square tablecloth over its edges twice, using the center point as the reference. Cut off the excess part with scissors to form a circle, and attach the thread. 1. Prepare materials: three or four 2.5-liter Jianlibao or Coke bottles, several X-ray films, several soft gaskets of types 3 and 4 for chemical equipment, a complete set of bicycle valve cores, scissors and a small knife, transparent tape, double-sided tape, and insulating tape, one tube of glue (type 502).
Second manufacturing method: 1. Wing production. Use scissors to cut the X-ray films into 28 identical right-angled trapezoids, each with a length of 12 cm and a height of 6 cm, with an angle of approximately 45 degrees between the slant sides and the long base. Cut additionally 4 trapezoids of the same size but with a height of 8 cm and a shorter base, which will be overlapped on both sides (used as the wing surface). Use double-sided adhesive to tightly bond the 7 small trapezoids into a thick trapezoid, making it flat and straight, then wrap it tightly around a large double-sided trapezoid and secure it. To ensure the thick surface of the wing is smooth, use scissors or a knife to shape it evenly, and then seal the thick surface with insulating adhesive. Finally, bend the excess parts on both sides of the wing at a 90-degree angle. In this way, the remaining X-ray films are made into three wings using the above method. 2. Body production. Take a Canpol bottle (the arc at the bottle cap is natural, and using it as a rocket head helps reduce air resistance). Cut the cross-section 11 cm from the bottom, then use insulating adhesive to attach the part with the bottle mouth to the bottom of another bottle. Wrap the joint several times with insulating adhesive for better fixation. 3. Air plug production. Take a soft rubber plug of size 4, use a hole-making tool to create a straight hole slightly smaller than the valve core sleeve at the center of the plug bottom, then cut off about 0.6 cm from the thin end with a knife; place a larger “ring” (available at hardware stores) on the valve core sleeve from the thin end of the rubber plug upward to insert the valve core, put the same “ring” on top, screw on the screw, and it will fit tightly once adjusted slightly. Then grind the air plug into a cylinder using a sharpening stone until it can fully fit into the Coca-Cola bottle mouth or just a little tighter, and install the valve core to use. 4. Rocket head production. Take a soft rubber plug of size 3 and sharpen it with a knife to make it sharp and smooth. 5. Assembly of the wing. Cut a cylindrical object with both sides connected, slightly longer than the wing, from a Canpol bottle, then use transparent adhesive and insulating adhesive to tightly bond the four wings evenly into four equal parts. Then place the cylindrical object with the bonded wings at the bottom of the water rocket so it is level with the bottle mouth (this may not be the optimal position; adjust up and down during flight testing), and wrap and secure it with insulating adhesive. 6. Other steps. To increase the contact area between the air plug and the bottle mouth and thus raise the internal pressure, use a knife to make the larger end of the air plug thinner and rougher. Since the body has gained a section used as the rocket head, which is lighter and unbalanced, you can fill some paper inside to achieve balance. To minimize air resistance, attach the rocket head made of soft rubber plug to the rocket head bottle mouth using 502 glue. Following these steps, a simple water rocket is completed. Based on the water rocket we developed, through practical improvements, it can fly about 160 meters horizontally and 40–50 meters vertically.
How to launch a water rocket: 1. Control the amount of water. The amount of water used for a water rocket must be in a certain proportion to the air chamber; it should not be too much or too little. The optimal amount is approximately 1/4 to 2/5 of the air chamber volume (for a space of 2.5 liters, about 600 milliliters of water can be used. You can experiment multiple times to determine the exact amount).
2. Launch angle. When flying in the horizontal direction, due to air resistance, the optimal launch angle ranges from 50 to 55 degrees. This may vary for different water rocket models, which can be determined through variable control experiments. (The optimal angle for the water rockets we made is approximately 53 degrees). For vertical flight, the angle is 90 degrees.
3. Use the air plug. The mechanism of operation is to adjust the tightness of the air plug by compressing the soft rubber plug, which causes greater volume expansion. The more compression occurs, the tighter the plug becomes, and the higher the pressure required to push out the plug, resulting in greater thrust for the rocket. The specific usage procedure is as follows: remove the valve core of the air plug, insert the air plug in its original shape into the rocket’s nozzle, then tighten the screw on the air plug using a sleeve (a tool specifically used for screwing screws, available at hardware stores), and finally install the valve core to begin gas injection. (Note: The tightening degree can be adjusted as needed.)
4. Launch stabilization control. Only the horizontal launch direction is discussed. A launch platform is required, which must be equipped with a navigation track. The length of the navigation track should not be too long nor too short; generally, it is 60 cm. This can be made by combining three large teaching triangular rulers and two broom handles. To reduce friction between the broom handles and the water rocket when used as the navigation track, the broom handles can be glued with transparent tape or used according to the model shown in the diagram. During calm weather, launch at the optimal angle (referring to the angle between the launch trajectory and the ground) directly toward the target. In windy conditions, adjust the launch direction appropriately based on wind force and direction to maintain the optimal launch angle.
5. Precautions. During launch, ensure the rocket and orbit are perfectly aligned; any deviation of 1–2 degrees will affect flight stability and cause an “8” shape trajectory. When inflating with a pump, do so smoothly, and increase the inflation frequency to be faster rather than slower. Try to tighten the air plug as much as possible, which can be adjusted by tightening the screw on the plug. The tighter the plug is secured, the higher the pressure inside the bottle, and the greater the rocket’s thrust. Take a bottle and call it Bottle A. Draw a line at 1-1 and 2-2 above and below the bottle respectively. The methods for determining these positions are as follows: 1-1: Choose the point where the arc curvature of the bottle matches the curvature of the rocket foam head. 2-2: Select approximately 0.5 cm below the point where the curve below the bottle becomes straight.
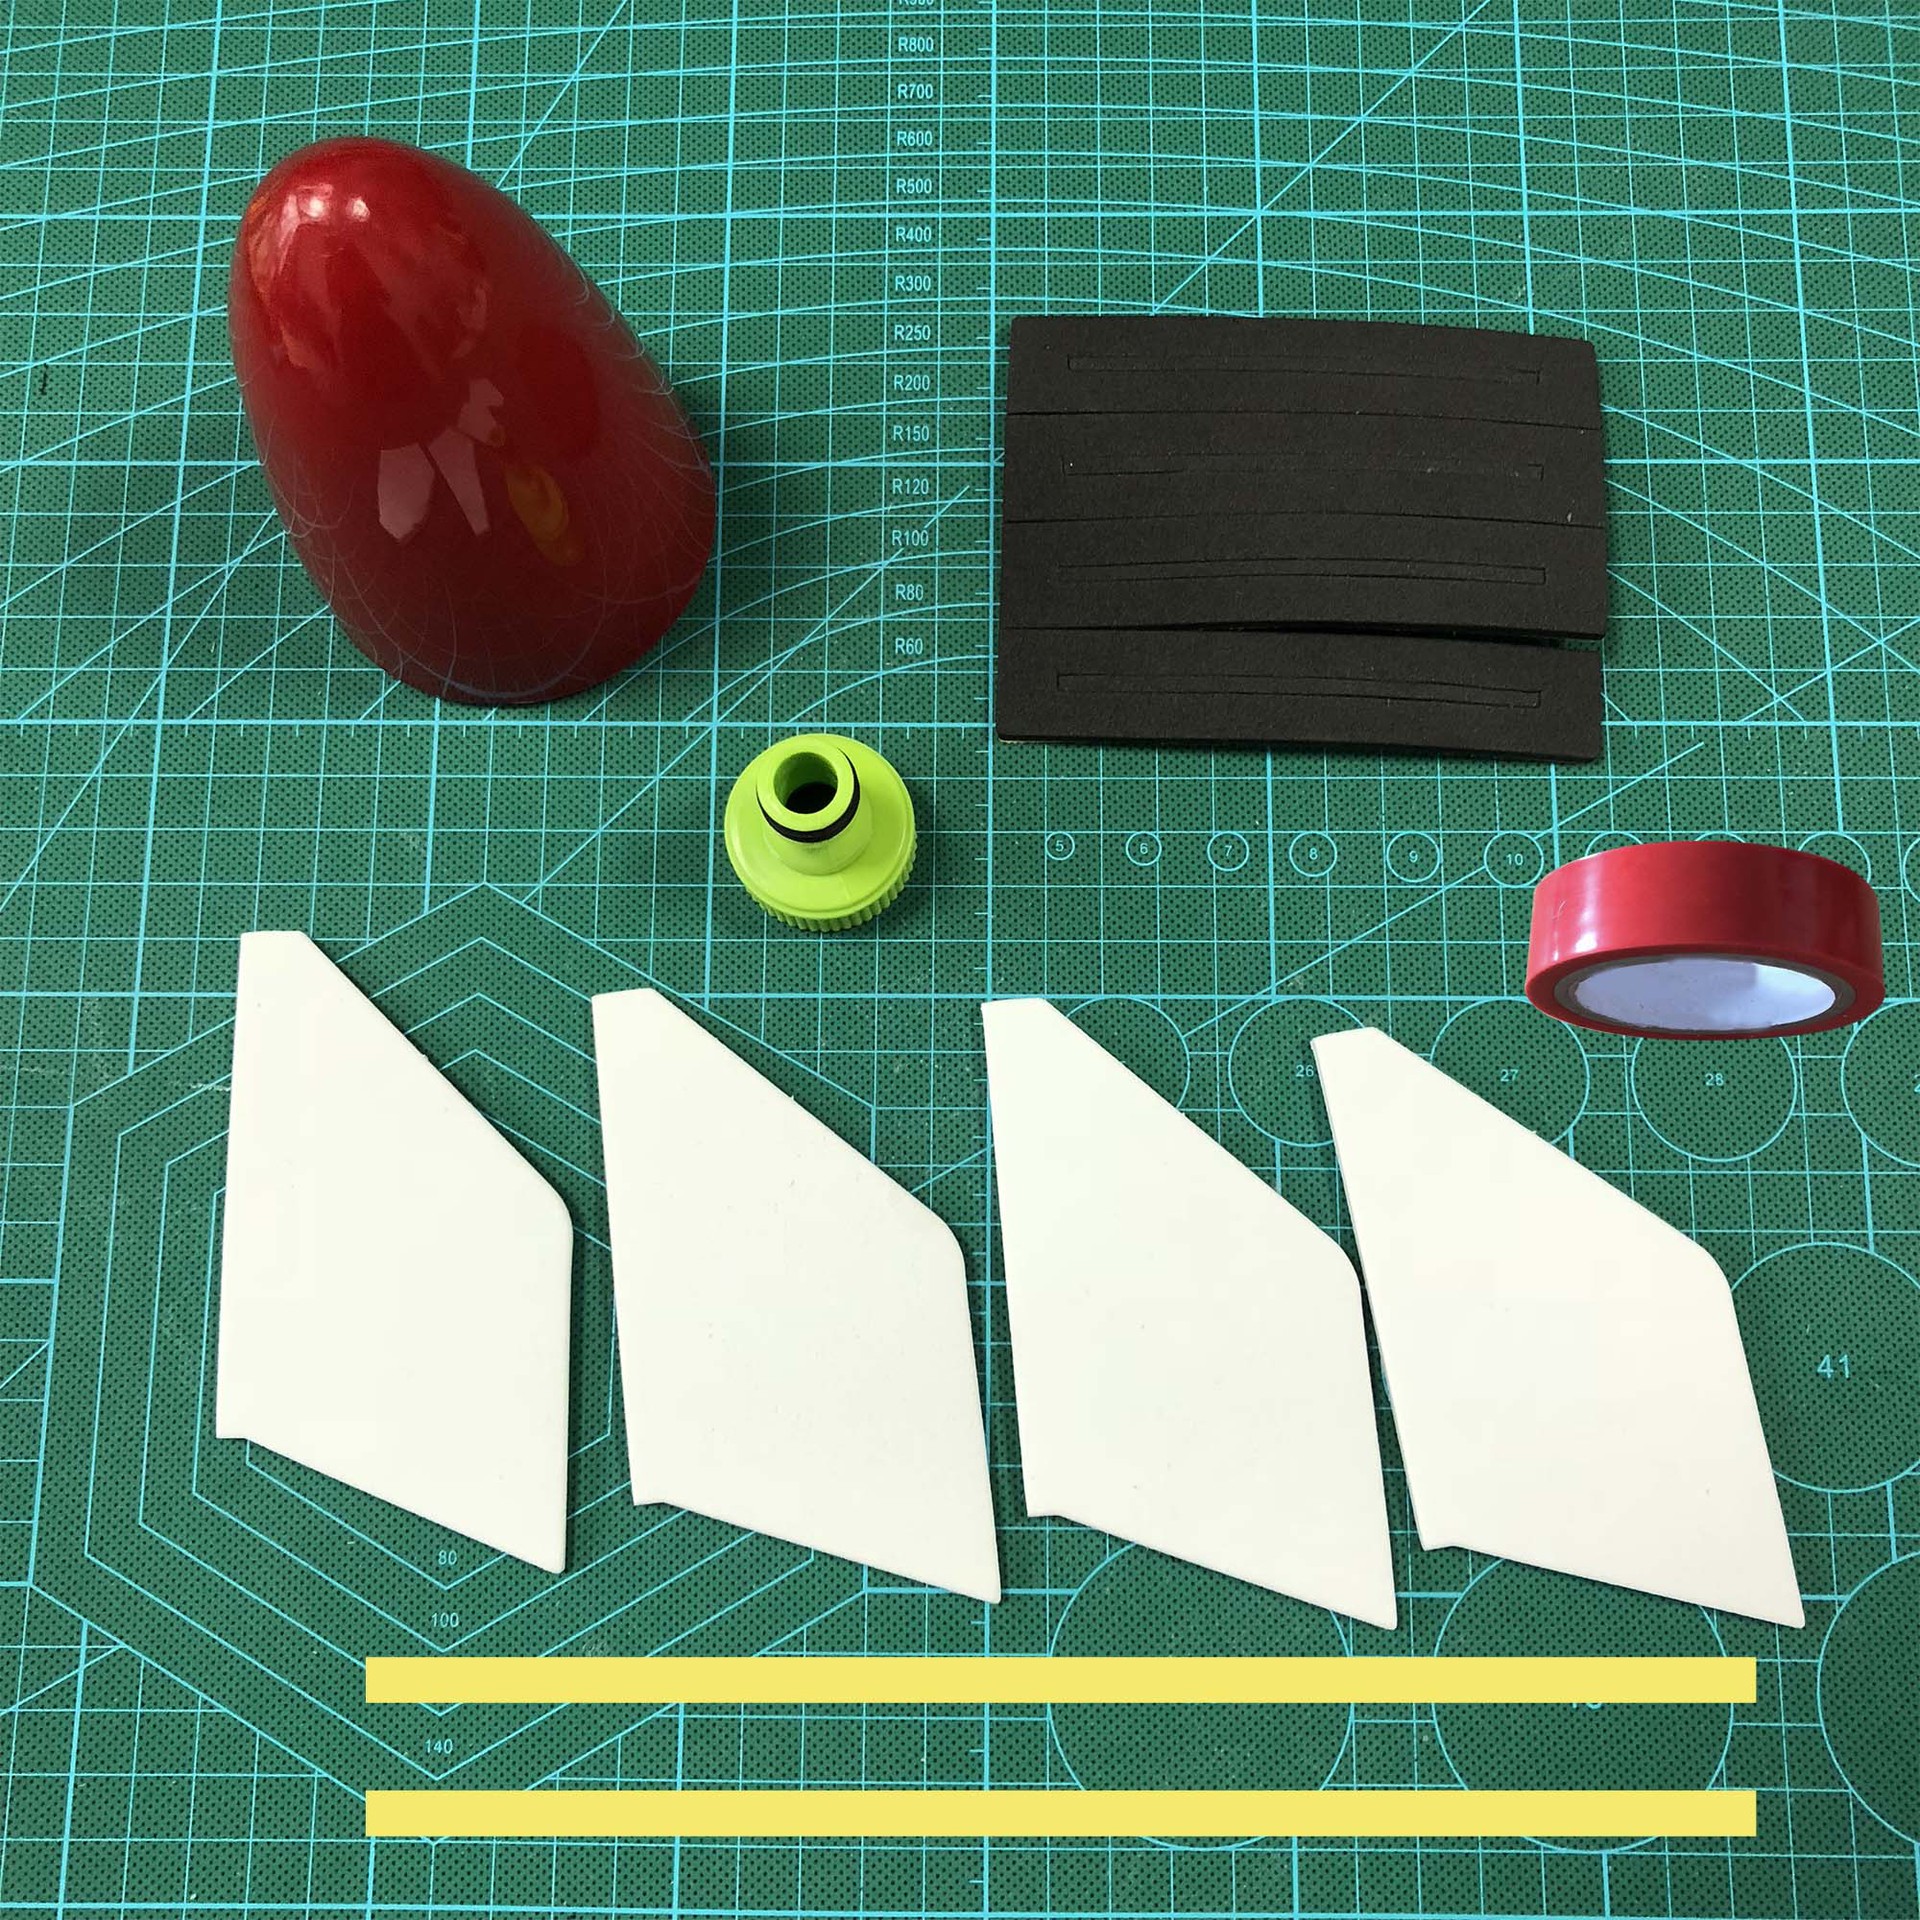
Cut (trim) with a craft knife (or scissors) approximately 0.5 cm above line 1-1 and below line 2-2.
Use scissors to trim slowly until the marked line, trying to make it smooth so it fits tightly with Bottle B when connected. Place the rocket foam head above Bottle A, and check from directly above whether the foam head is centered in the protective bottle. If correct, wrap electrical tape around the connection point to secure it. Take another bottle called Bottle B, remove its cap, then screw on the nozzle through the opening of the protective bottle. Connect Bottle A and Bottle B. Next, roll it on a flat surface or on the ground to check if the connection is smooth and the movement is smooth. If so, secure it with electrical tape. Take a third bottle, called Bottle C. Draw a line at positions 3-3 and 4-4 on the bottles. 3-3: About 0.5 cm below the curve point above the bottle. 4-4: About 0.5 cm below the curve point below the bottle. Use a craft knife (scissors) to cut approximately 0.5 cm above the 3-3 line and 0.5 cm below the 4-4 line. Fold a thick cardboard sheet in half, then draw four trapezoids with a pencil, and cut along the lines with scissors. Note: The size and shape of the tail fins can be varied to test their impact on flight. Also, use a projection sheet to create trapezoids matching the thickness of the cardboard. Cover the trapezoids on the cardboard with the projection sheet, first bonding them together with double-sided tape, then covering all three edges with electrical tape. Apply double-sided tape to the bottom of the folded part. This step ensures the four tail fins are properly attached to Bottle C. Final image of the four tail fins. Attach the four tail fins to Bottle C in a cross-symmetric arrangement for balance. First, apply electrical tape to both sides of the tail fins; ensure the tape is long enough—about one tape height above the tail fins and folded inside Bottle C to enhance stability. Then wrap electrical tape around the tail fins about two circles above them. Connect Bottle C and Bottle B using electrical tape. Note: Same attention must be paid to keeping the rocket body straight to ensure accurate flight direction.
Production Focus
During the manufacturing process, the nozzle is crucial; the seal must be tight to ensure proper pressure. The air needle should also be completely watertight within the cork, so that a heated needle tip can pass through the hole. If there is still leakage, a ballpoint pen core can be attached to the air needle, with its tip protruding above the water surface, which helps prevent bubble rolling and leakage during inflation. The parachute lines must be securely attached; otherwise, excessive pressure may cause the lines to fall off the parachute.[1]
4 World Records
With a height of 830 meters, it was created by several students at the University of Cape Town. The rocket has a unique shape; from a distance, it resembles a chopstick. It was designed after multiple data collection, analysis, and calculations by a professional team, and its exterior is made from special materials. It differs significantly from traditional water rocket manufacturing techniques and concepts.
5 Research Methods
The relationship between the vertical rise of a water rocket and the water level inside the bottle
The relationship between the vertical rise of a water rocket and the water level inside the bottle can be determined through experiments: experiments show that when the water volume is 1/3, the water rocket flies higher. From these results, it can be concluded that air pressure is directly proportional to range. This is because higher air pressure results in greater water ejection force, resulting in greater impulse for the water rocket, which causes it to move in recoil motion. When the water volume exceeds 1000 ml during launch, the water inside the rocket is not completely ejected, and due to reduced air pressure, acceleration stops. Increasing the weight of the rocket causes it to fall earlier under gravity. The greater the mass, the greater the required momentum; when mass is constant, the higher the velocity, the greater the momentum. Increasing velocity involves increasing the water volume ejected per unit time. Therefore, only when the air pressure inside the rocket and the water volume are appropriately balanced can the rocket fly farther and higher. Experiments reveal that if the water volume exceeds the upper limit that a given air pressure can eject, the water will not be completely ejected. How can this be avoided? Using PV = nRT, the maximum water volume that can be ejected at a certain air pressure can be calculated. If the water volume is insufficient, the water is ejected earlier than expected. According to theory, during launch, we first measure the maximum amount of water that can fill the rocket, then calculate the maximum water volume that can be ejected at that air pressure. By filling the rocket with this amount of water and igniting it using this data, the maximum range of the water rocket can be achieved (Pmax = Fmax × Mmax).
How to improve the stability of water rockets
During the ascent of a water rocket, it does not rise vertically; it often rises horizontally or at an angle. This requires us to improve its stability so that it can rise vertically. To enhance stability, we must also consider the effect of air resistance. The top of the water rocket should be pointed to reduce air resistance; additionally, the body shape should be streamlined to facilitate airflow. To ensure vertical ascent, the rocket must be placed vertically when set up. We used a triangular frame to support the water rocket (without tightly fitting it) so that it can stand upright.
Impact of launch trajectory on range
Fixed water volume: 600 ml, launch elevation angle: 50°. Water rocket launches were conducted using a trackless launcher and a 70 cm launcher, and results along with launch conditions were recorded. The impact of the launch trajectory on flight distance was compared. The experimental results show that both tracked and trackless launchers achieve similar range under the same impulse, indicating that either type of trajectory does not affect range. However, at lower impulses, water rockets launched by the trackless launcher tend to deviate from the intended direction more frequently; in contrast, the tracked launcher has two support points, which reduce the generation of secondary forces during the water column ejection, allowing the water rocket to move in a straight line. Therefore, the tracked launcher is more accurate than the trackless launcher.
The impact of warhead weight on the launch trajectory
Fixed water volume: 600 ml, launch elevation angle: 50°, using a track launcher. The warheads are placed in sequence with fillers of 30 g, 40 g, 50 g, and 60 g. Comparing the impact of warhead weights on the water rocket launch trajectory.
As proven by experiments: The warhead without any pre-filling material has a significantly rearward center of gravity due to the influence of the tail fin mass. At this point, since the center of rotation is the center of gravity, we can treat G as a pivot point. Under the action of gravity alone, the warhead becomes a horizontal lever with G as the pivot point. During flight, both warhead A and the tail B will be affected by the same wind resistance, but due to the different arm lengths (AG > AB), the torque generated at point A is greater than that at point B. Therefore, the water rocket will rotate, affecting the flight path. Thus, it is necessary to place pre-filling material to shift the center of gravity G toward A, making the arm length AG = BG (i.e., the midpoint of the water rocket). Only then will the torques generated by A and B be equal, achieving balance. However, if too much pre-filling material is used, the center of gravity moves forward, causing AG
Impact of launch elevation angle
Fixed volume of 500 ml water, pre-filled filler, using a rail launcher. Launches are performed at angles of 35°, 45°, 55°, 65°, and 75°. Comparing the effect of launch angles on the range of the water rocket.
The oblique launch and throw of water rockets are related, so theoretically, the flight distance is longer when the launch elevation angle is 45°. However, results from actual launches show that the maximum range is achieved between 45° and 55° (approximately 52°). When the launch elevation angle is too small, the upward component force of the water rocket is minimal, resulting in a low climbing height. Additionally, due to the weight of the rocket being pulled by gravity, it tends to fall, reducing the range. On the other hand, if the angle is too large, although the upward component force is strong, the forward component force is too weak, leading to a short range—creating a situation where the rocket reaches a high altitude but not far. Therefore, for the launch angle of water rockets, it is necessary to balance the appropriate combination of upward and forward components, consider various external factors, and also take into account the launch elevation angle.
6 Technical Interesting Points
There are many types of water rockets, generally including single-stage single-thrust (one-stage rocket with one nozzle), single-stage multi-thrust (one-stage rocket with multiple nozzles), and multi-stage multi-thrust (multi-stage rocket with multiple nozzles), with few being single-stage multi-thrust. Since single-stage multi-thrust typically involves "passive separation" where the nozzles (one or several bottles connected in series) detach independently, and both the rocket body and nozzles are launched simultaneously, although it has the effect of the nozzles being ejected, it is generally not considered a multi-stage water rocket. In contrast, multi-stage multi-thrust water rockets use "active separation" technology where the nozzles and rocket body separate independently, with the nozzles taking over after the rocket body is launched. The key technical features of water rocket manufacturing include nozzle technology, active separation technology, and recovery technology.
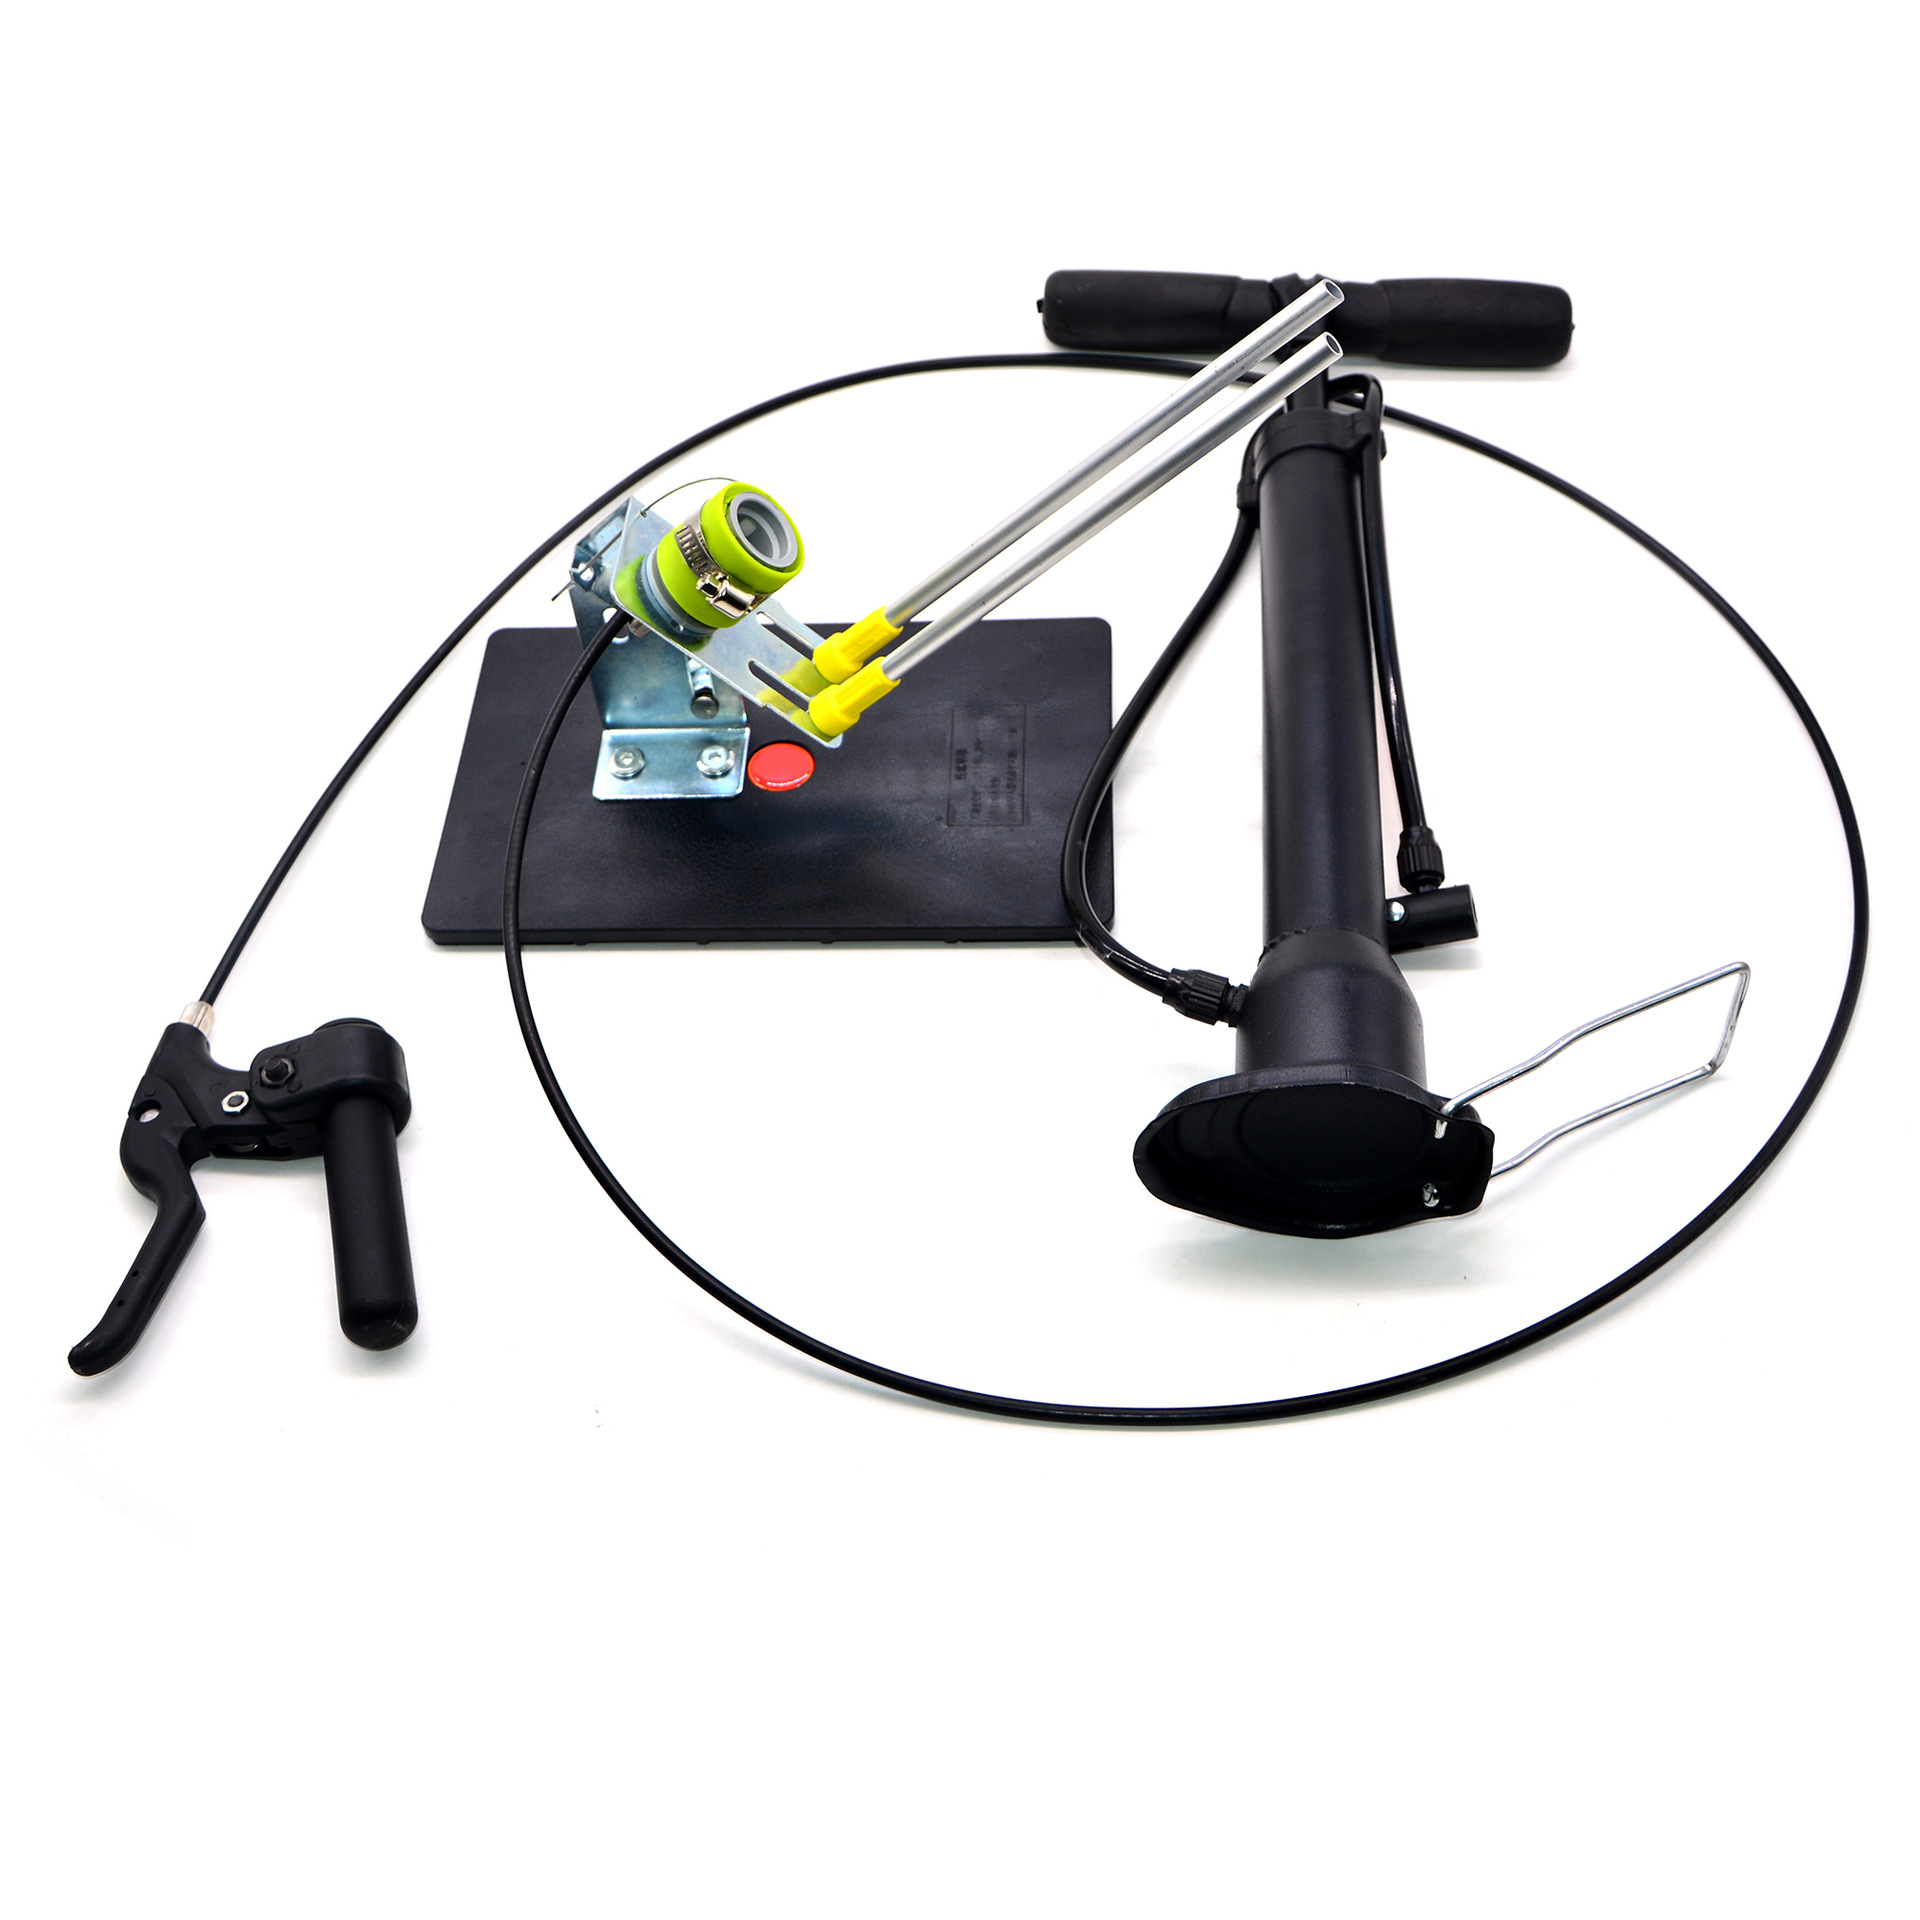
A commonly used method in China for making bicycle inner tubes and air ports into bottle caps, however, this approach cannot effectively control the firing time, so it cannot achieve perfect multi-push functionality. Using pulleys and strings to pull down on the launcher ring enables good control over the firing time.
Generally speaking, single-stage multi-thrust water rockets involve the issue of thrust difference between the thruster and the rocket body. Since “passive separation” is achieved naturally through gravity, the thrust from the thruster must be greater than that of the rocket body to ensure both have equal and consistent thrust when the rocket takes off. When the thrust from the thruster is exhausted, they naturally separate due to gravity. The main rocket body then continues to fly. The advantage of such rockets is that they do not require complex multi-stage separation technology, offer significant thrust, and are relatively easy to manufacture. It is important to note that the diameter of the rocket body nozzle must be smaller than that of the thruster nozzle to achieve the required thrust difference. Typically, the rocket body uses parachute recovery technology.
Let’s talk about multi-stage water rockets. These water rockets are quite large in size, with heights that can even exceed 200 meters. The highest known launch height is 864 feet, approximately 263 meters, achieved by foreign water rocket enthusiasts on October 30, 2010. Although the launch height of these rockets is not very high, they are more challenging due to technologies such as “timed ejection,” “active separation,” and “graded recovery” of the rocket body and propellers. Different countries have varying versions of the active separation technology, but the basic principle remains the same. By utilizing gravity when the propellers run out of thrust, the elastic force of springs in the separators, and the ejection thrust of the second stage when separation begins, rapid active separation between the first and second stages can be achieved. The propeller section enters the falling phase and opens the parachute, while the second stage continues to rise until its thrust is exhausted, then opens its own parachute. If a third stage exists, it follows in sequence.
Single-stage multi-thrust water rockets and multi-stage multi-thrust water rockets can both be quite large, but distinguishing between them is not difficult—it can be done by looking at their appearance. In a single-stage multi-thrust water rocket (also known as a pseudo-two-stage rocket), the rocket body and the nozzle of the thruster are on the same plane, as this allows for simultaneous launch. In contrast, multi-stage multi-thrust water rockets do not have this arrangement; the second stage nozzle is always connected to the thruster, since the second stage does not operate during launch. Therefore, the difference can be identified simply by examining the position of the nozzle.
7 Expansion Production
1. After getting familiar with the basic construction of water rockets, you can try making large-scale and multi-stage water rockets. They are made from lightweight metal, and the air pressure is generated by an air pump.
2. Manufacturing of multi-stage rockets:
Several water rockets are tied together, with an air intake providing pressure. At the same time, water columns are sprayed to enhance the flight capability of the water rockets.
After more than half a semester of exploration, research, and experiments, we have initially completed the development of water rockets, and we have made improvements in many aspects. By searching for information, we have gained a deep understanding of the history of rocket development, especially the history of rocket technology in China. We realize that rockets are essential launch vehicles for modern space exploration, and China is the birthplace of rocket technology. However, due to funding shortages and technical limitations, the development of space exploration has been slow. Nevertheless, with the strengthening of overall national strength and through cooperation with foreign countries, multiple "Long March series" rockets have been launched.
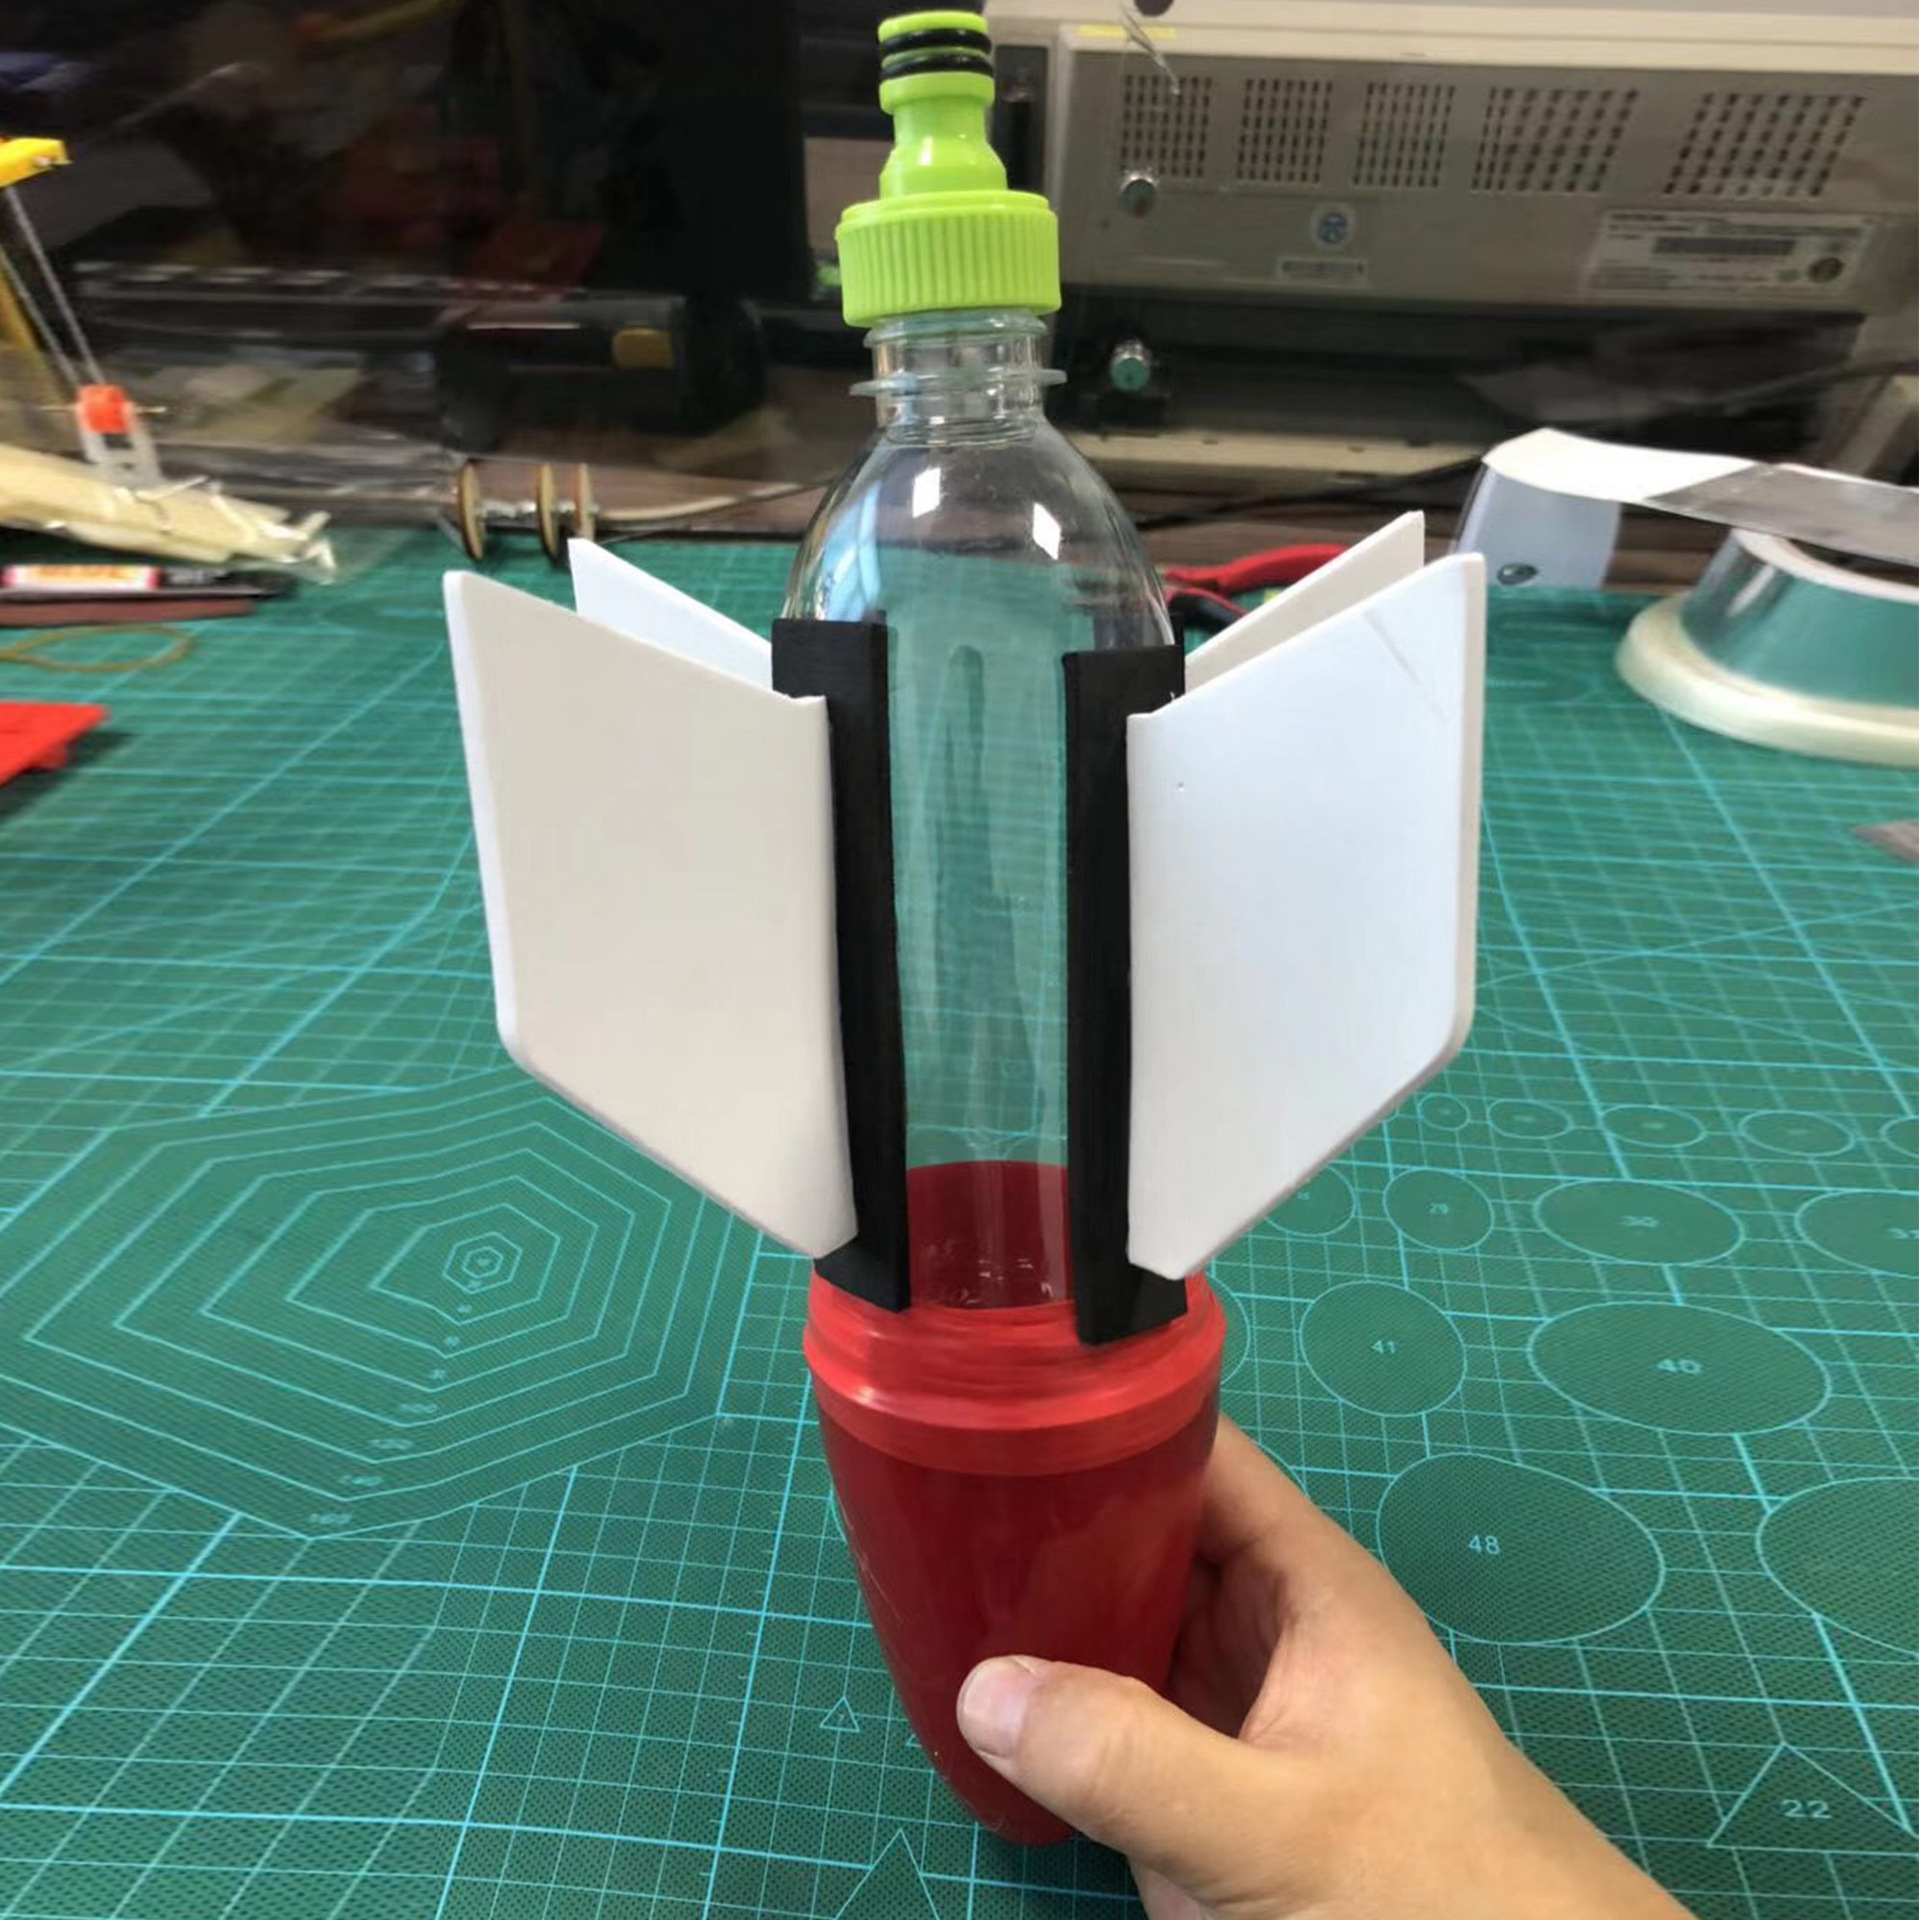
2. Divide one of the bottle caps into three parts; keep the mouth and middle part intact
3. Fit the remaining bottle mouth and middle section onto the bottom and bottle mouth of another special bottle, then apply adhesive and secure with insulating tape.
ps: It must be ensured that the body of the rocket is a straight line
4. Use thick transparent film or pearl plate to create four tail fins, and evenly distribute them for fixation on the fire
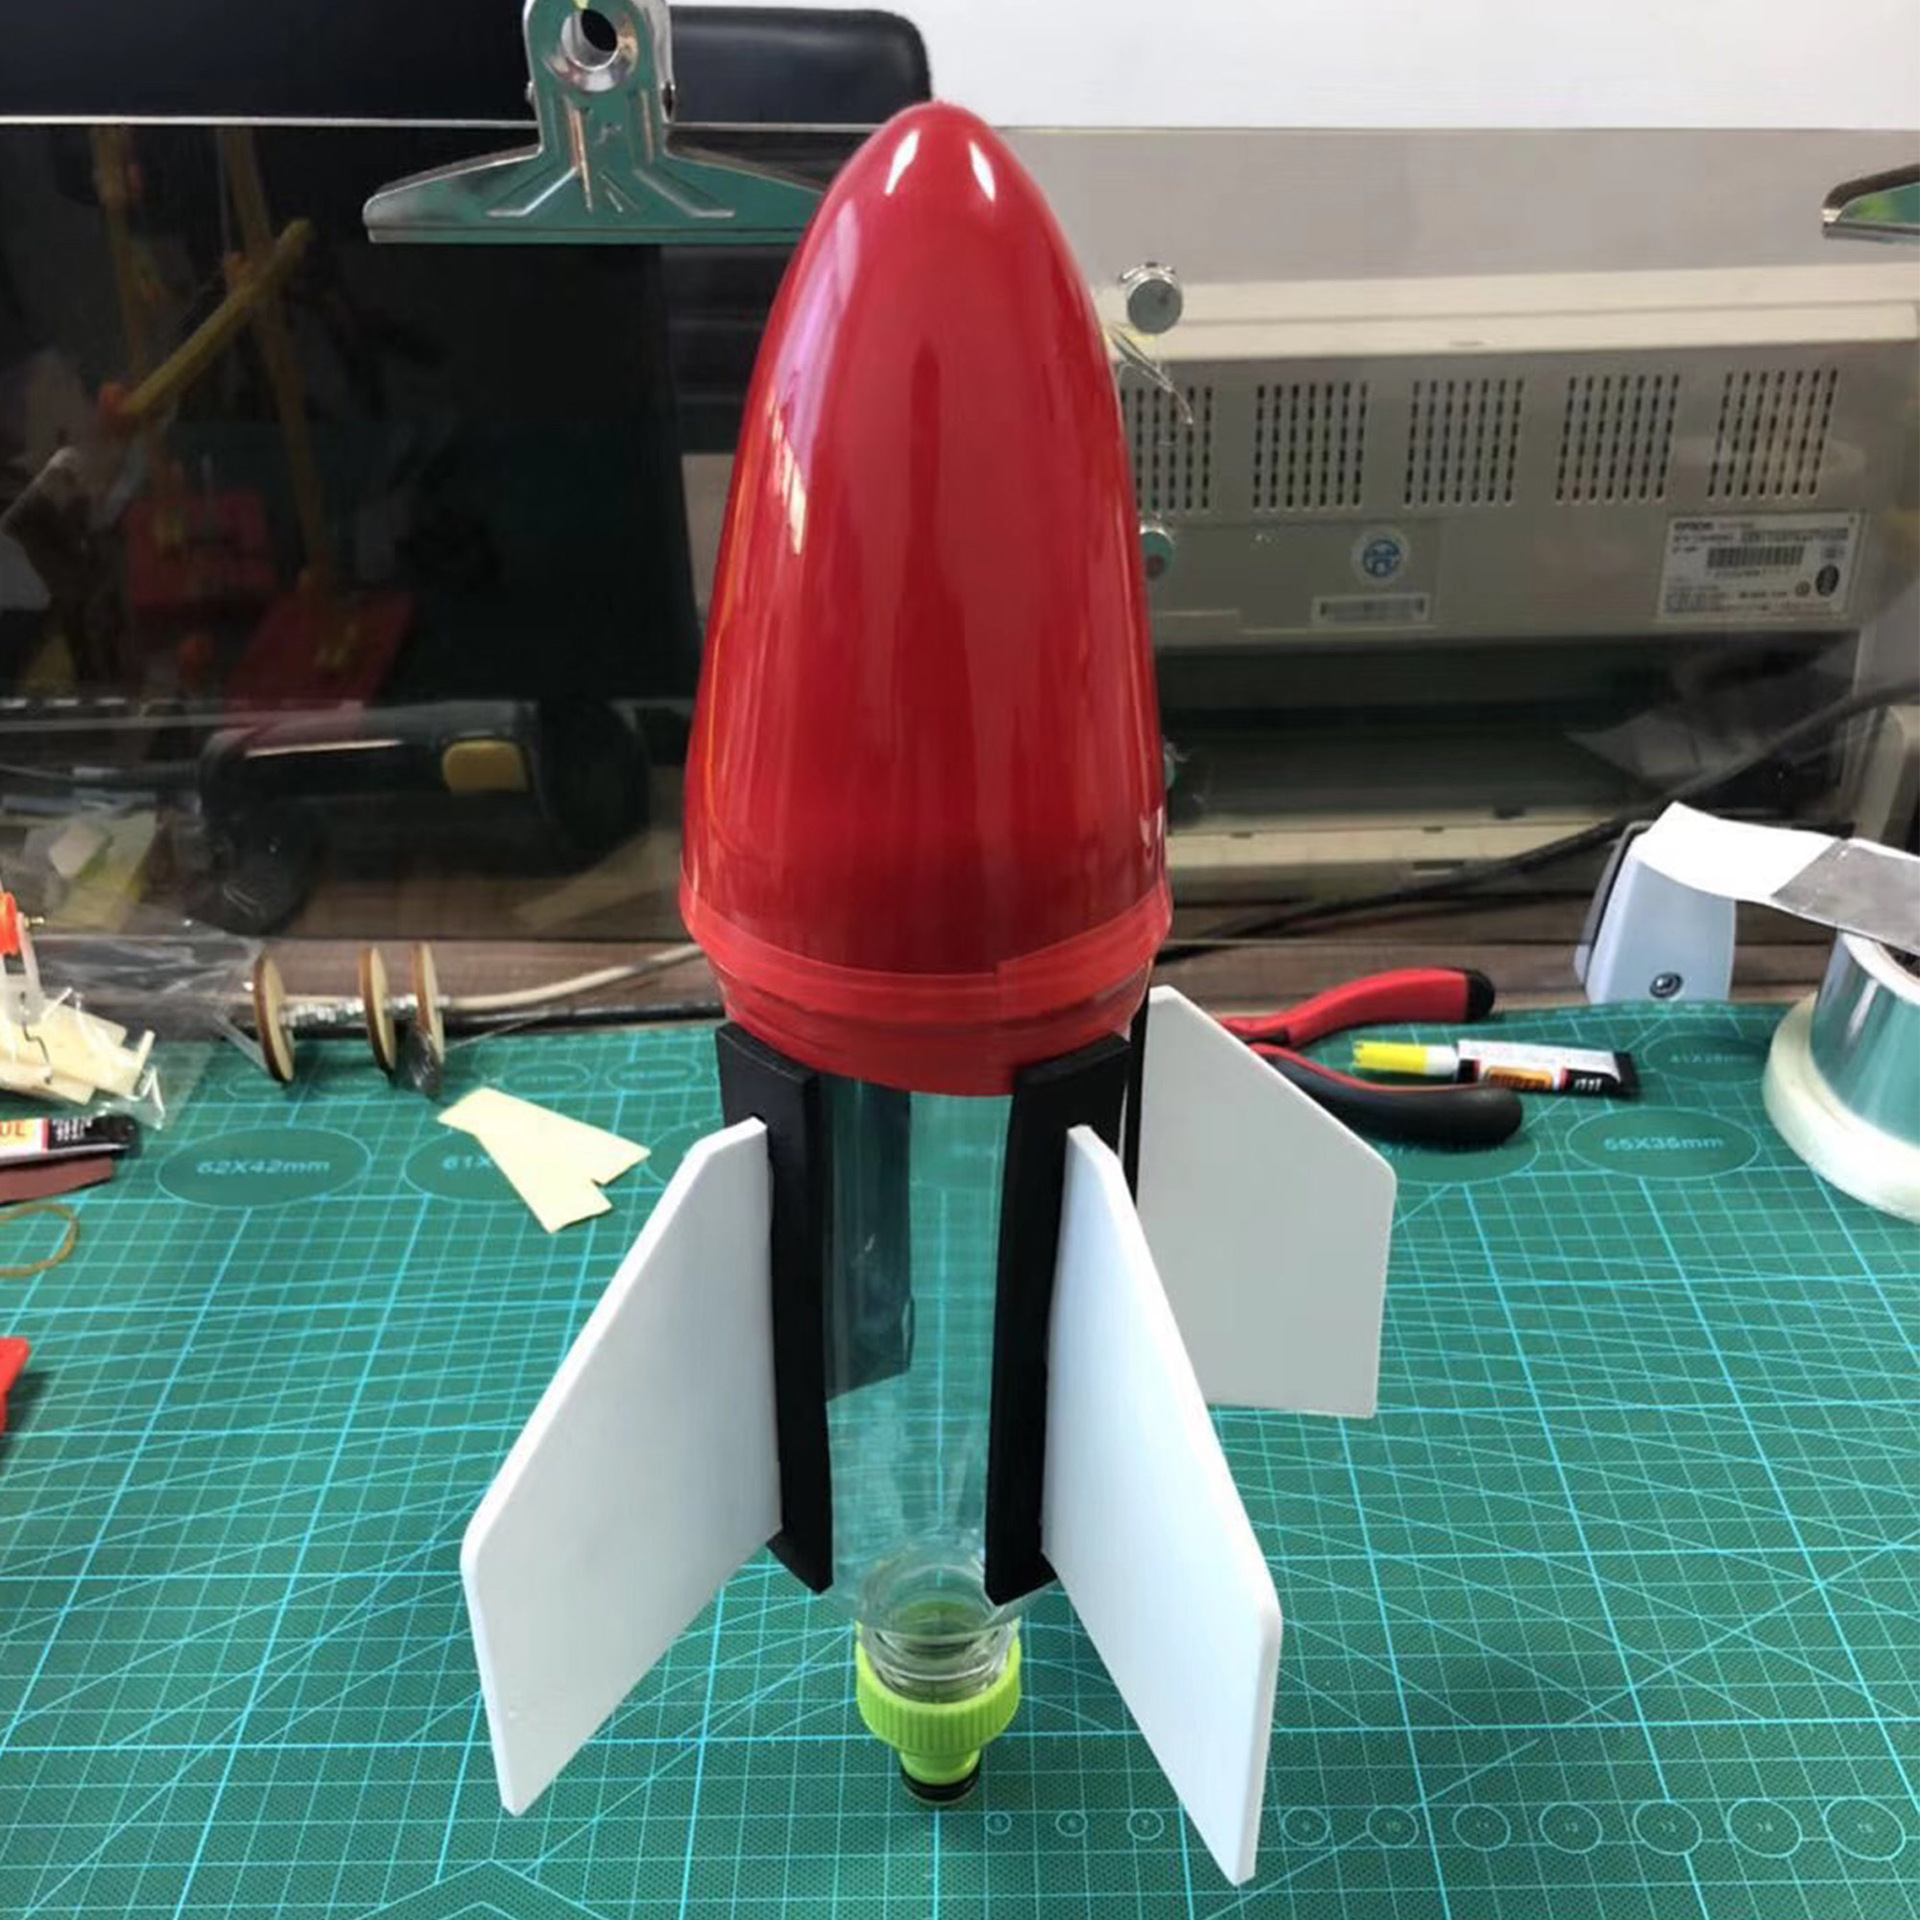
The second half: Water rocket. PS: Apply adhesive and secure it with tape. If it is not evenly distributed or not secured properly, it will affect the direction of the rocket's flight.
5. Put on the rocket head and nozzle, ready to take off into the sky
6. Prepare for launch on the launch pad




Zhejiang Jianyi Education Technology Co., Ltd.
Zhejiang Jianyi Education Technology Co., Ltd. (formerly Yifei Toys Factory)Established in 2007, the current brand names include “XING TEACHER” and “JIAN YI”. Through 10 years of relentless effort, the company has gradually matured. Our firm is a member of the Ministry of Education’s Teaching Equipment Industry Association and a key enterprise in Zhejiang Province’s teaching equipment sector. For three consecutive years, it was recognized by Jinhua City as a “Contract-Abiding and Creditworthy” entity, and in 2014, it was awarded the title of “Advanced Enterprise in Jinhua Teaching Instruments Industry” by Zhejiang Province.
Zhejiang Jianyi Education Technology Co., Ltd. is a high-tech enterprise that integrates modern scientific research and development of educational equipment, curriculum design, integrated teaching resources, and technical services. With its high-tech products and modern educational equipment, Zhejiang Jianyi Education Technology Co., Ltd. sells its products across the country and to Europe, America, Japan, South Korea, and other regions. After years of accumulation, the company has reached a certain scale. In terms of technological innovation, the company employs professional designers who develop complete sets of educational products and upgrade existing products. In terms of production, management, and installation services, the company strictly adheres to the standards of the ISO9001 international quality assurance system. In marketing, the “Teacher Xing” products have been introduced to many provinces and cities in China and enjoy a good reputation. Over the years, the company has provided high-quality, advanced, and professional series of modern teaching equipment and specialized R&D and customization services for the education sector. With excellent, highly qualified professionals, comprehensive after-sales service, high product quality, and a positive corporate image, the “Teacher Xing” educational and scientific series in physics, chemistry, energy, geography, biology, art, and more have won multiple bids in education bureau tenders. Zhejiang Jianyi Education Technology Co., Ltd. continues to uphold the business philosophy of “ultimate quality, diligent service, and sincerity in people,” maintain the “Teacher Xing” culture, build the “Teacher Xing” brand, and advance the development of “Teacher Xing.” It provides excellent equipment and high-quality services for school teaching and research. We are willing to cooperate wholeheartedly with new and old friends at home and abroad, work together, and serve education with all our efforts, contributing to the education industry.

Please check that the circuit is unobstructed and all components are intact before assembly, as well as ensure all contact points are properly aligned. During assembly, be careful not to let glue get on your clothes or skin. Keep the components out of reach for younger siblings to prevent them from accidentally swallowing them! Do not play with them on your head, as the model may fall and hurt you!


Update time:


TOP


