Search history
Clear allSearch by image
XDrag and drop an image here or upload an image
Max 5MB per image
UploadSign In | Join
Search history
Clear allSearch by image
XDrag and drop an image here or upload an image
Max 5MB per image
UploadSign In | Join
X Email Mobile
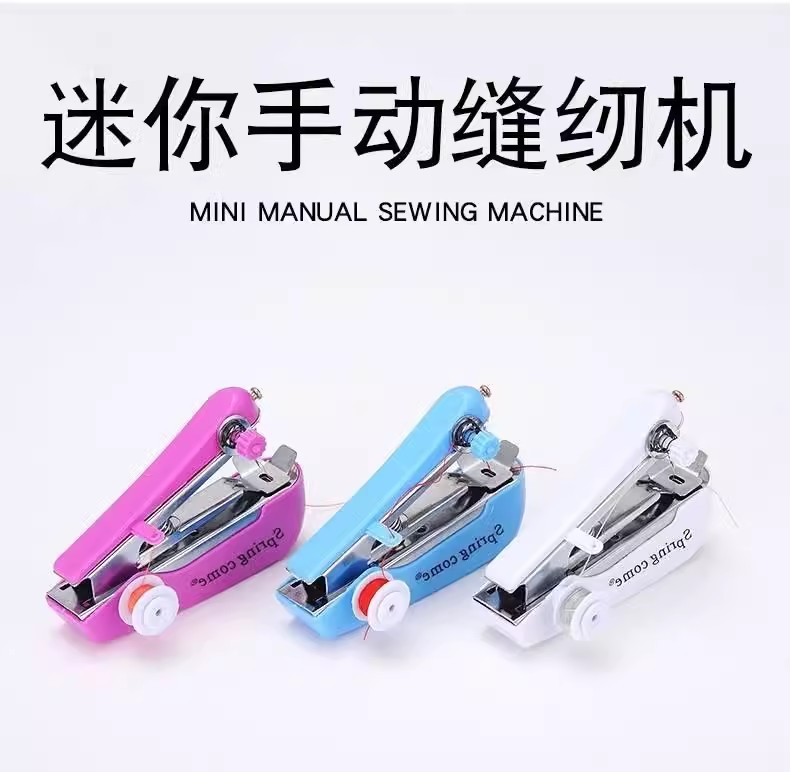
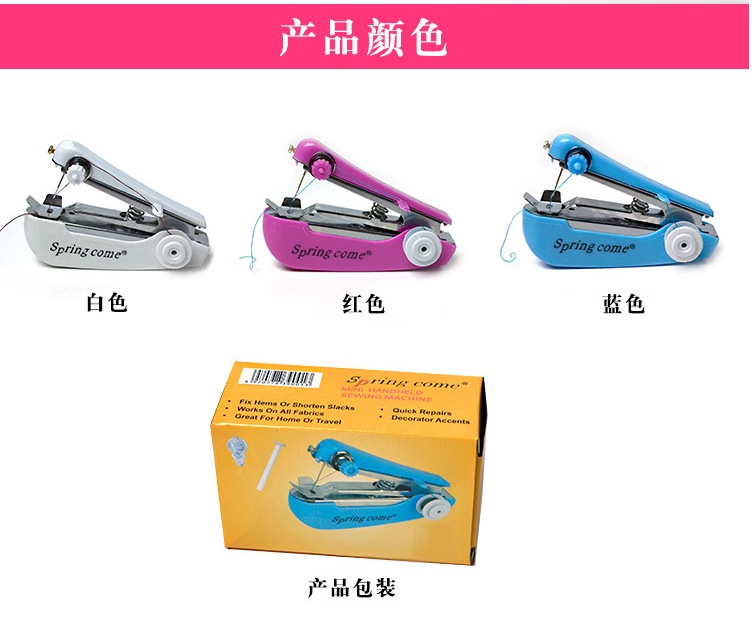
 white
white
|
CN¥ 0.0 |
 bright red
|
CN¥ 0.0 |
 blue
blue
|
CN¥ 0.0 |
 pink
pink
|
CN¥ 0.0 |
Yiwu WANYING 5yr.
Contacts Wang Haijiang Chat
Mobile 86-13345927877
E-mail 1032644595@qq.com
13345927877

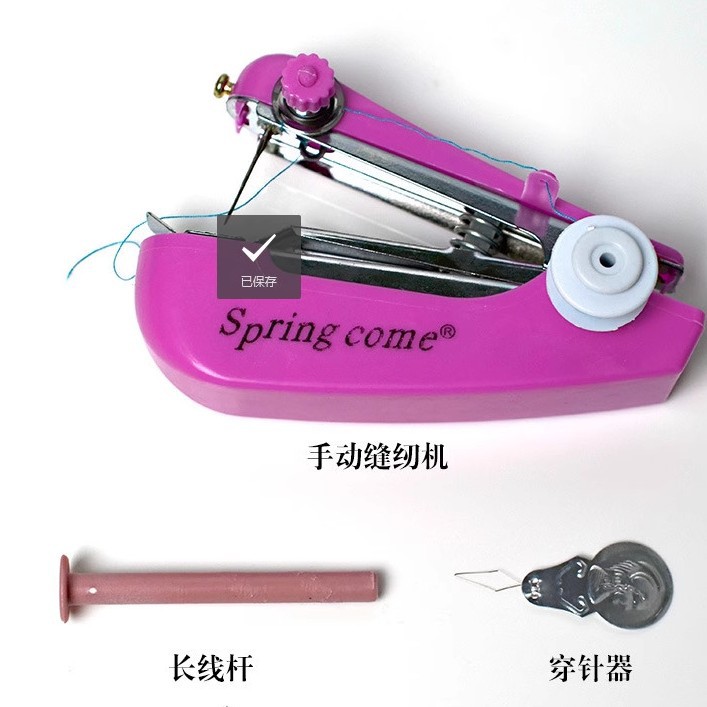
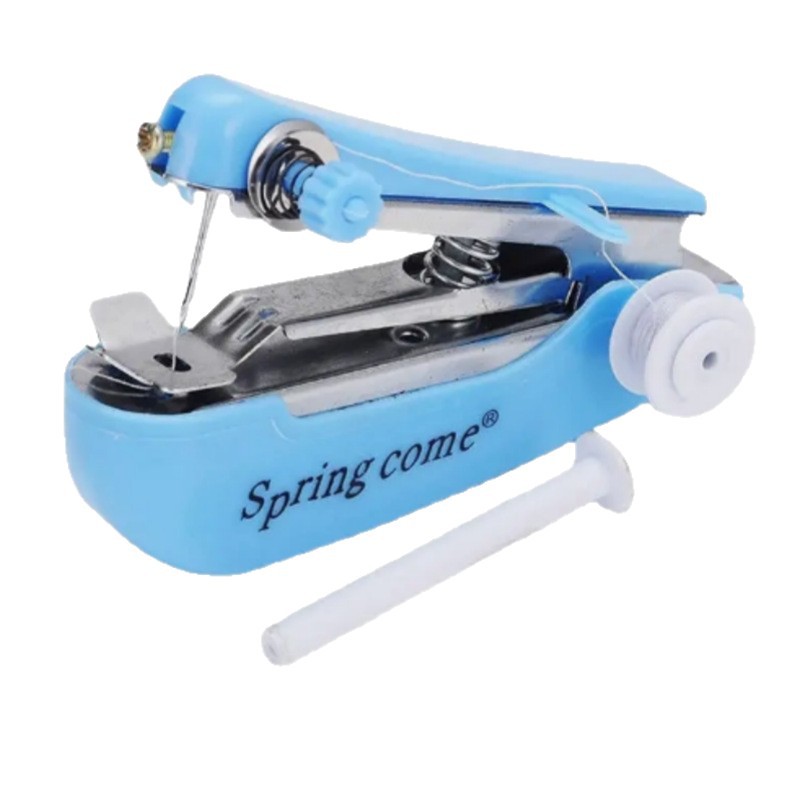
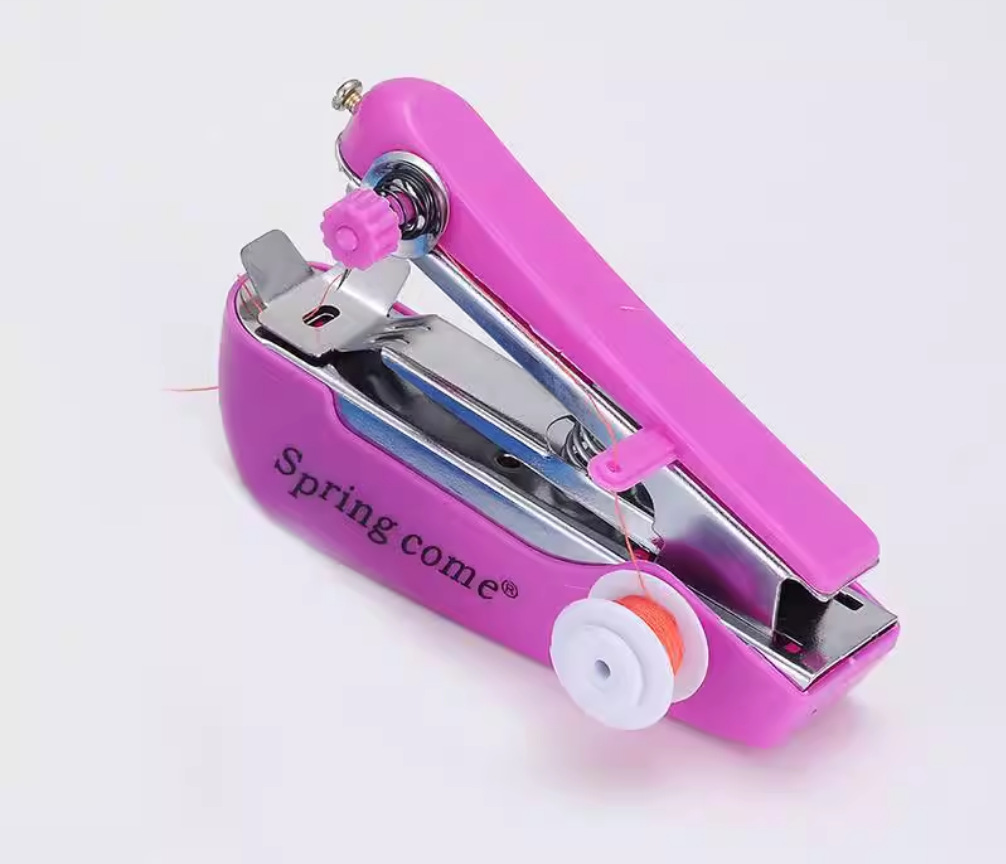
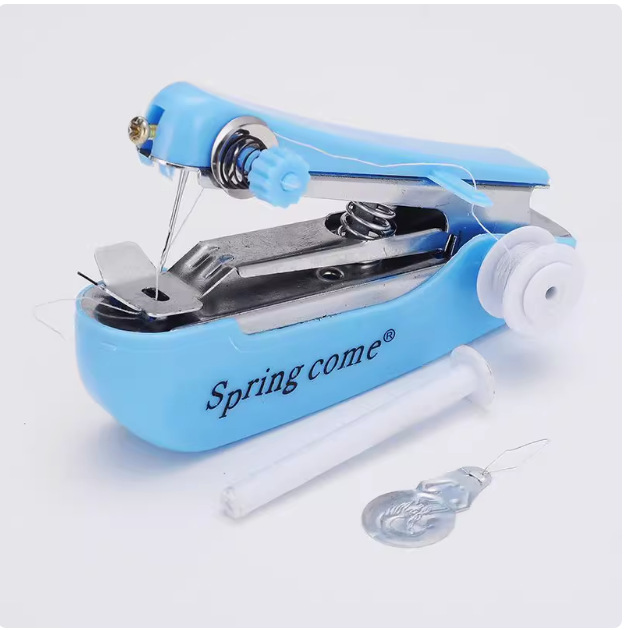
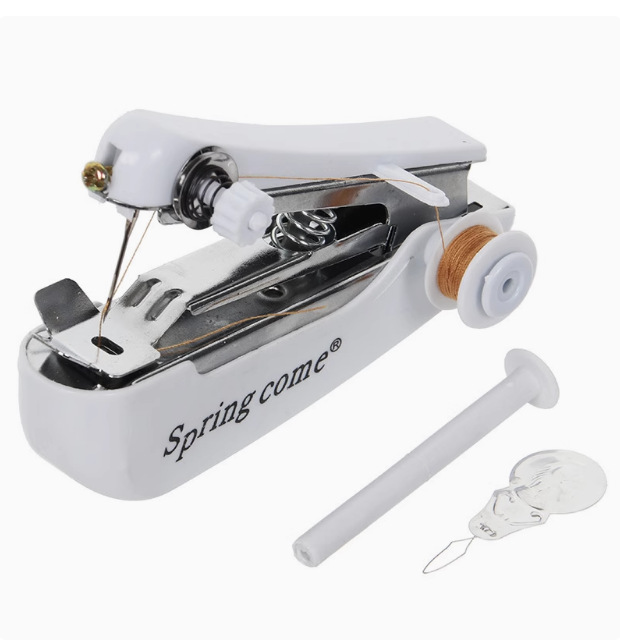
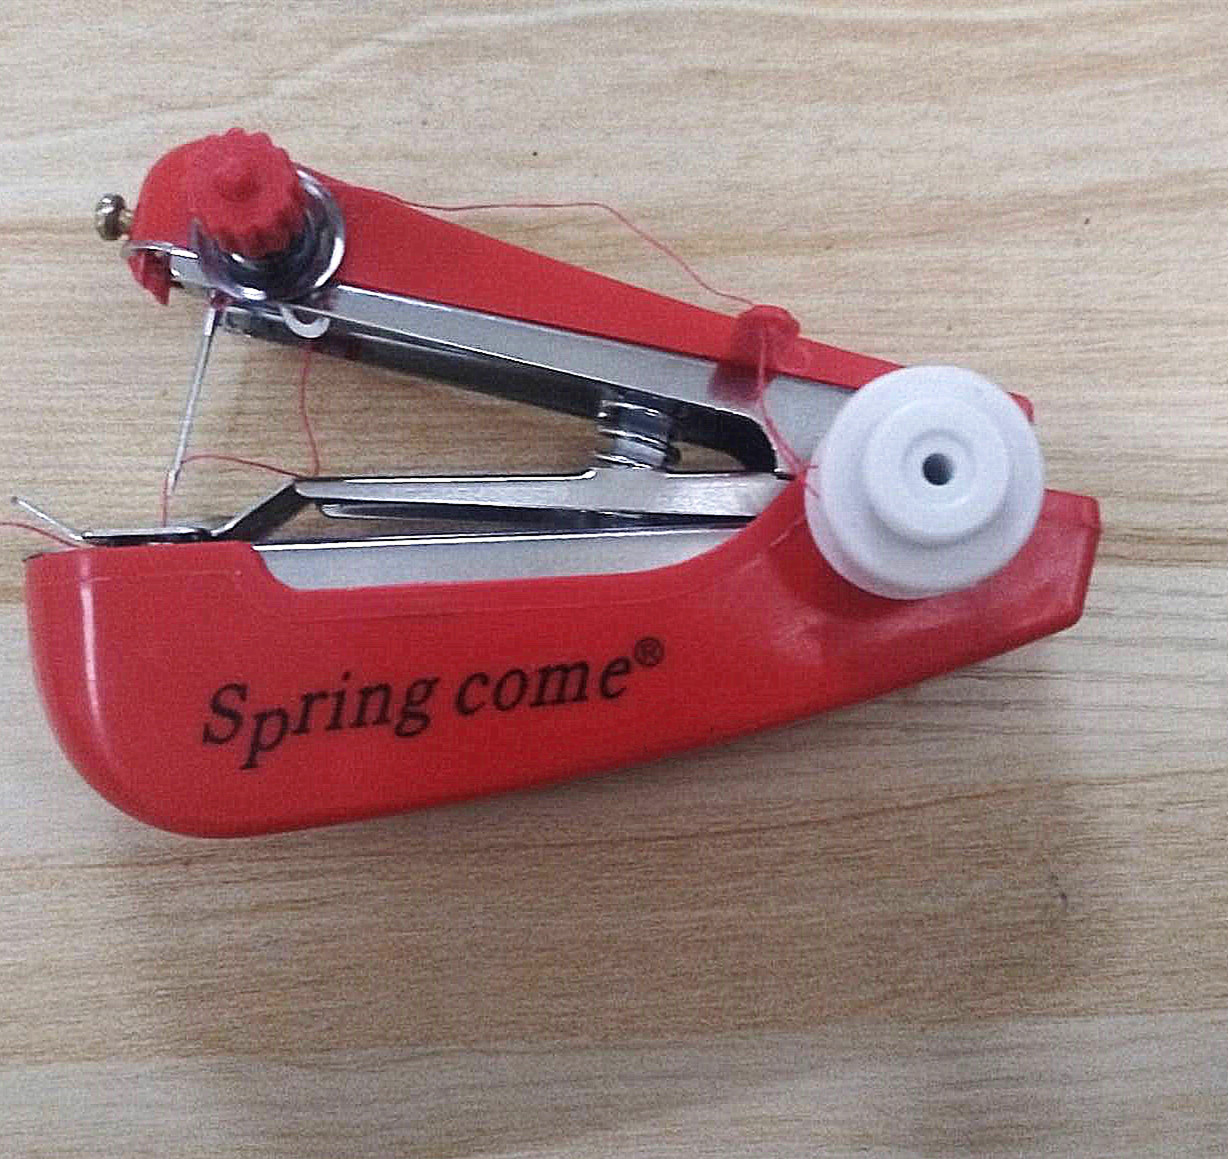
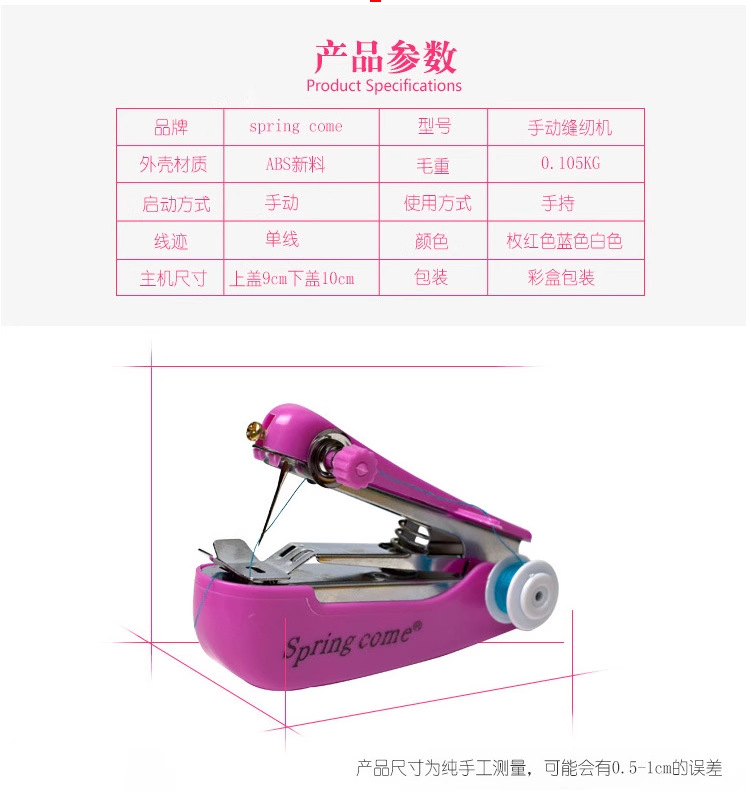
Product Name: Upgraded Manual Sewing Machine
Weight per unit: 100 grams
Packing Quantity: 160PCS for Electroplated Model
Box Specification Size: 48.5*31*47cm
Whole box weight: About 19kg
This machine has very low profit margins, and it is non-refundable. Please be aware, buyers! Those who are concerned should be cautious when making a purchase!
Note: The Springcome brand we sell is electroplated.
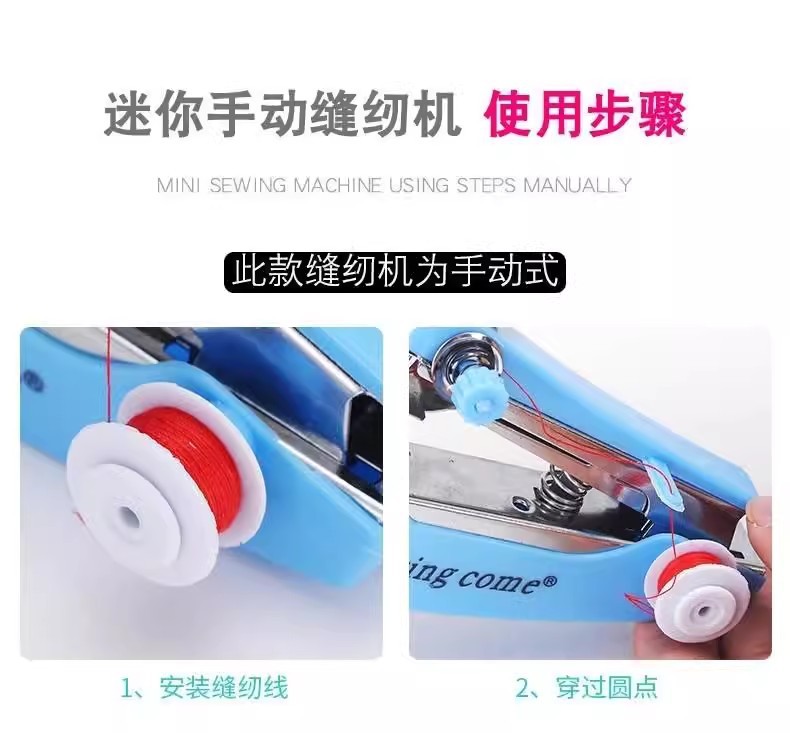


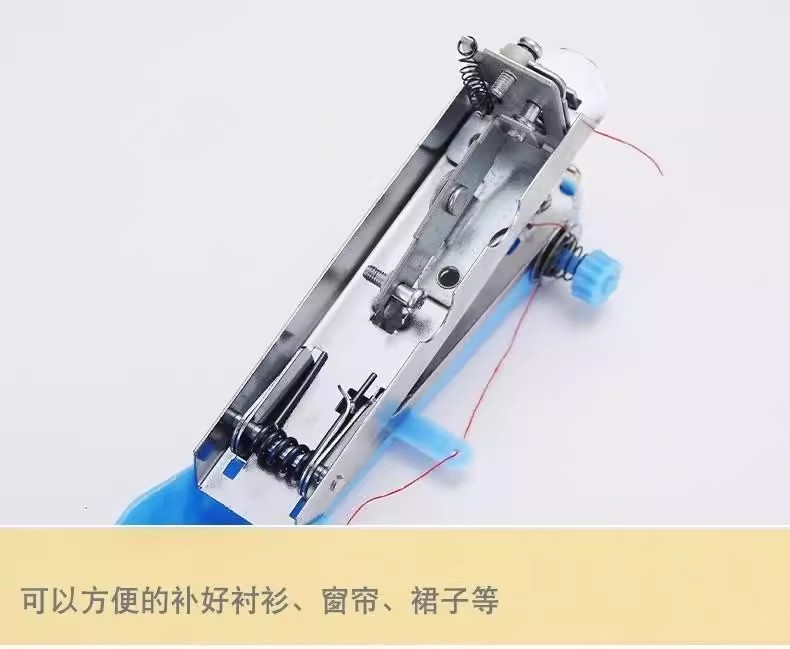
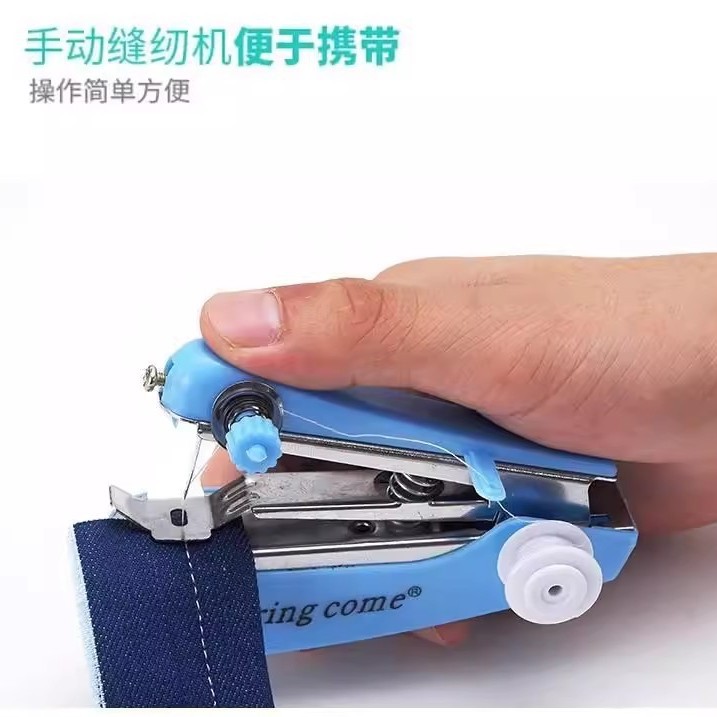
Micro sewing machine correct usage method
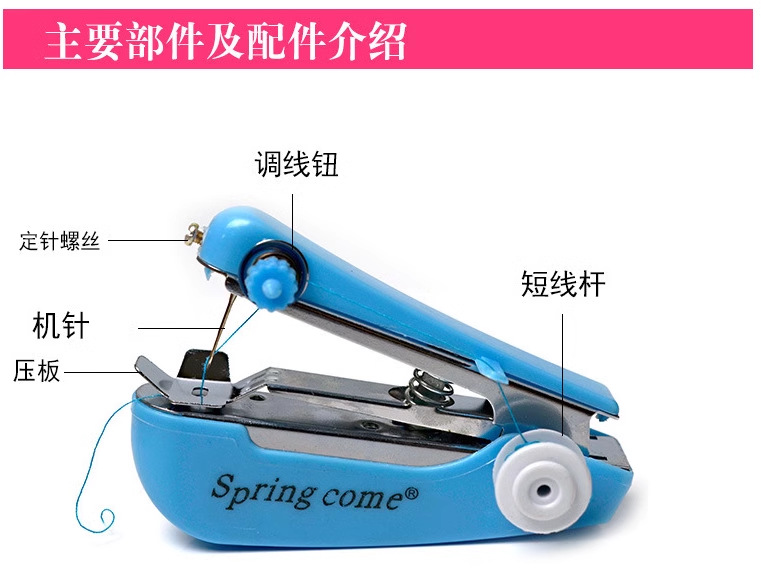
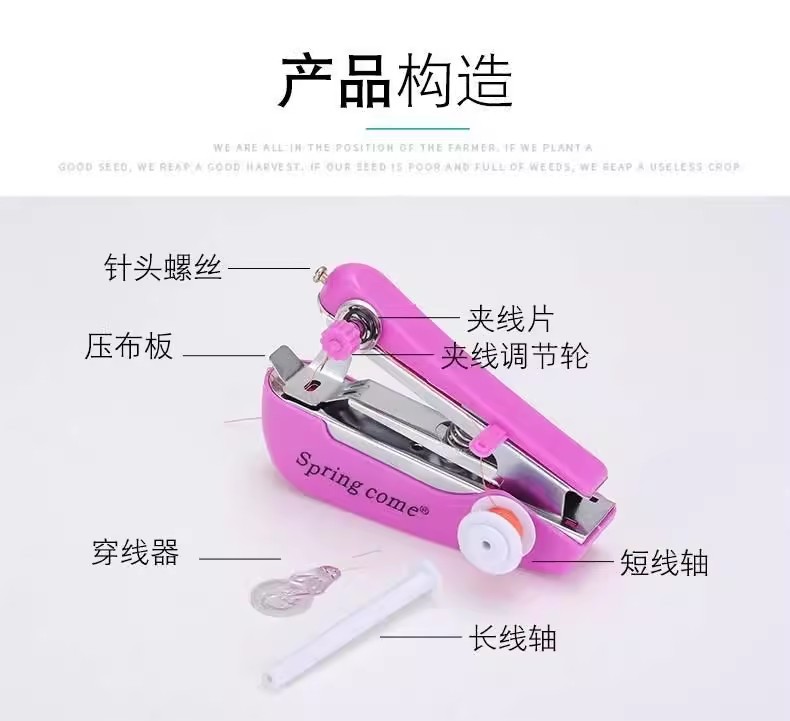
1. Hold the machine: Support the base with the four fingers of your right hand, and place your thumb naturally on the upper cover of the machine, holding the entire machine steadily.
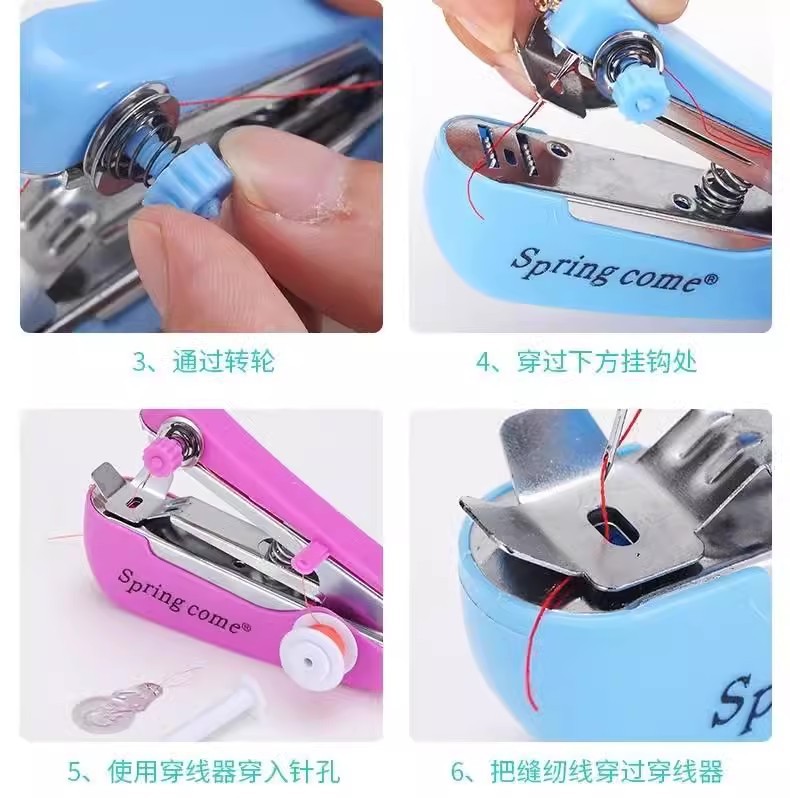
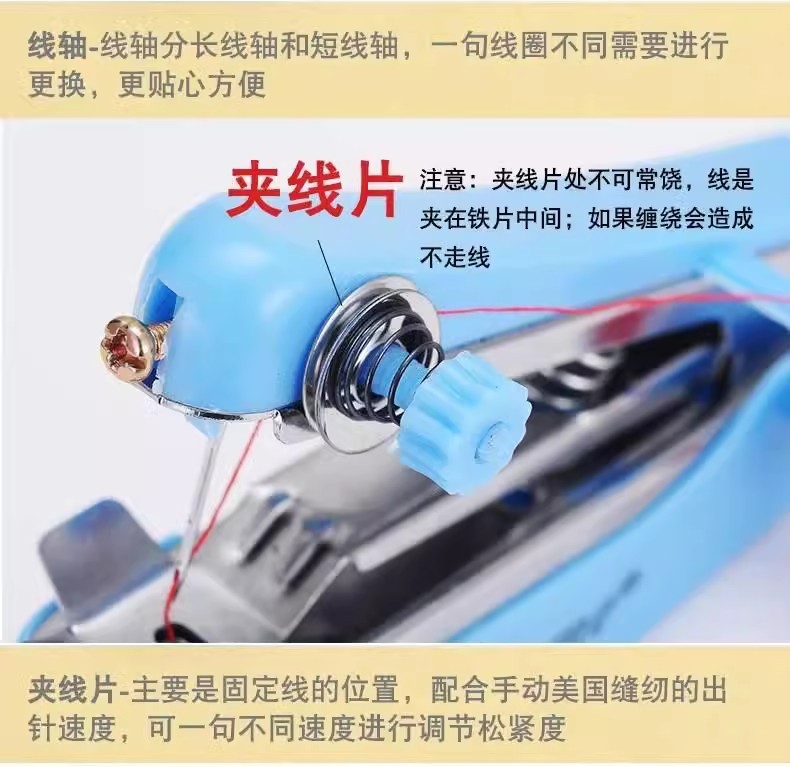
2. Thread Tying: Gently pull the thread from the spool. Pass it through the guide line diagram A, and then lead it into the clamping adjustment piece.
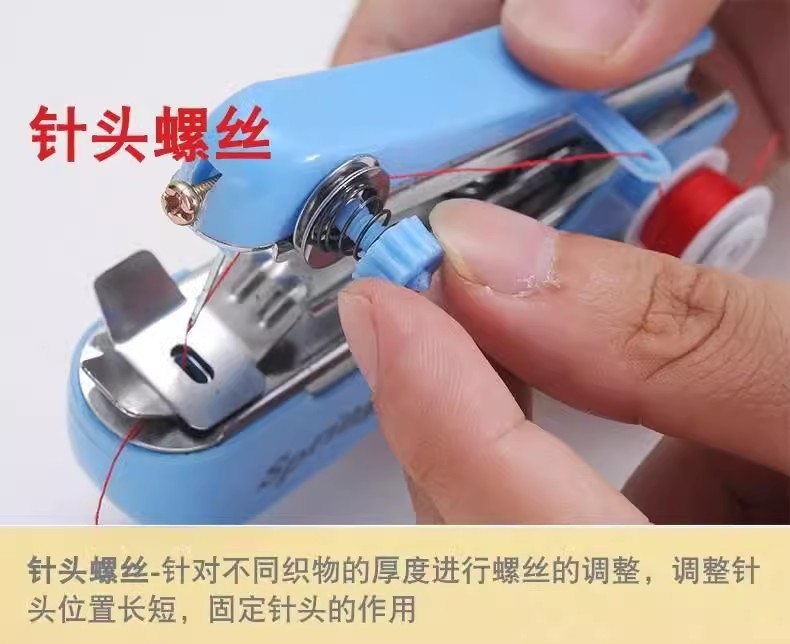
B. Then pass through the guide coil. C. Temporary place the thread head that has been guided beside the machine needle, and then pass the threader through the machine needle hole from the front of the machine needle (towards the body joint), and then introduce the thread head into the small hole of the threader, and then pull out the threader to press the head thread about 2-3 cm on the pressing board and then use it as needed.
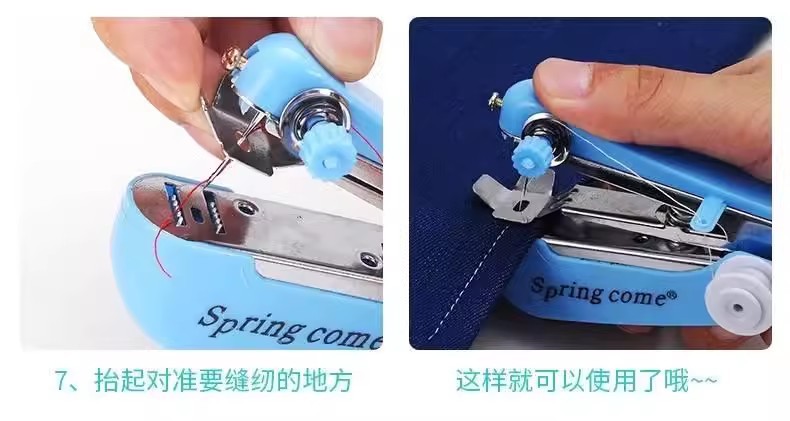
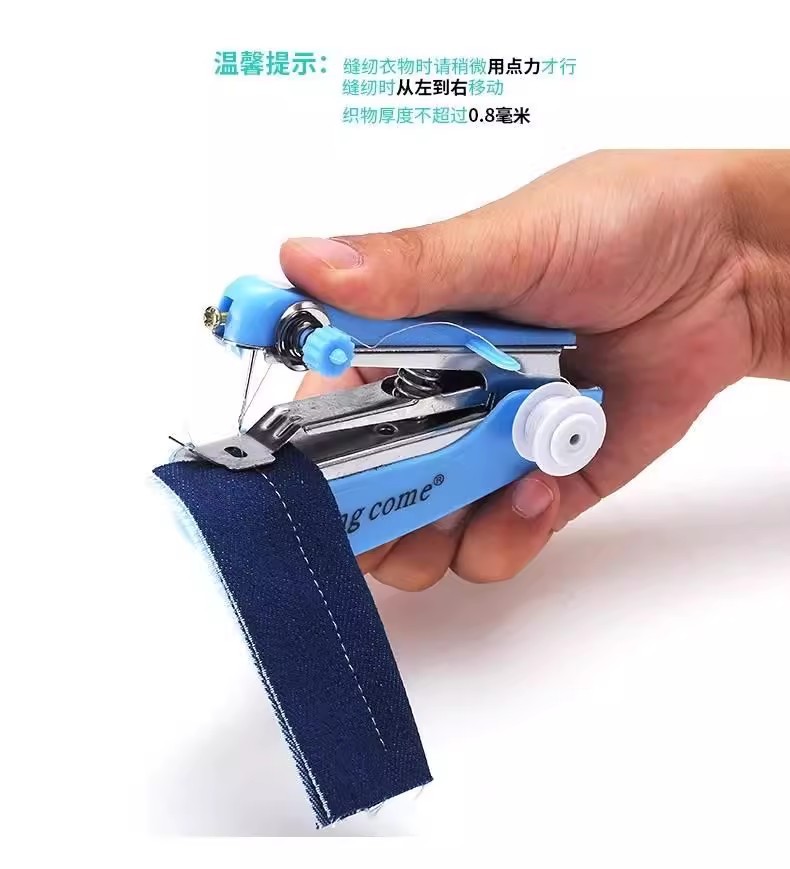
3. Release the fabric: Lift the press plate with the index finger of your right hand, place the prepared fabric (thickness no more than 0.8 mm) flatly under the press plate, and gently replace the press plate to press the fabric;
4. Sewing operation: Hold the fabric with your left hand, and press the upper cover down lightly and quickly with your right thumb. After pressing the cover to the bottom, press down again with your thumb. Repeat this process, and the feeding mechanism will automatically move the sewn item to the left. As the machine is moved to the right with your right hand, the fabric held by your left hand should be moved to the left gently in sync with the sewing rhythm until the sewing is complete.
5. End: Sewing is complete. Cut the thread with scissors and gently lift the presser foot to remove the fabric. From the reverse side of the fabric to be sewn, pull the thread out and thread it through the next loop to tighten and tie a knot, securing the stitching. Always avoid pulling the fabric violently to break the thread at the end of sewing, to avoid damaging the sewing needle or stitches;
6. This function can automatically advance the fabric and adjust the tension between the stitches, but it is very necessary to pay attention to the following points:
A. The pin is too tight, adjust the pressure nut slightly counterclockwise.
B. The pins are too loose, adjust the pressure nut slightly clockwise.
As shown, the correct tension of the stitches is achieved. If you need larger stitches, you can pull the fabric slightly faster with your left hand. If you need tighter stitches, you can pull the fabric slightly slower with your left hand;
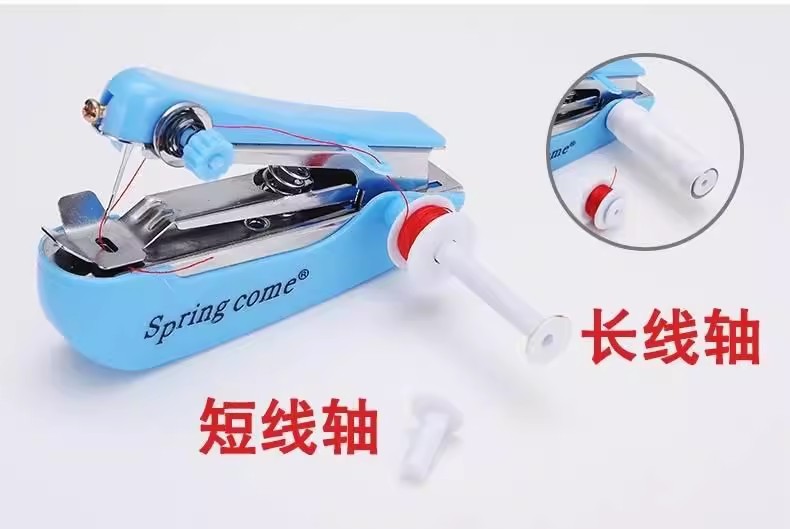
7. Change the thread ball; if you need to change to a larger thread ball, you can connect the spare extending rod to the thread ball shaft, insert the larger thread ball into it. Place the spare plastic cap at the end of the rod to fix the larger thread ball, and then re-thread the needle, adjust the tightness of the thread after sewing; using 50#-90# cotton thread or synthetic thread works very well;
8. Change the needle: Loosen the fixed screw, remove the broken needle. Install the new needle, making sure the flat side of the needle is aligned with the fixed screw, and do not install it backwards. The needle type is DHK-14.
Update time:


TOP