Search history
Clear allSearch by image
XDrag and drop an image here or upload an image
Max 5MB per image
UploadSign In | Join
Search history
Clear allSearch by image
XDrag and drop an image here or upload an image
Max 5MB per image
UploadSign In | Join
X Email Mobile
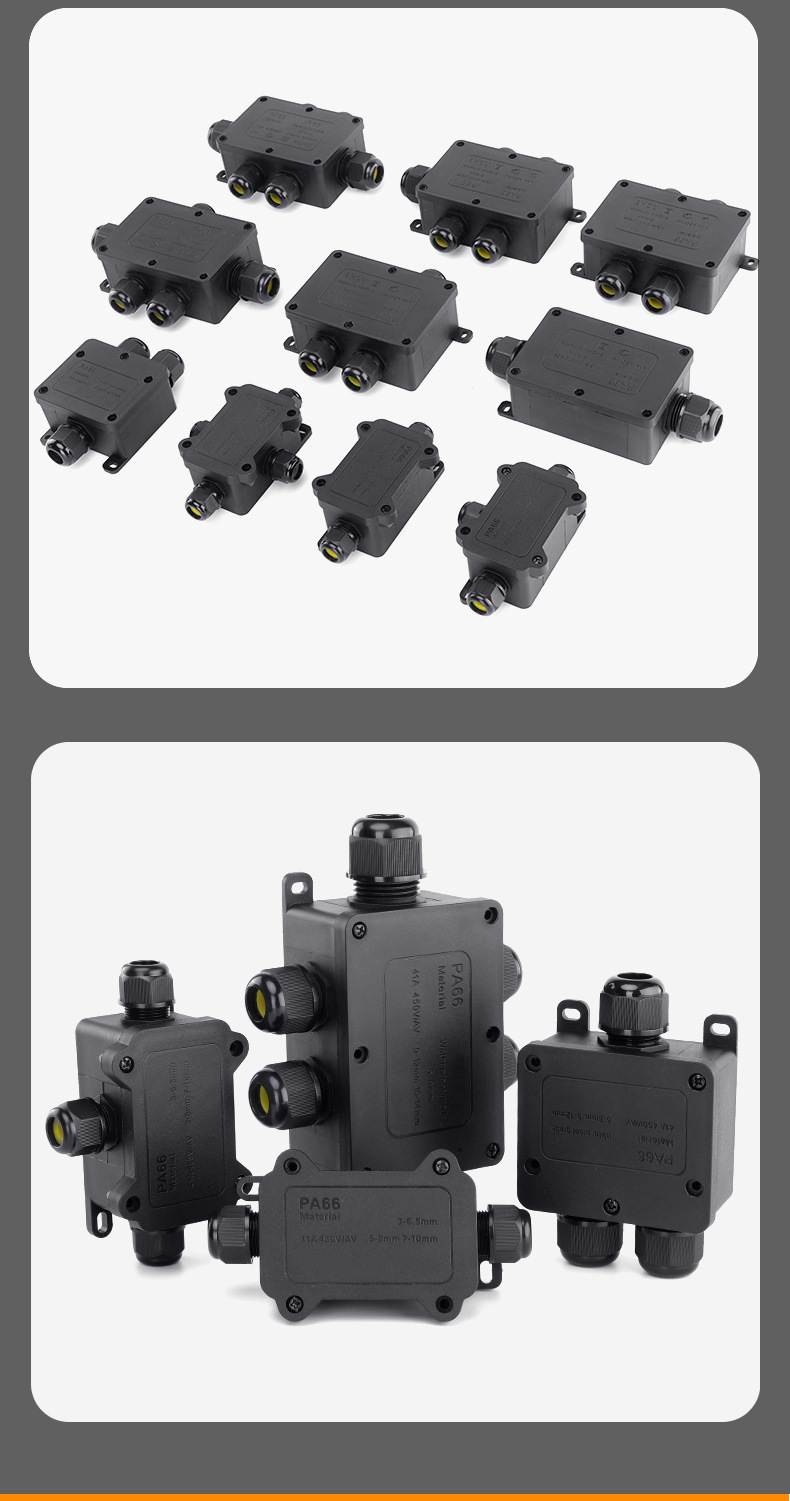
") f1-2t (wire diameter 3-6.5)
f1-2t (wire diameter 3-6.5)
|
CN¥ 6.2 |
") f1-2t (5-8 wire diameter)
f1-2t (5-8 wire diameter)
|
CN¥ 6.2 |
") f1-2t (7-10 wire gauge)
f1-2t (7-10 wire gauge)
|
CN¥ 6.2 |
") f1-3t (wire diameter 3-6.5)
f1-3t (wire diameter 3-6.5)
|
CN¥ 6.7 |
") f1-3t (5-8 wire gauge)
f1-3t (5-8 wire gauge)
|
CN¥ 6.7 |
") f1-3t (7-10 wire gauge)
f1-3t (7-10 wire gauge)
|
CN¥ 6.7 |
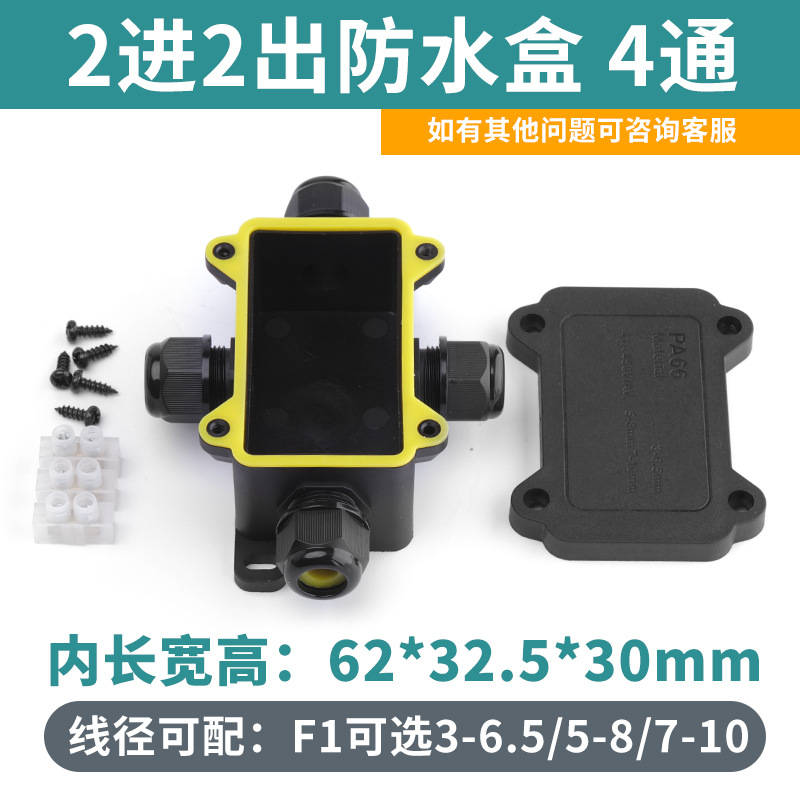
") f1-4t (wire diameter 3-6.5)
f1-4t (wire diameter 3-6.5)
|
CN¥ 7.2 |
") f1-4t (5-8 wire gauge)
f1-4t (5-8 wire gauge)
|
CN¥ 7.2 |
") f1-4t (7-10 wire gauge)
f1-4t (7-10 wire gauge)
|
CN¥ 7.2 |
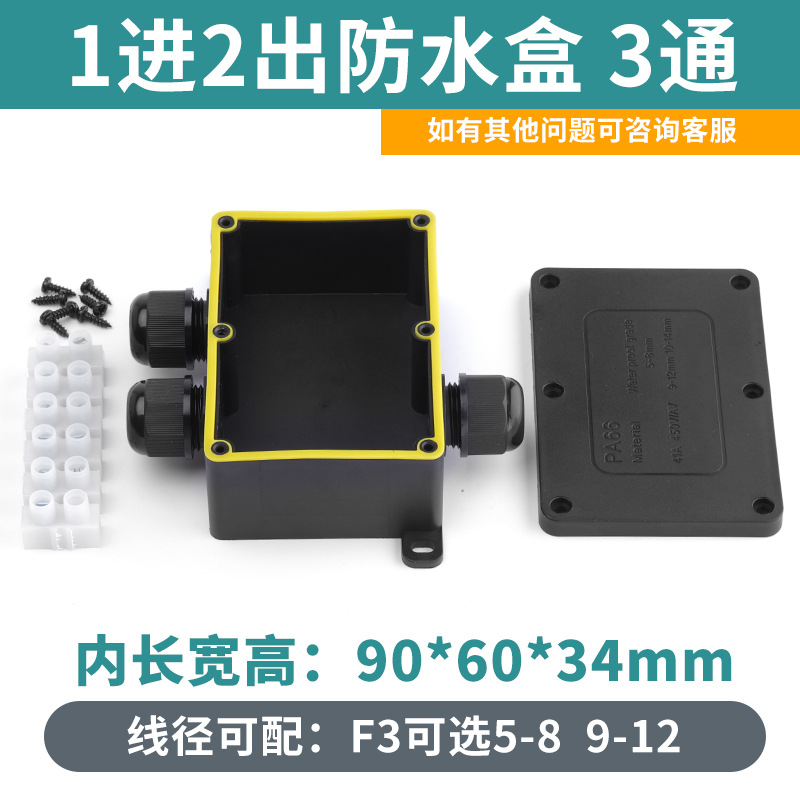
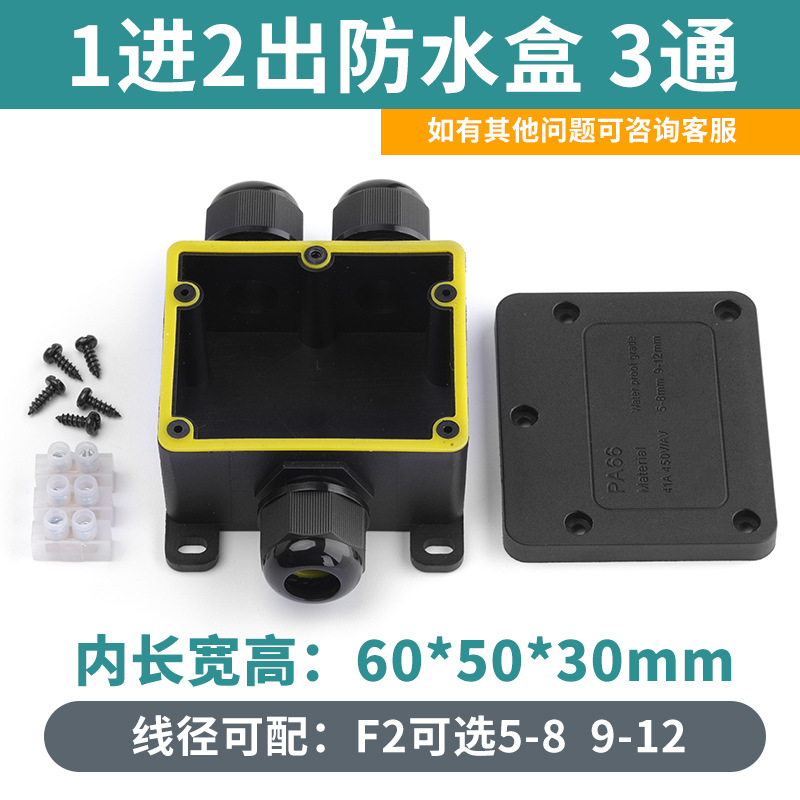
") f2-3t (5-8 wire gauge)
f2-3t (5-8 wire gauge)
|
CN¥ 7.2 |
") f2-3t (9-12 wire gauge)
f2-3t (9-12 wire gauge)
|
CN¥ 7.2 |
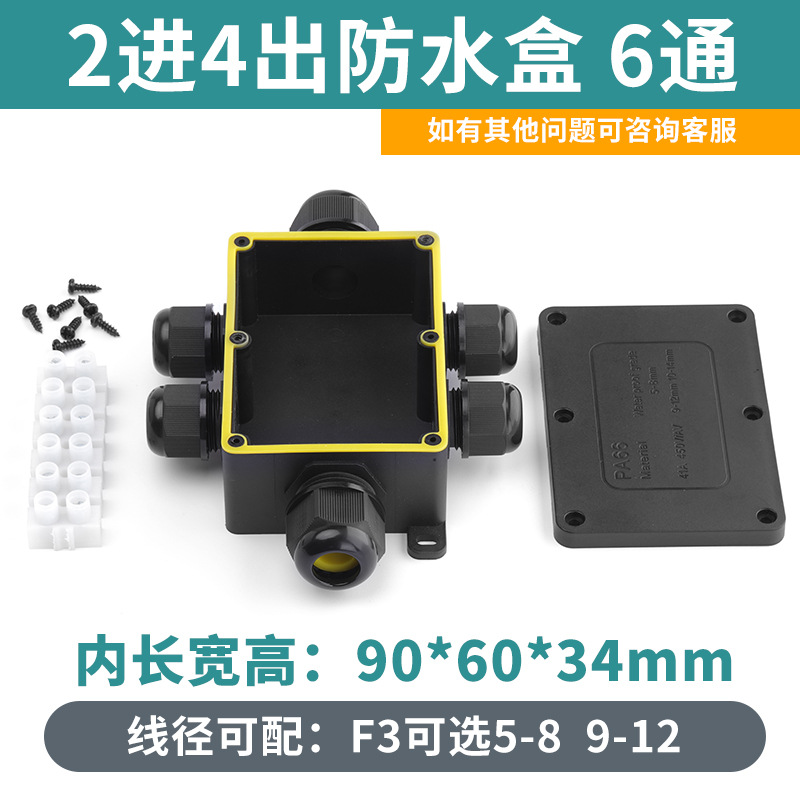
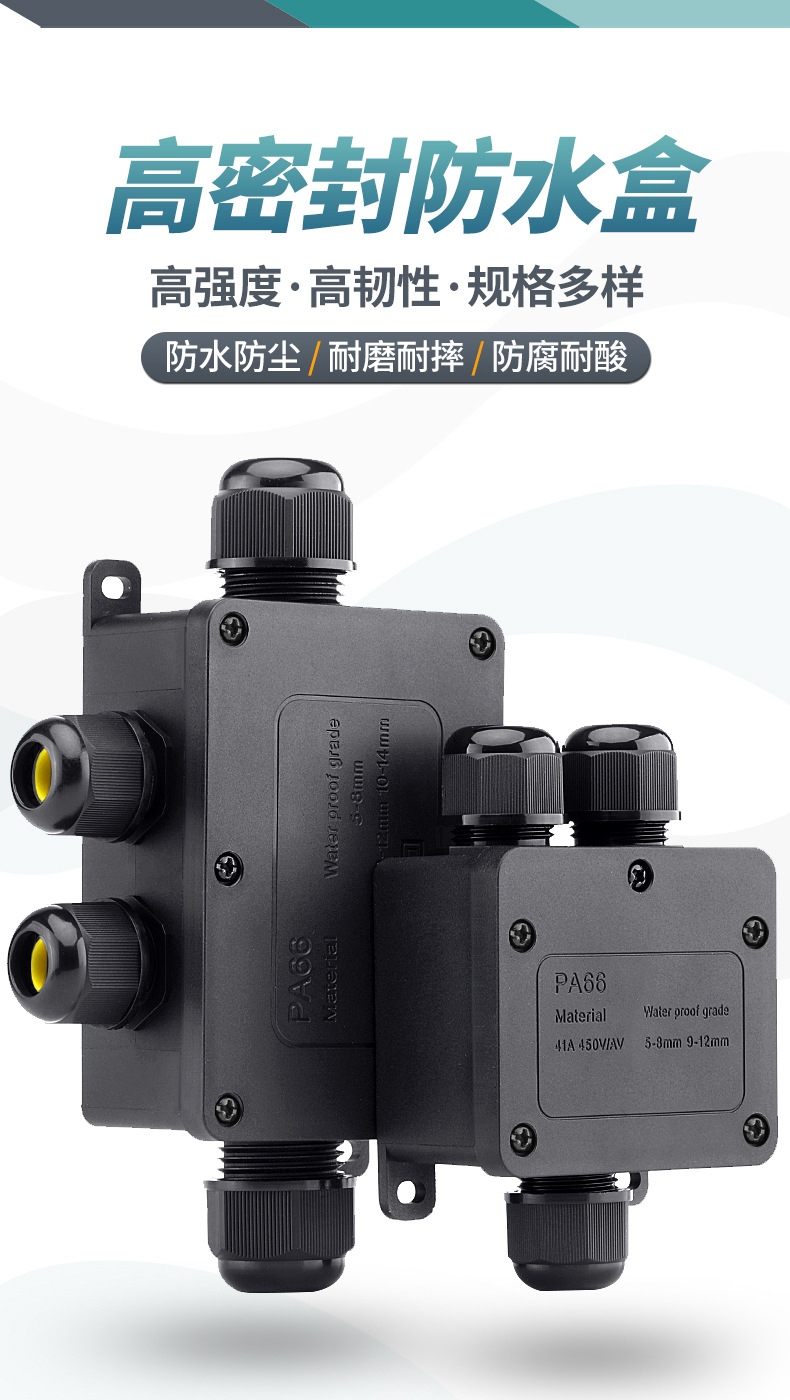
") f3-2t (5-8 wire gauge)
f3-2t (5-8 wire gauge)
|
CN¥ 14.0 |
") f3-2t (9-12 wire gauge)
f3-2t (9-12 wire gauge)
|
CN¥ 14.0 |
") f3-2t (10-14 wire gauge)
f3-2t (10-14 wire gauge)
|
CN¥ 14.0 |
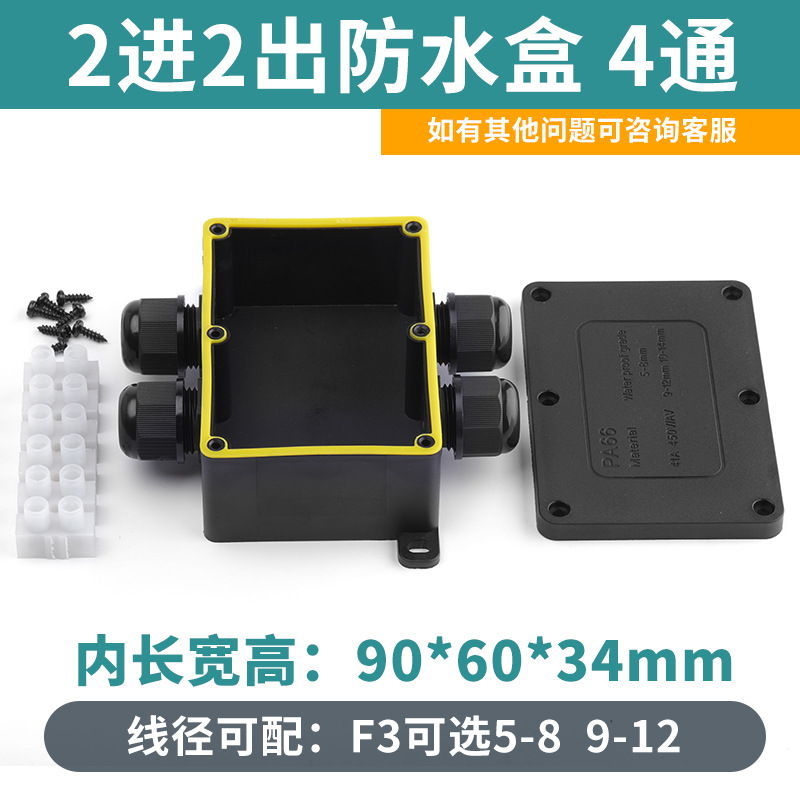
") f3-3t (5-8 wire gauge)
f3-3t (5-8 wire gauge)
|
CN¥ 14.0 |
") f3-3t (9-12 wire gauge)
f3-3t (9-12 wire gauge)
|
CN¥ 14.0 |
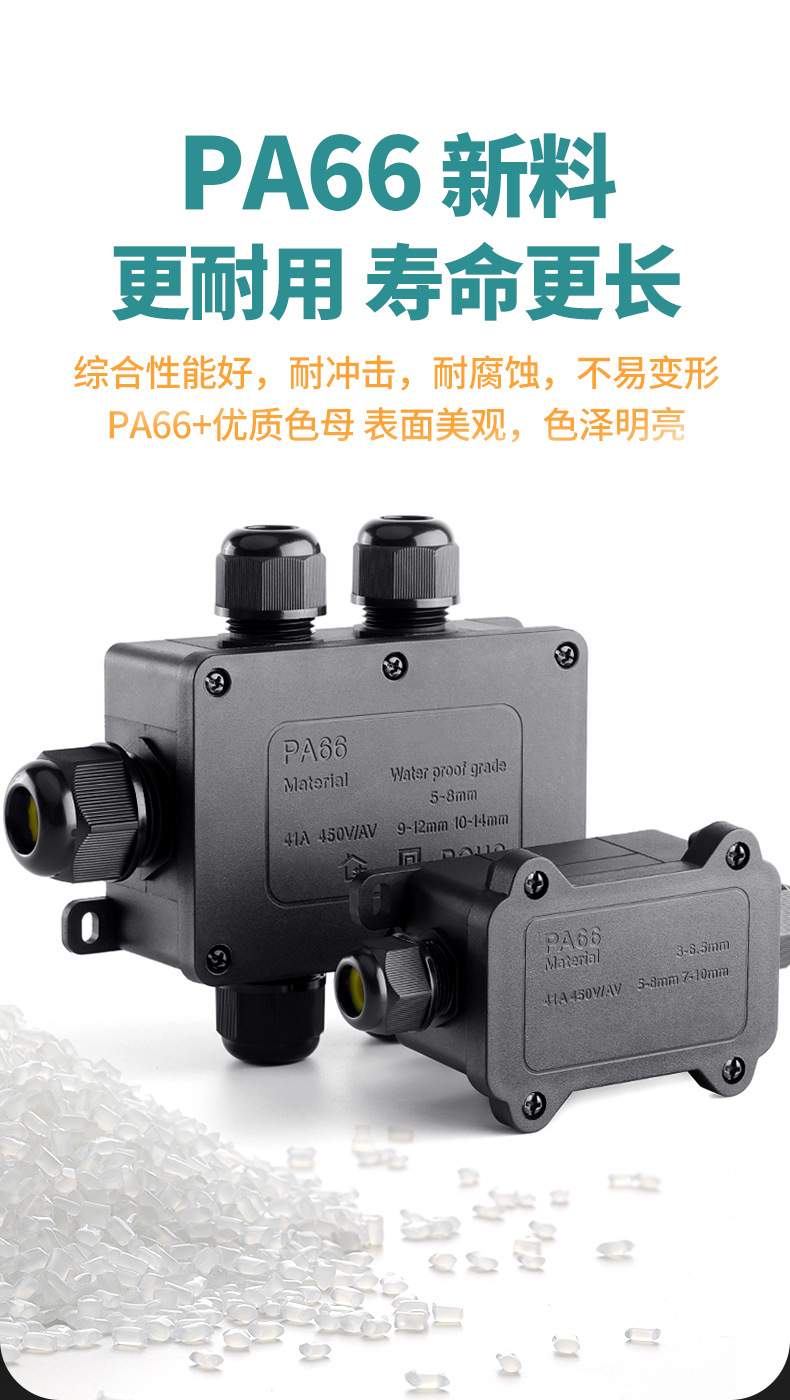
") f3-4t (5-8 wire gauge)
f3-4t (5-8 wire gauge)
|
CN¥ 14.5 |
") f3-4t (9-12 wire gauge)
f3-4t (9-12 wire gauge)
|
CN¥ 14.5 |
") f3-5t (wire diameter 5-8)
f3-5t (wire diameter 5-8)
|
CN¥ 15.0 |
") f3-5t (9-12 wire gauge)
f3-5t (9-12 wire gauge)
|
CN¥ 15.0 |
") f3-5t (10-14 wire gauge)
f3-5t (10-14 wire gauge)
|
CN¥ 15.0 |
") f3-6t (5-8 wire diameter)
f3-6t (5-8 wire diameter)
|
CN¥ 16.0 |
") f3-6t (9-12 wire gauge)
f3-6t (9-12 wire gauge)
|
CN¥ 16.0 |
") f3-6t (10-14 wire gauge)
f3-6t (10-14 wire gauge)
|
CN¥ 16.0 |
wenzhou enrui electric co., ltd. 1yr.
Contacts huang chaoyan Chat
Mobile 86-15258659897
E-mail 1544784883@qq.com
15258659897

WhatsApp 18758772547
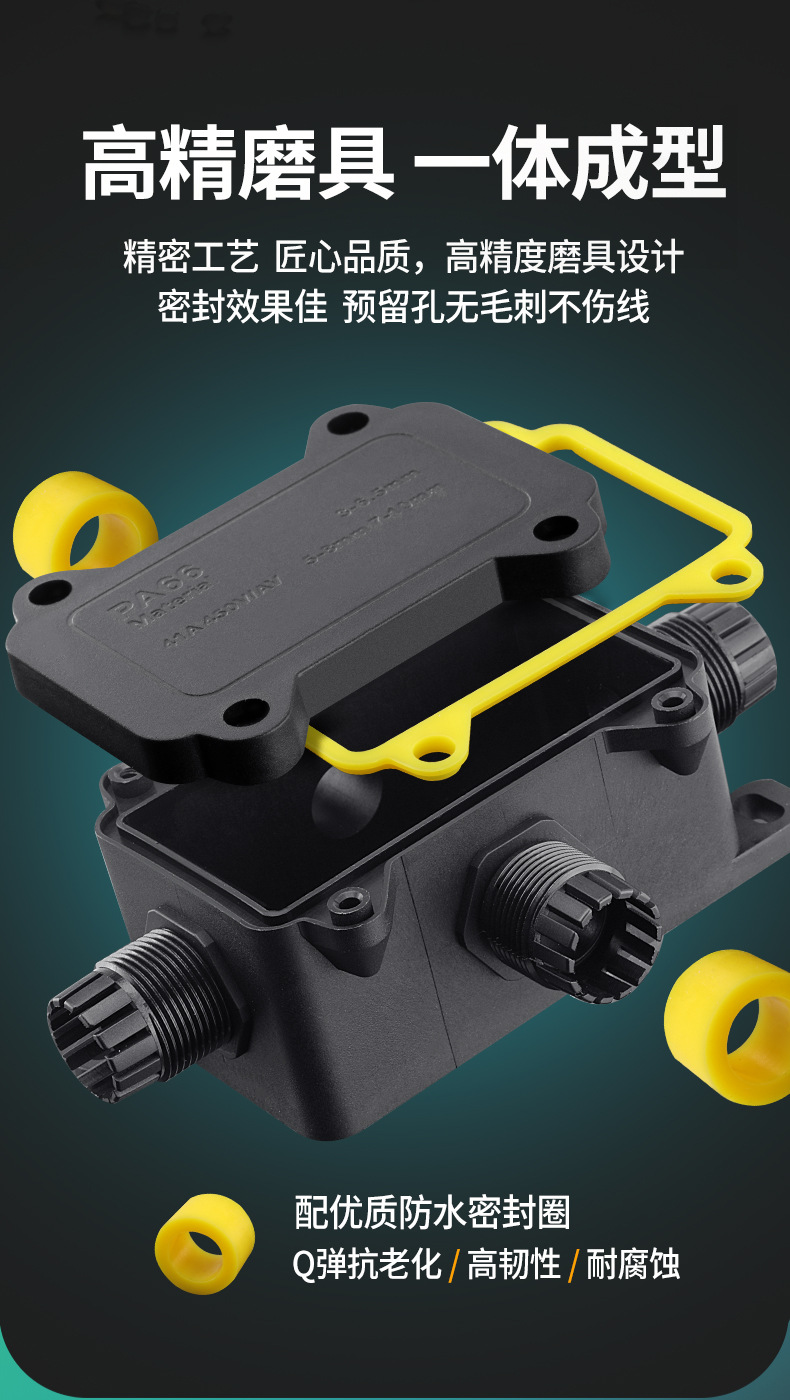
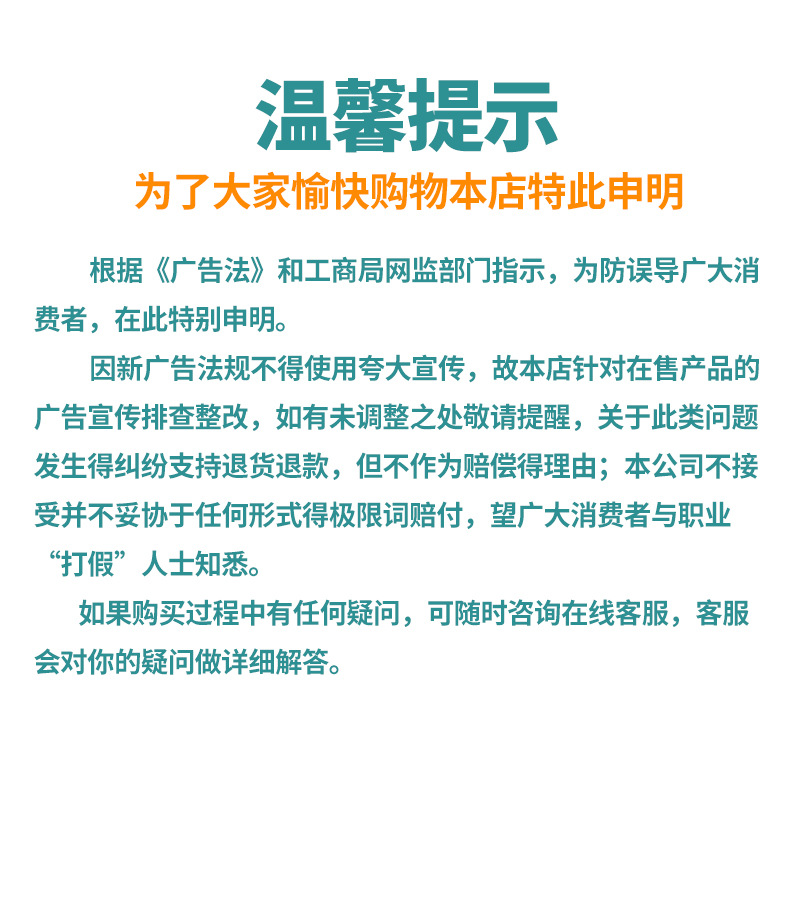
Assembly Steps
Step 1: Peel the insulation off the cable (wire) end by 4-6mm, and prepare the end well.
Step two, loosen the screw of the terminal counterclockwise, but do not completely remove it. Then, set the terminal aside for future use.
Step 3: Loosen the nylon (PA) connector nut on the box without removing it.
Step 4: Insert the cable (wire) with the stripped ends into the box through the PA (Polyamide) connector.
Step 5: Insert the conductor into the terminal platform and tighten the screw. If it does not fall off easily, it indicates that it is properly locked. After connecting the wires, insert the terminals into the two fixed columns of the box and secure them.
Step 6: Pull out the excess cable (wire) from the box gently, please do not pull too hard. After pulling out the cable (wire), tighten the nylon (PA) connector nut securely.
Step 7: Insert the waterproof gasket into the gasket groove, cover the lid, and secure the self-tapping screws with an electric screwdriver or a hand screwdriver. Tighten the screws until the lid is parallel to the bottom. Remember not to twist the lid too much when tightening the screws, as this may cause the lid to crack or allow water to enter.
Step 8: Check if the polyamide (PA) joints are pushing up the cover or if there is any deformation of the gaskets. If these phenomena exist, the operation needs to be re-performed, adjust well, and then cover the lid.。


Update time:


TOP